Woodworking Techniques for Dovetail Joinery
Course final project
A course by Helen Welch , Woodworker and Head Instructor at the London School of Furniture Making

Joined April 2022


Joined April 2022
About the final project for: Woodworking Techniques for Dovetail Joinery
Woodworking Techniques for Dovetail Joinery
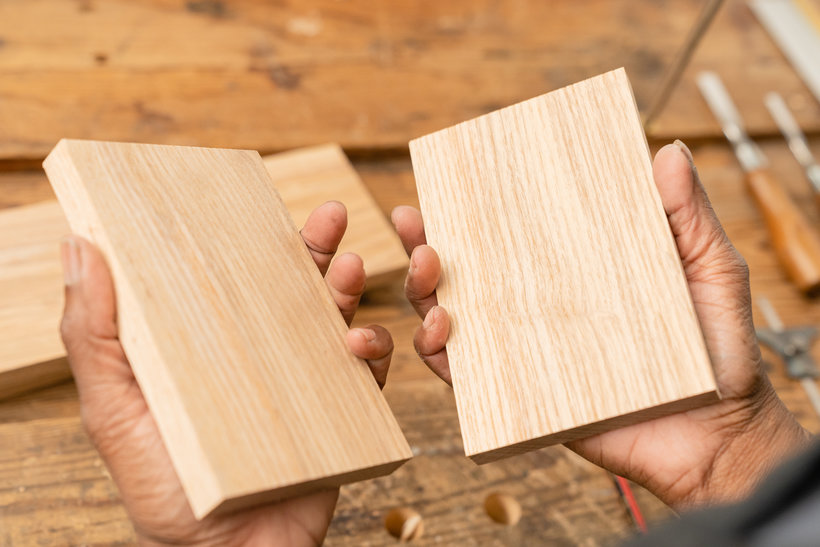
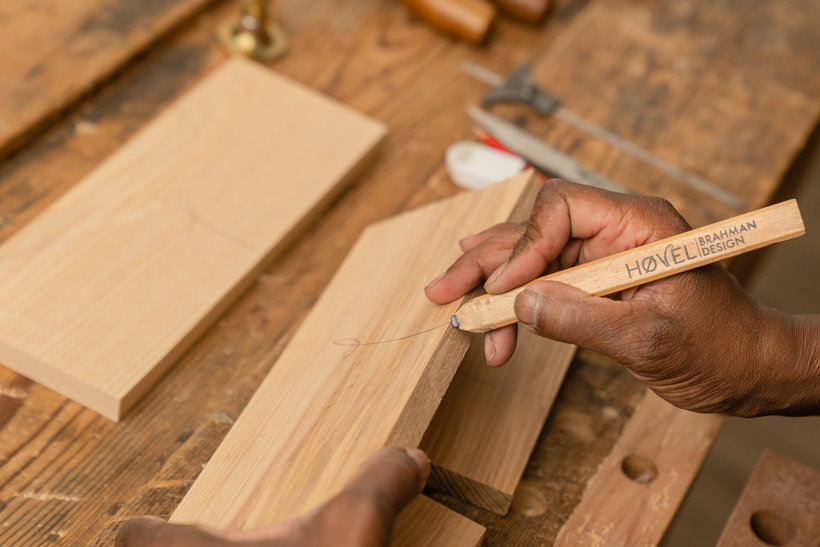
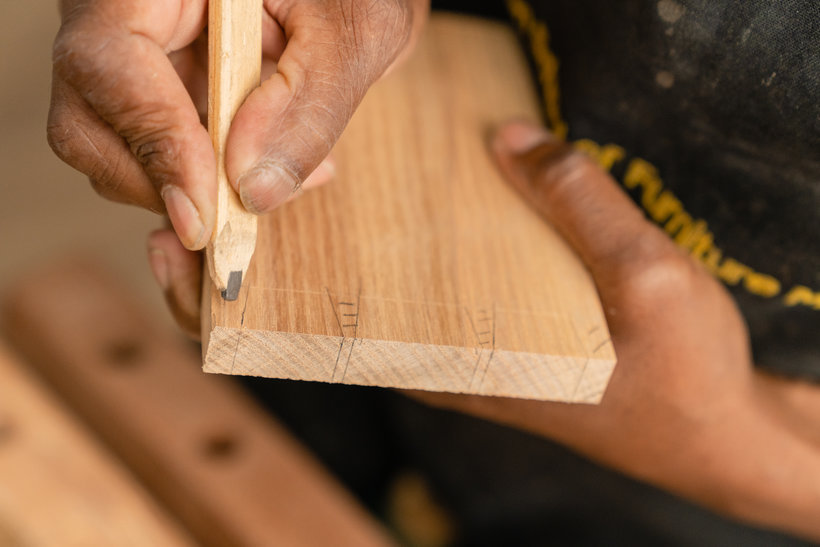
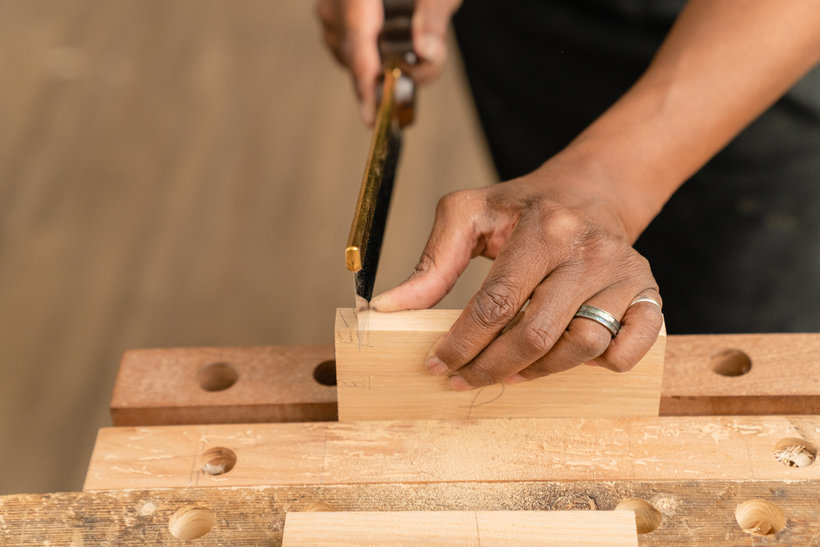
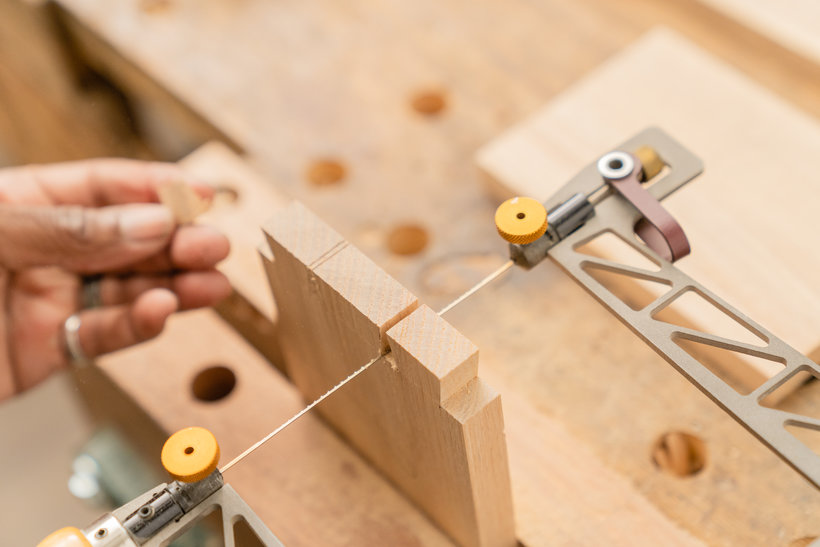
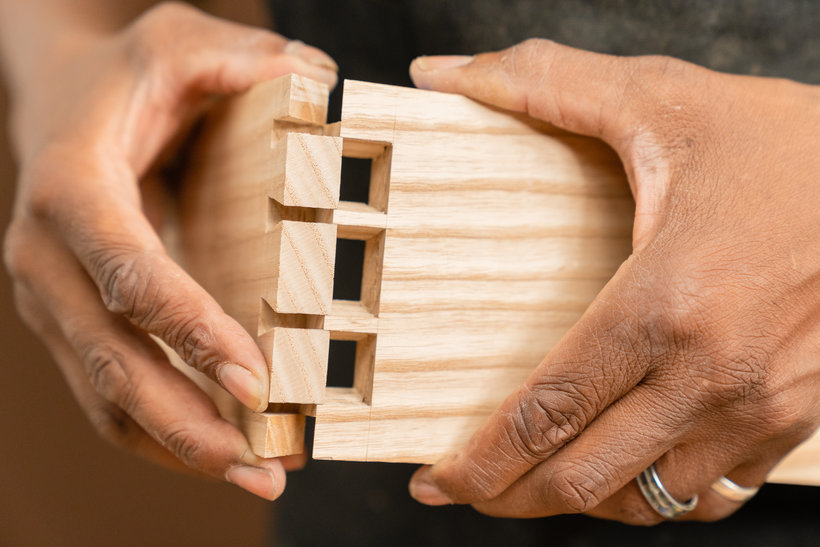
“Thank you so much for taking part in this course and I hope you've enjoyed it. It's now time to work on your project. This could mean finishing the box you started by completing the course tasks or making a brand-new project! Either way, I strongly suggest you take the time to gather inspiration and make a unique project of your own. Make sure to keep track of your progress with different pictures of each step. It'd be great if you could also explain the choices you've made along the way and tell us if you have any doubts. This will help me guide you better if you need advice. Here are some final tips to guide you on your journey: Preparing the Parts Saw the box parts to the required length. Leave the lid slightly too long at this stage. Use a shooting board to plane the ends square. Add the face marks and place the coloured dots in their respective corners.


Partial transcription of the video
“ Final Project I'd like to thank you and congratulate you for taking my Domestika course. You've seen and learned woodworking techniques where you can create the most iconic of joints, the dovetail, gaining an understanding of how to build something useful from raw materials. Let's take this opportunity to remind ourselves of the key steps. Make sure you use my drawings to help you. Start by cutting your boards to length and squaring the ends to make sure all the edges are 90 degrees to each other. Mark out and cut your tails. Transfer the tails to the pins, cut out your pins, and adjust a...”
This transcript is automatically generated, so it may contain mistakes.
Course summary for: Woodworking Techniques for Dovetail Joinery
-
Category
Craft -
Areas
Arts & Crafts, DIY, Furniture Design & Making, Interior Design, Woodworking

Helen Welch
A course by Helen Welch
Helen Welch is a woodworker from London with decades of experience. She started her career as an apprentice carpenter before moving to guitar making. Eventually, she found her passion in teaching. After teaching at the London Metropolitan University, in 2013, Helen founded the London School of Furniture Making. There, she has created a space where both beginners and more experienced makers alike can learn the fundamental skills for success in their woodworking through short but intensive introductory workshops. She’s had the opportunity to take her woodworking expertise to television as well, having served as a judge on Handmade: Britain’s Best Woodworker.
- 100% positive reviews (36)
- 3,094 students
- 18 lessons (3h 46m)
- 17 additional resources (4 files)
- Online and at your own pace
- Available on the app
- Audio: English, Spanish
- Spanish · English · Portuguese · German · French · Italian · Polish · Dutch · Turkish · Romanian · Indonesian
- Level: Beginner
- Unlimited access forever
Category
Areas

