Best seller

Edible Sculptures Design

Course final project

A course by Marc Suárez , Cake Designer

Cake Designer. Barcelona, Spain.
Joined November 2020
Best seller
99% positive reviews (143)
6,231 students
Audio: Spanish, French, Italian, Portuguese, Turkish
Spanish · English · Portuguese · German · French · Italian · Polish · Dutch · Turkish

About the final project for: Edible Sculptures Design

Edible Sculptures Design

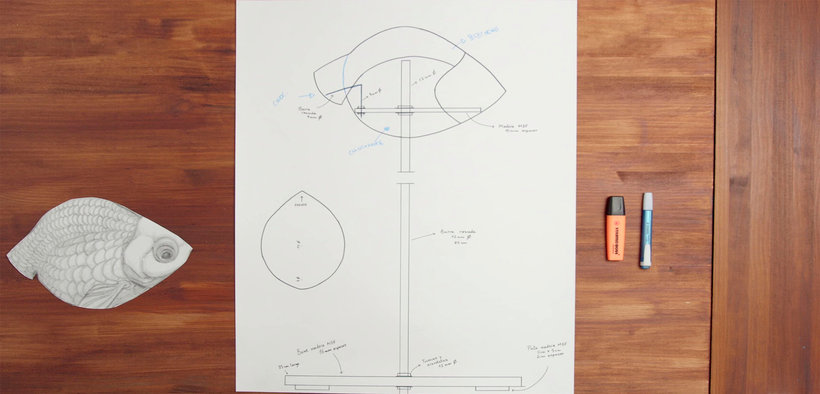
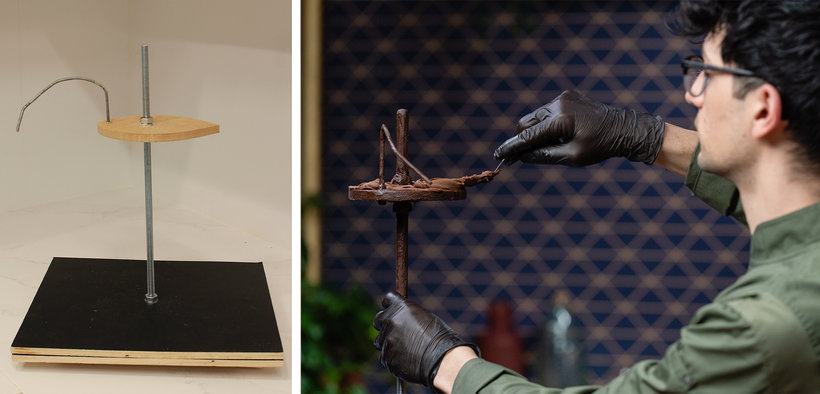
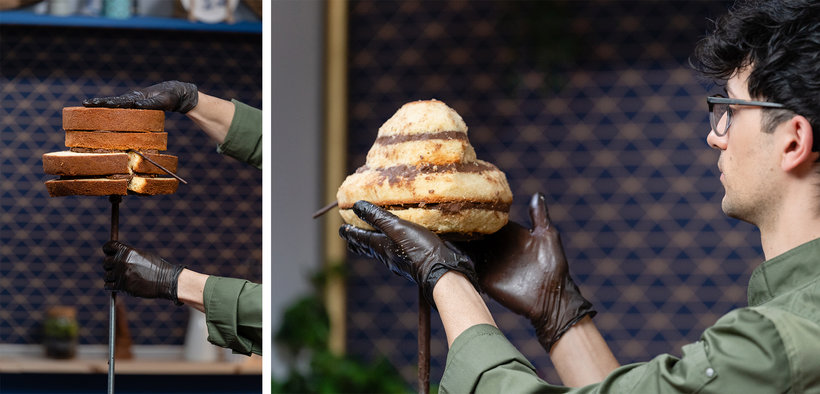
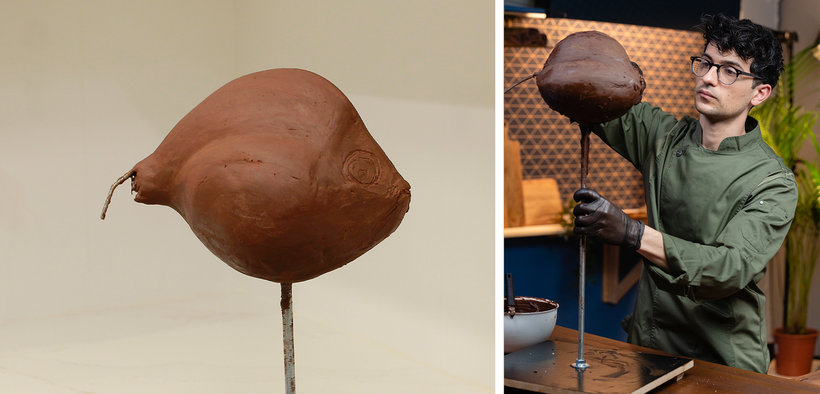
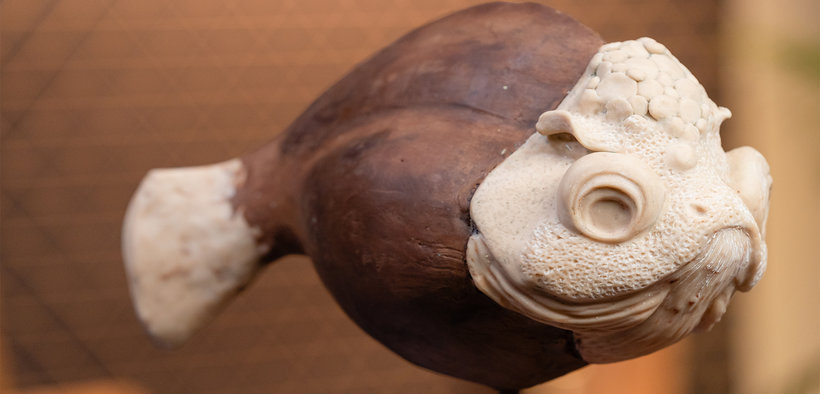
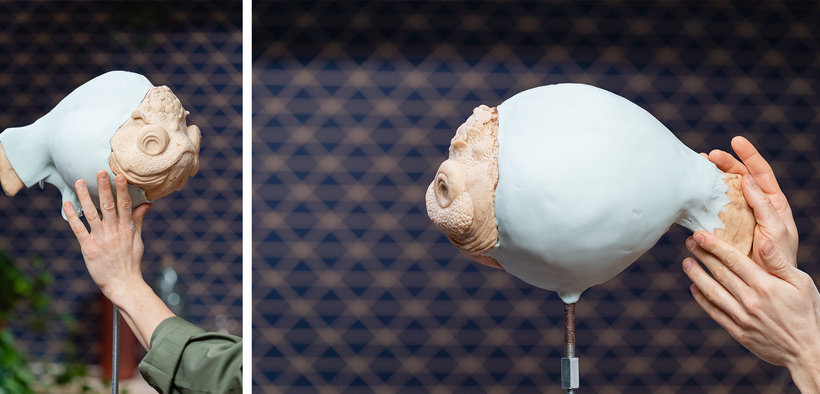
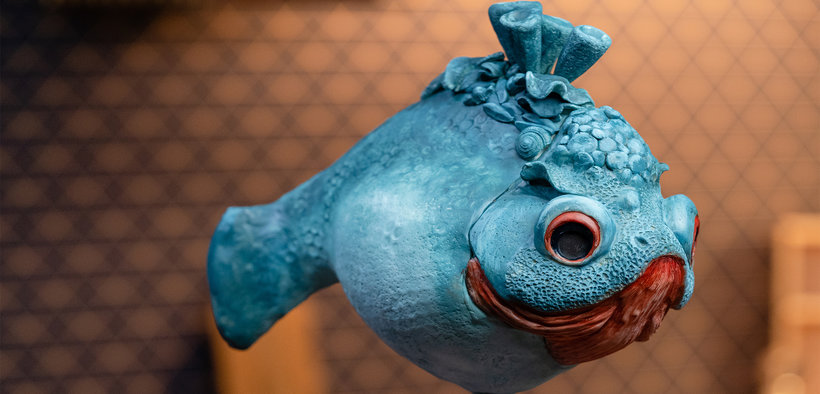
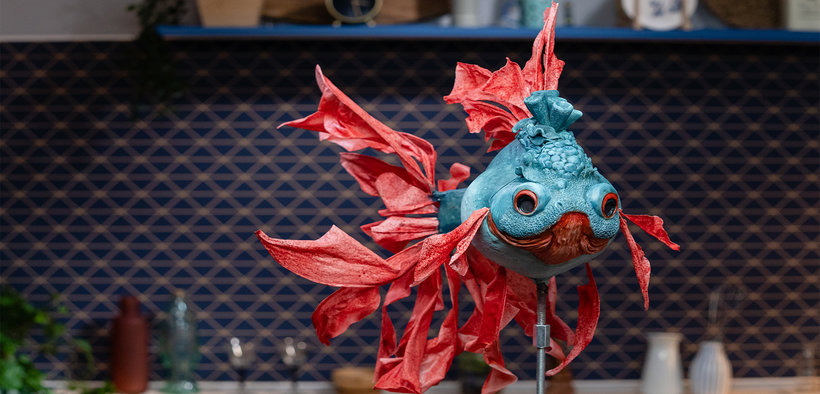
“As you may have seen, the process of creating a carved cake is somewhat slow and requires patience, but if you can understand the cake step by step as a linear process, which goes from the general to the particular, from the large to the small , you can create authentic works of art, with the particularity of being edible. I hope that with this course I have been able to awaken in you what I myself experienced when I discovered creative pastry and that is still alive, what motivates me every day to create true edible sculptures. During the course I have explained many cake decorating techniques to you and I have used very different materials that you may know, so, before finishing this course, I want to review the phases that I have followed to make the fish-shaped cake. I hope it inspires you to create your own project and share it with the Domestika community. Come up with an idea that is feasible and seek inspiration It is often difficult to find ideas that are both good and feasible to make on cake. Remember that to be able to transform an object into a cake it must be solid, it must have enough volume to be able to put cake and a focal point as close as possible to the base. Next, you should start looking for inspiration to have reference images to support your creation. Remember that it is not necessary to look strictly in the creative confectionery sector. Perhaps an interior design image can give you a color palette that you like, or an image of a piece of fabric can give you information about a certain texture. After all, you can find inspiration in what you least imagine. Don't forget to look for at least one profile image of what you want to carve. Make the sketch of your cake and draw its structure Before starting to draw the sketch, remember that it is important to print the profile photo of what you need to carve at the final size. In this way you can draw the structure taking into account the final dimensions of your cake. Next, it is important that you analyze the shape to be carved and determine with what materials you will make each of the parts of your cake. Finally, you will have to draw the structure to hold the cakes. Remember that it is important to maintain a central axis, trying to distribute the weight equally to the side and side of the axis, and that it is important not to place elements too far from that same axis. All the measurements of threaded rods and other pieces can be obtained directly by measuring in the sketch. Remember that to obtain the shape of the wooden base that holds the cakes, you should look for more images with other points of view on the same object, so you can better understand the generic shape that you should give to the wooden base.

Assemble and insulate the structure When you have already determined the measurements and the shape of all the pieces, you can have them cut or made yourself and then proceed to the assembly of all of them. It is important that you tighten well all the nuts that you are going to place on the structure, otherwise they can loosen and cause serious problems. Before putting the cakes in the structure, remember that it is essential to isolate it, since the cakes cannot be in direct contact with the materials used to make the structure.
Place and carve the cakes Placing the cakes on the structure is the first step, perhaps the simplest, but not the least. Remember that the cake layers must be approximately 2.5 cm thick and that the texture of the filling must be adequate. If not, the cake would be unstable and difficult to carve. To carve the cakes, it is important that you stick to the initial plan and respect the measurements that the cutting template that you have obtained from the initial sketch will dictate. Remember that following the template, the shape of the wooden base and keeping the knife always at an angle are the three tricks that will help you get the shape you are looking for the most.
Cover the cake with ganache When you have the carved cakes, it is time to start working with the covering ganache, that chocolate and cream cream that is used to cover, seal and smooth the cakes before decorating or covering them with fondant or moldable chocolate. To do this, remember that the texture of the ganache should be similar to a creamy butter, silky and smooth but consistent. If you use a very runny ganache, you will not be able to cover the cake properly. It is important that you do not lose sight of the shape you have carved and that it is very smooth. Otherwise, all the imperfections in the fondant will be marked and the cake will not be well finished.
Models with moldable chocolate With the basic shape of the fish finished, it's time to start modeling and detailing to transform the cake into a real fish. To do this, it is important that you analyze the shape you should model and try to separate it into parts. This will help you during the modeling process. The eyes will be the reference point to be able to model to scale, so I recommend that you look for those reference points in your sculpture to facilitate your work. When you have the basic parts modeled, you can go on to add more details, to later smooth all the chocolate and create texture.
Cover the body with fondant After modeling the head with moldable chocolate, it is important that you cover the rest of your cake with fondant. I have used fondant dyed slightly eucalyptus green to give the white fondant a first color base. Spread the hardened ganache with a little vegetable shortening, then stretch the fondant to a thickness of about 3 mm. Cover the cake with fondant and quickly cut the excess so that the cake is perfectly covered. Next, you can now texture the fondant using pastry tools or other utensils that you consider appropriate to obtain the texture you are looking for. Finally, model some details in sugar paste to finish decorating your piece.
Color your cake To bridge the differences in color between moldable chocolate and fondant, and to bring your creation to life, it is time to paint it with edible coloring diluted in a little alcohol. Remember that it is essential to use an edible distilled alcohol and mix the gel colorants with a little white powder colorant to make them opaque. Start by giving a base of color throughout your cake, then apply darker color to enhance those areas that you deem appropriate and, finally, lighten with a little white coloring those parts that you want to highlight. Finally, paint those parts that are a different color, such as the lower part of the mouth or the eyes.
Finish the decorations Once the painting process is finished, you just need to add as many details as you want, such as the fish tails, made on wafer paper. To work with the wafer and give it color, you must mix the food coloring with a little water and apply it with a small sprayer to moisten the wafers as you color them. Remember that the wafer shrinks with humidity, so it is important that the pieces are larger than usual so that, when they dry, they are the correct size.
Leave the cake ready Even the last detail counts, so the last step will be to cover the rod with flower ribbon, decorate the base if necessary and glue a satin ribbon to the edge of the cake base. Remember that if you want to transport it, you must prepare a polystyrene or wood box of the necessary measures, as well as remove those decorative elements that may be damaged during the transfer.
Now it's your turn. The possibilities of creating true wonders starting from some cakes are endless so I will be very aware of the photos of your final project to give you those tips that can make you improve. Remember, share your final project with all of us by clicking on "Create your project". Share both the final result of your cake and the steps that have led you to it. It would be great if you showed a picture of each step and added a brief explanation about what you have done in each one. So I can give you feedback. I also invite you to actively participate in the forum and comment on the projects of the other students. We sure can help each other a lot! By showing you my own process of creating a carved cake, I intend to show you how to reason when faced with your own pastry projects, so that you can move from idea to reality autonomously. I am convinced that this course will make you see baking as a true art. Greetings and see you on the forum! ”

Partial transcription of the video

“Final Project In this video, we're doing a summary of our final project. As you know, I chose a fish for this final project, but if you think this shape is too complicated, you can choose an easier shape. For example, a similar but easier shape would be the shape of a lemon or a rugby ball. And using this final project, you'll be able to make other shapes. Any type of animal or figure that's fixed and rounded. It's a simple structure to which it's very easy to add a few more pieces to take the cake we made in this course one step further. Remember the main thing at the beginning is getting ...”

This transcript is automatically generated, so it may contain mistakes.


Course summary for: Edible Sculptures Design

  • Level: Beginner
  • 99% positive reviews (143)
  • 6231 students
  • 5 units
  • 22 lessons (4h 38m)
  • 8 downloads
  • Category

    Craft, Culinary
  • Areas

    Baking, Cake Decorating, Cake Design, DIY, Edible Art, Fondant

Marc Suárez

Marc Suárez
A course by Marc Suárez

Teacher Plus
Cake Designer

Marc Suárez is a cake designer and expert in hyperrealistic sculptures using modeling chocolate. He's taught creative baking and cake decoration classes all across the world, from New Zealand to Canada, stopping by in Australia, Singapore, India, Kuwait, Greece, the United States, and Costa Rica.
He received the Sculpted Cake Award at the 2019 Cake Master Awards, also known as the Cake Oscars due to its international prestige. Throughout his career he's also been awarded first prize at the 2015 BCN&Cake (Spain), first prize at the 2016 Marseille ExpoGato (France), gold medal at both the 2016 and 2019 Cake International (UK), and second prize at the 2018 SoFlo Cake&Candy Expo (USA).


  • 99% positive reviews (143)
  • 6,231 students
  • 22 lessons (4h 38m)
  • 29 additional resources (8 files)
  • Online and at your own pace
  • Available on the app
  • Audio: Spanish, French, Italian, Portuguese, Turkish
  • Spanish · English · Portuguese · German · French · Italian · Polish · Dutch · Turkish
  • Level: Beginner
  • Unlimited access forever

Category

Areas

Edible Sculptures Design. Craft, and Culinary course by Marc Suárez Best seller

Edible Sculptures Design

A course by Marc Suárez
Cake Designer. Barcelona, Spain.
Joined November 2020
  • 99% positive reviews (143)
  • 6,231 students