


Learn the Basics of Script Lettering
Joluvian shows us how to create a script using brush lettering
Cursive lettering, also known as script lettering, is one of the prettiest designs in lettering works. It is a recognizable style that turns anything we want to communicate into an attractive message.
Starting out writing script using a brush (the brush lettering method) may be daunting, but by following a few basic principles, you'll be able to create your letters in italics in no time. Graphic designer Joluvian (@joluvian), also a calligrapher, typographer, and illustrator, goes over the basics of script alphabets and shares the best tips to get excellent results.

1. Prepare your materials
To start, you’ll need three essential items: a lightbox (it can also be a computer screen or any other source of light behind the sheet on which you are drawing), lined paper, and a lettering brush that you can dip in ink.
2. Slant and beauty: the simple stroke
When you start drawing, it is essential to understand why we use a slanted stroke: in your lined paper, the letter stroke should never be perpendicular to the horizontal lines but needs to be inclined to create a small space at the top and bottom of its length between the two lines. This detail adds to the traditional beauty of script calligraphy.
For good practice, fill a full row on your sheet with slanted strokes, trying to keep the same distance between each one. Simply guide your brush from top to bottom, maintaining the same thickness, and using the same pressure.

3. Complex stroke: the flick
Next, create a stroke that varies in thickness, from a thicker starting point to a thinner endpoint. For this, press the brush against the paper and move it quickly downwards, rapidly lifting it.
That way, you create a V shape that can be used as a comma, an accent, the dot on the letter i or on an exclamation mark, etc. You can also create these flicks moving from left to right, rather than from up to down. The most important thing is to practice a lot, to get your hand used to the brush.

4. Different brushes, different thickness
After practicing the stroke's shape, you can experiment with the thickness achieved with different types of brushes. The effect of a thick inking brush is different from that of a thin-tipped marker pen, and all the brushes available in between will result in a great variety of strokes.
When you start in brush lettering, it is advisable to use thick brushes, that help you appreciate the details better, and get you used to a more unusual tool than the usual felt-tip pen.

5. Creating our first letter
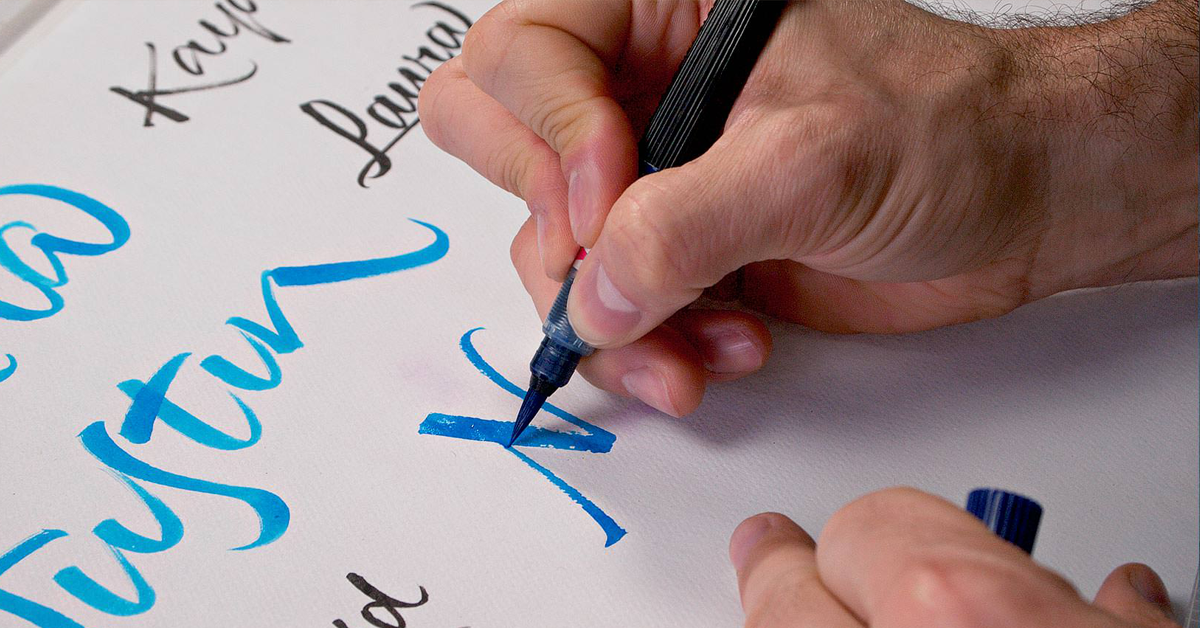
Once you've grasped the basic principles of stroke-making in terms of shape and thickness, you can start to combine strokes to build letters. Begin with the letter N: you move down with a thick stroke, then move up with a thin diagonal stroke, to finish with another thick downward stroke.
By connecting thick strokes with thinner ones, you can develop the entire script alphabet. The main thing to remember is to combine thicker downward strokes with other thinner upward ones that connect with the next stroke or letter: this is the continuous stroke principle.

If you’ve enjoyed this article, don’t forget that you can learn to add a personal character to your designs in Joluvian’s online course Design of Calligraphy Logos.
You can also sign up for his course Artistic Lettering: Tips to Decorate your Letters to discover the best techniques to draw letters, numbers, symbols, and illustrated monograms.
You may also like:
- Introduction to Script Lettering, a course by Ximena Jiménez.
- Introduction to Italic Calligraphy, a course by Belén La Rivera.
- Cursive Lettering for Logos, a course by Martina Flor.
- Calligraphy and Lettering: Break the Rules with Creativity, a course by TECK24.


0 comments