Adobe After Effects Tutorial: How to Animate Your Fonts

Create professional animated fonts in Adobe After Effects with these practical tips by Érico Santana
Adobe After Effects is one of the most-popular 3D animation, motion graphics and post-production packages on the market. It helps give videos, graphic designs and animated fonts a perfect final touch. This software provides a range of ways to create professional content for films, social media, TV and in fact any other audiovisual media.
The world of animated fonts allows you to create texts that come to life and jump out at your audience. These words are full of character and style. You can also come up with digital compositions that reflect the spirit of a brand. Which is exactly what Érico Santana (@erico_santana) has done in audiovisual projects for major brands including: Heinken, Itaú and Comic-Con Experience (CCXP).

In this tutorial, Érico teaches you the steps you need to use Adobe After Effects to create professional animated fonts.
Don’t miss his tips!
Select the type of animation you want to use
Start by defining the kind of animation you want to create. We’ll use Tracking for this tutorial.
Then define your text value/size. Now click on Advanced, then Based On > Words.
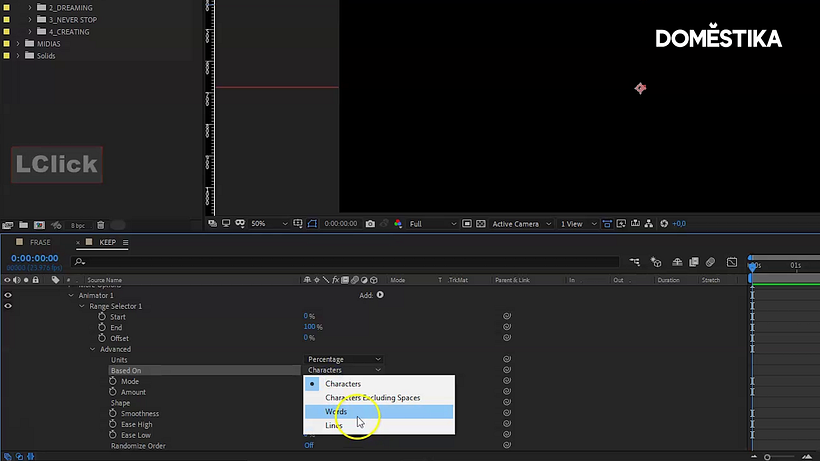
Define the shape by clicking on Shape > Ramp Up.
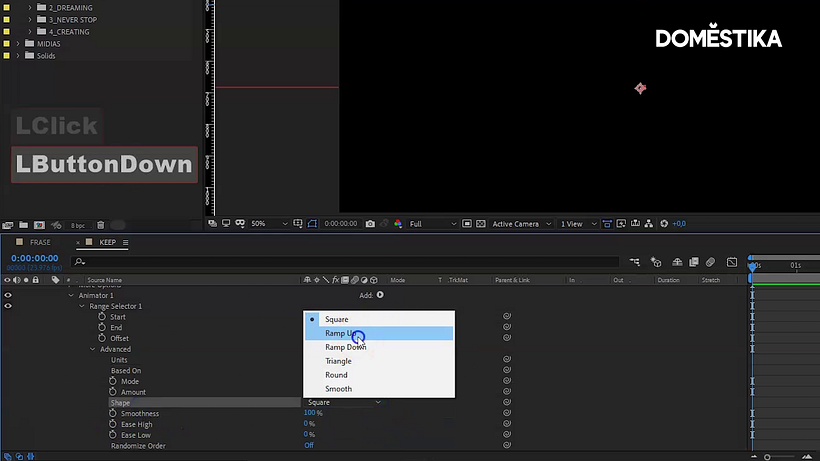
Click on Easy Low and set the value to 100%.
To animate your text, go to Offset and click on the Stopwatch icon. Set the value of the first still to -100. The next still will come 1 second later: set its value to 100.
Click Play to check your results.
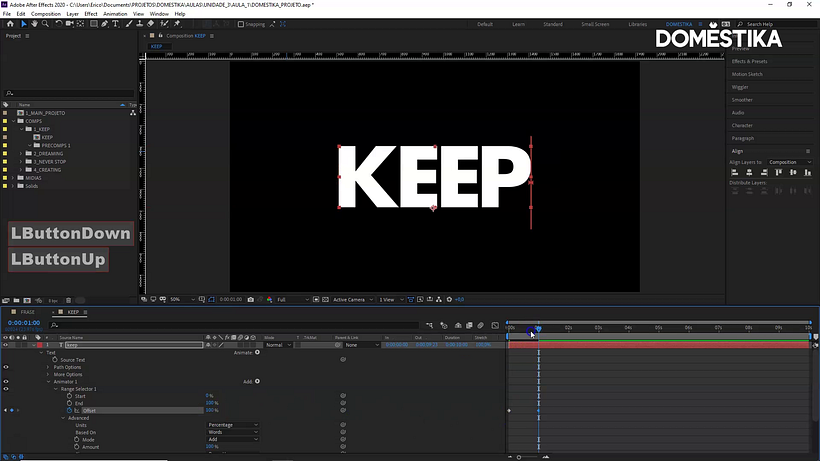
Create a mask to define a small section of the animation, then select the area you wish to apply it to.
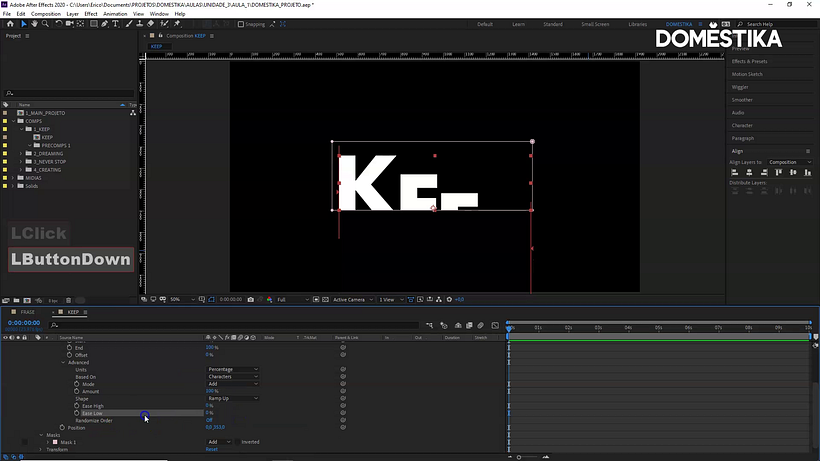
Click on Position and define the start position value for your animation.
Then click on Advanced > Shape. Select Ramp Up. Set the Easy Low to 100.
To animate your text, go to Offset and click on the Stopwatch icon. Set the value of the first still as -100. The next still will come 1 second later, set its value as 100.
Change the position of the text to create your desired design.
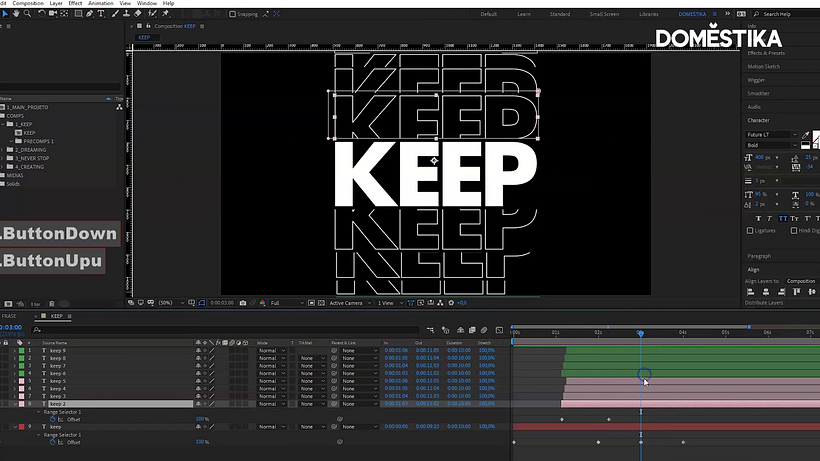
Adjust the animation duration and add elements, such as other fonts or colors, to your image.
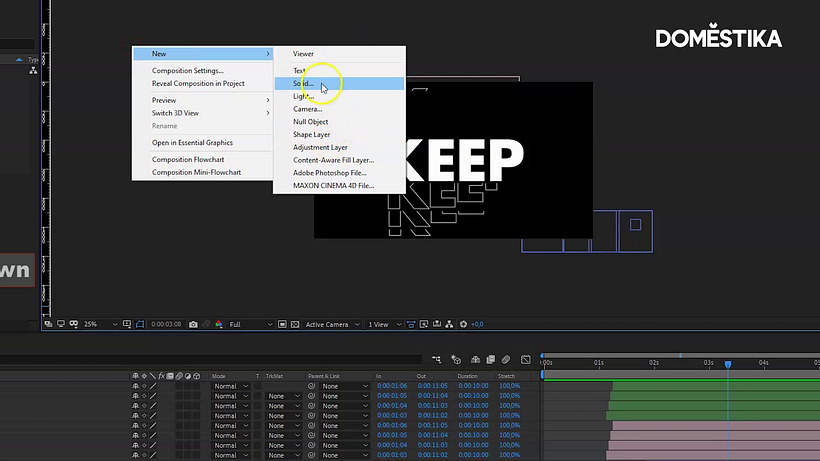
Right click then select New > Solid to add a background color. Choose the color and click on OK.
Apply the Gradient Ramp effect and customize the colors.
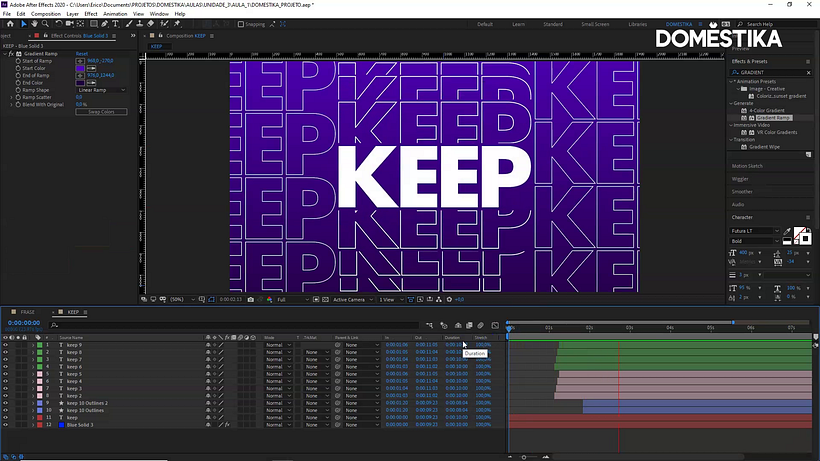
Your animated font is ready to go! You can now save and export your file.
Love this tutorial? Have a look at Érico’s course: Typography Animation with After Effects to learn creative motion design techniques and bring animated fonts to life with unique visual effects.
You may also like:
- 5 Free Tutorials to Master After Effects
- After Effects Tips to Speed Up Your Workflow
- After Effects Tutorial: How to Create a Loop
- Advanced After Effects, a course by Carlos “Zenzuke” Albarrán


0 commenti