3D Character Design and Illustration

Course final project

A course by Enrique Escalona , Graphic Designer and 3D Illustrator

Graphic Designer and 3D Illustrator. Getafe, Spain.
Joined November 2014
100% positive reviews (78)
1,221 students
Audio: Spanish
Spanish · English · Portuguese · German · French · Italian · Polish · Dutch · Turkish · Romanian · Indonesian

About the final project for: 3D Character Design and Illustration

3D Character Design and Illustration

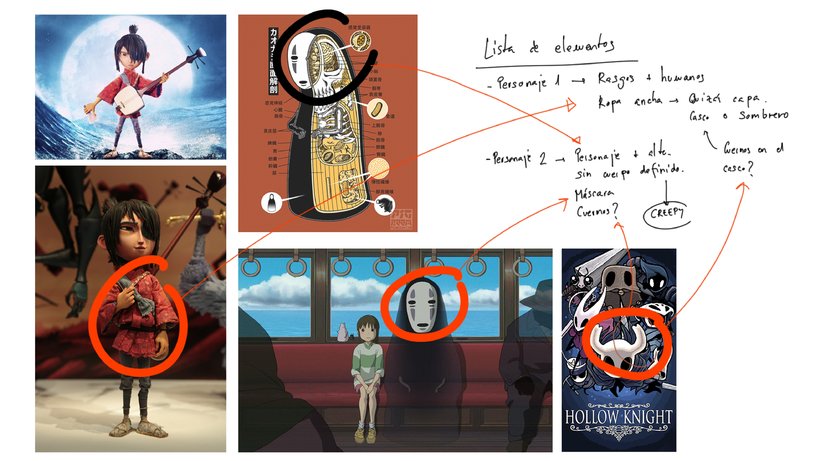
“We have reached the end of our journey. I don't want to say goodbye without thanking you again for the time you have invested in learning. For me, as always, it is a luxury. I hope that the hours that we have spent together have given you the tools to create what is going to be your own adventure and you manage to discover and create all those characters that haunt your head. The more you investigate what you like, the easier it will be for you to find your own and personal style. I have been very repetitive and you already know a little about my work methodology, but we are going to do a very last review of the phases of the final project! Influences and sketching Since you have already mastered the basic tools and actions of Cinema 4D, search, research and gather everything that will serve as inspiration. With this you can build a good file and mood board that will help you find the way to create your characters. Analyzing the elements that you are going to use in your characters and thinking about how you will do it in the program is a method that will save you time in the long run. Here you can see an example of my references, but I left you the complete presentation in PDF in Unit 2.

By generating a good file you can get down to work and start your first strokes on a blank sheet of paper. Remember, a very detailed sketch is not necessary: the drawing will serve as a guide, as an element that can change in the modeling process.
Creation of the characters This is the moment when butterflies flutter in the stomach: modeling. When we start bringing our characters to life is when we really discover their personalities. It is advisable to start with an order to facilitate the work. I encourage you to have a good organization and to rename all the elements that you create: it will make the next steps easier and more comfortable. If you are new to the world of 3D, this step can be overwhelming, but remember that we have done previous work in which we must support ourselves to make this phase easier. In this phase of the project I modeled my protagonist, his pet and other animals that will be part of the scene.
Lighting, color and textures Once you have your characters created, it is time to design a good setting where they can show off. In the course we started creating some lights. In my case, I really like studio lighting, but feel free to experiment with the tools that the render engine offers. The next step is to add color and textures to finish bringing the characters to life. Remember to use the node window to create materials more comfortably and use the texture resources that I have shared with you. Plus, you can keep digging through texture pages or even create your own. In Unit 4 we saw this whole process step by step. Review the video lessons if it serves as a guide.
Final result Finally, take a render modifying the sample parameters wherever you need them, to reduce the noise of your final image. I advise you not to just stick with a single image and take advantage of all the elements that you have been creating. Create content for your portfolio using secondary elements as well, adding detail elements that you enjoyed while modeling… don't limit yourself to just one part of the work! The details are what enrich the final project.
Share your final project with all of us by clicking on "Create your project". Remember to share both the final result of your scene and the steps that have led you to it. It would be great if you showed a picture of each step and added a brief explanation about what you have done in each one. So I can give you feedback. Now yes, the time has come to tell us see you soon, that the farewells were never very good for me. Thank you very much for choosing my course to enter the world of 3D illustration. I am sure that, if you have made it this far, at some point we will end up crossing our paths. To keep in touch so that we don't lose track of each other, I'd love for you to participate in the forum. We can chat, exchange ideas and create a really cool community where we can all learn from each other and enrich our work and points of view. See you on the forum. ”

Partial transcription of the video

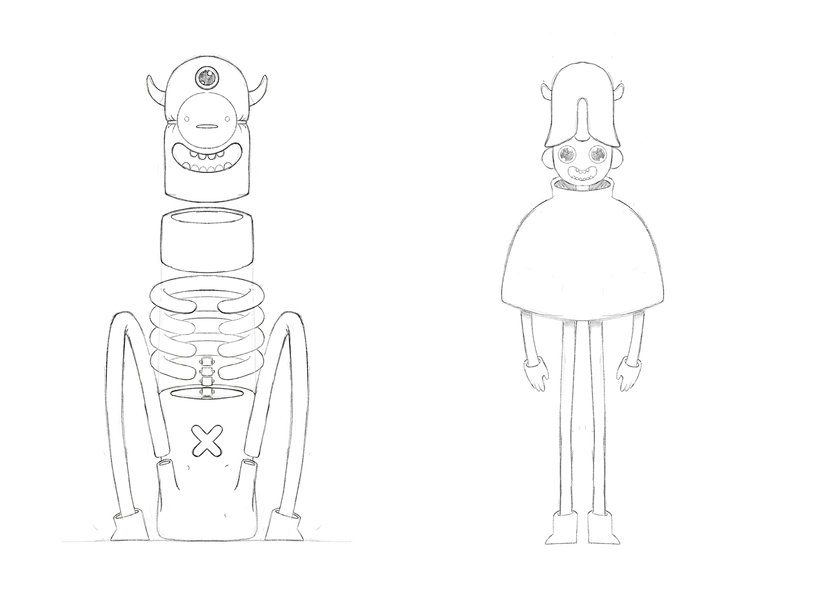
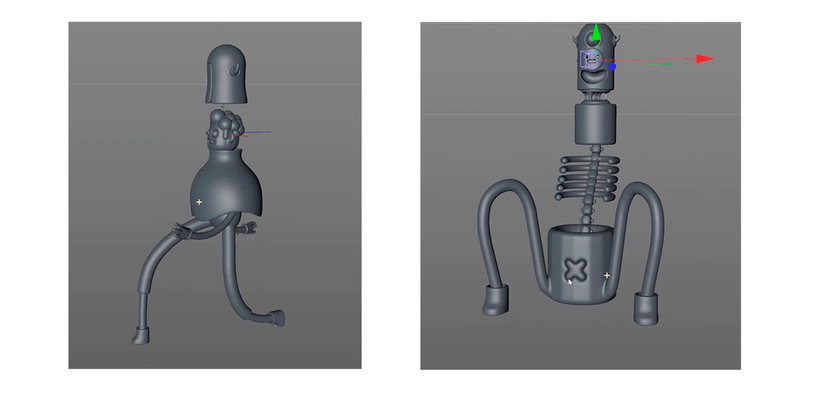
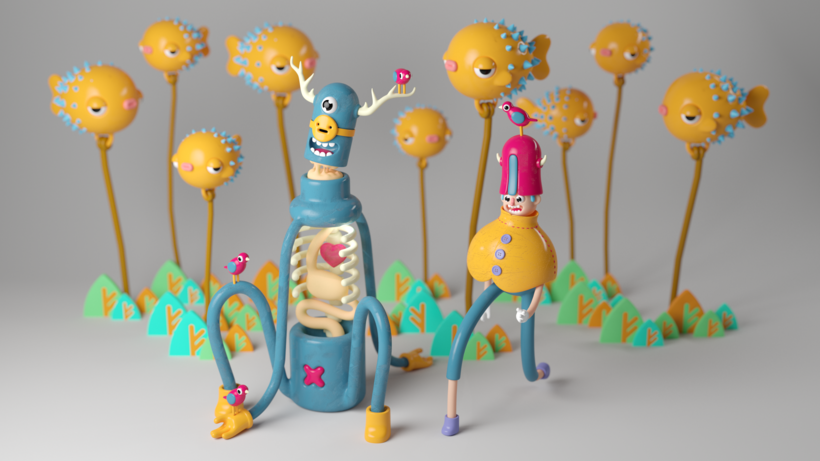
“Final project In this lesson we will do a brief summary of what we saw in the course. First, I showed you how to move around the Cinema 4D interface and the basic tools I use the most. Then, we looked at how I usually search for references online. We generated a file to later create our character and sketch. Having seen that, we got down to work. We started modeling our protagonist to then go on to model our pet. We finished our scene creating some details to improve our composition. The next thing was the render. We saw how to create cameras, illuminate and create materials with the Redshi...”

This transcript is automatically generated, so it may contain mistakes.


Course summary for: 3D Character Design and Illustration

  • Level: Beginner
  • 100% positive reviews (78)
  • 1221 students
  • 4 units
  • 23 lessons (5h 13m)
  • 10 downloads
  • Category

    3D & Animation
  • Software

    Adobe Illustrator, Cinema 4D, Redshift Render
  • Areas

    3D, 3D Character Design, 3D Modeling, Character Design

Enrique Escalona

Enrique Escalona
A course by Enrique Escalona

Teacher Plus
Graphic Designer and 3D Illustrator

Enrique Escalona studied audiovisual communication at the Complutense University of Madrid and graphic design and the Art School of Toledo. He currently devotes his time to creating original characters with loads of personality that are easily recognizable for their memorable features or unique ways of moving.

Enrique is the founder of collaborative projects like @congraphart and has worked with major brands like Xiaomi. He has also worked on sets for theatre productions like Young Frankenstein, The Addams Family, and Ghost thanks to his job as a production assistant for set construction.


  • 100% positive reviews (78)
  • 1,221 students
  • 23 lessons (5h 13m)
  • 22 additional resources (10 files)
  • Online and at your own pace
  • Available on the app
  • Audio: Spanish
  • Spanish · English · Portuguese · German · French · Italian · Polish · Dutch · Turkish · Romanian · Indonesian
  • Level: Beginner
  • Unlimited access forever

Category

Areas

3D Character Design and Illustration. 3D, and Animation course by Enrique Escalona

3D Character Design and Illustration

A course by Enrique Escalona
Graphic Designer and 3D Illustrator. Getafe, Spain.
Joined November 2014
  • 100% positive reviews (78)
  • 1,221 students