


Domestika Projects: Watercolor Portrait Notebook
Discover the creative process behind Carlos Rodríguez Casado’s watercolor portraits
Here, I (Carlos!) am sharing my project from my second Domestika course, in which I show you tricks for making a notebook for portraits using simple watercolor techniques.
Filling those first few pages of a new notebook can seem a daunting task: as those blank pages stare up at you, you feel nervous that you might ruin them with what you’re about to draw or paint. To combat this fear, you should use the first few pages as a catalog of techniques that you are going to use and different effects.
You are going to work with watercolor pencils, watercolor paints, and a refillable brush pen (Pentel) filled with paint diluted with water. Save a section of this catalog for testing out what happens when you mix different techniques.

Afterward, note down some quick rules on proportions, which you can use as a guide for adding facial features correctly. Although the instructions are clear on their own, you could also put these into practice and draw examples of faces from different angles: front, 3/4 view, and profile.
These are the pages that serve as a guide on proportions, in 4 simple steps. This is the front pose:

And here is the profile, which has ended up being with a prominent nose:

The steps you take to complete these pages serve as preparation for getting to grips with the techniques you are going to use and how to draw faces. However, there is another important step: adding light and shadow to our drawings.
In the course, I explain how light and shadow behave using two geometric figures. I explain that there are three elements to work with: shadows, medium tones, and lights. After, we see how to create these effects using the techniques covered in the course, and lastly, how to add them to a face, working from a photograph.
These are the pages on which we study how light and shadow interact with geometric shapes:

And afterward, the fun starts: we apply light and shadow to a face that we’ve drawn using our guide for proportions.

Now that we understand how these techniques work and are able to draw a face–using the right proportions and adding light and shadow correctly–we are ready to dive in and fill the following pages.
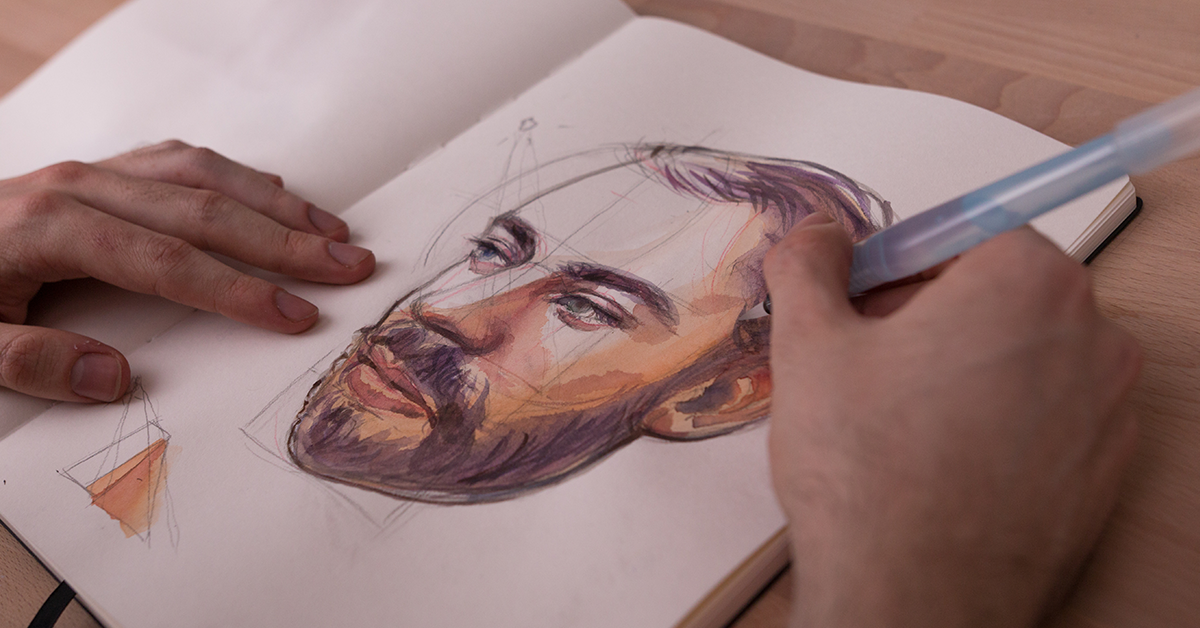
I drew the same model, my friend Miguel, three times. He posed for me throughout the course (bless his patience!). For each drawing, I applied everything I had learned and experimented with different effects. I was using the Pentel pen brush filled with diluted ink to sketch.
I warmed up by starting with a front portrait of Miguel, using just the watercolor pen brush and paint:

We also had some laughs during filming!

I marked the half of one side of the face to focus on.

To finish off, I used all the combined techniques to create a profile portrait. This one is my favorite!

Now, having loosened up my drawing hand with these exercises, all that was left to do was to fill the left-over pages with more portraits, while experimenting with compositions, colors, and styles. Your notebook is your playground.
The difficult bit will be stopping! I would love to see what you fill your pages with and whether you find spontaneous drawing as addictive as I do.
This is a translation of an article written by Carlos Rodríguez Casado (@carlosrodriguezcasado). In his course, Watercolor Portrait Notebook, you will learn to master drawing and watercolor techniques so that you can create spontaneous portraits from wherever.
Don’t forget to share your projects here!
You may be interested in:
- Draw Yourself: Puño.
- Tips for Starting out in Character Design.
- Tips For Transforming Your Illustrations into Pins, by Charlotte.


0 comments