Cinema 4D Tutorial: cloning methods in MoGraph
Learn the best way to clone models using the Cinema 4D MoGraph module
The MoGraph module is one of the most important tools that users of the Cinema 4D animation software have for animating objects and creating special effects. With MoGraph you can make models explode, control them using other objects, deform them or create infinite movements.
Zigor Samaniego (@zigor), illustrator, modeler, and designer specialized in Photoshop, Cinema 4D and After Effects has a vast experience in this field. In this tutorial, he explains the different cloning modes and tools found within this module of Cinema 4D.
Introduction to the MoGraph cloning tool
The MoGraph module has many options, but the most important and extensive one is the cloning tool, which you will find inside MoGraph > Cloner.
For the cloning effect to start working, you must select an object - in the case of this example, a cube- in the cloning tool, drag it into the window and start creating the clones.
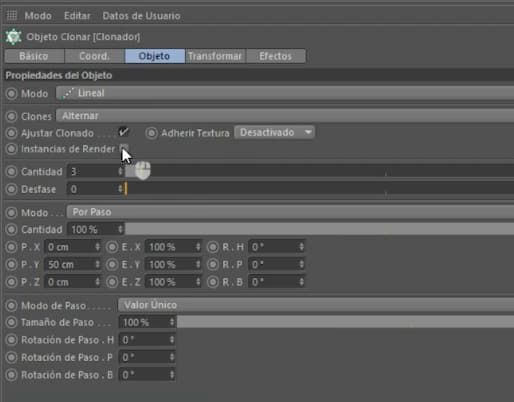
There's one option that you have to turn on because it will be very important in order to lighten the rendering load and protect the computer's processor while working with Cinema 4D, and that's Render Instances, which will allow you to work using instances and thus free your processor workload.
Instances are clones of objects that are modified at the same time the master object is modified. As the computer does not have to modify all the objects one by one this will make changing a set of equal objects much faster.
The main MoGraph modes
Mode: linear
By default, when the cloner is used, it works in linear mode. Linear mode creates a finite line and allows you to create clones in one direction. The options that you are allowed to perform using this mode are the following:
- Move the line back and forth.
- Scale the clones, from beginning to end.
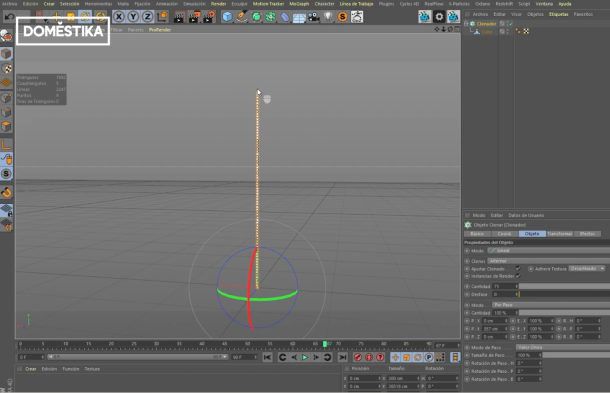
The line of clones can be animated very simply by adding an initial and ending key. Once you press play, it will interpolate between the two positions.
Mode: radial
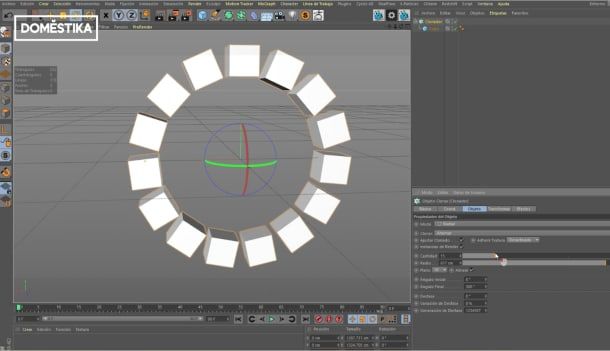
As the name implies, the cloned objects will expand forming a circle. The options allowed by this mode are the following:
- Increase the radius: it will allow you to expand the cloned objects.
- Increase the number of objects.
- Adjust the initial and final angle - this can also be animated.
- Offset: with this option you can rotate the cloned objects.
Mode: grid formation
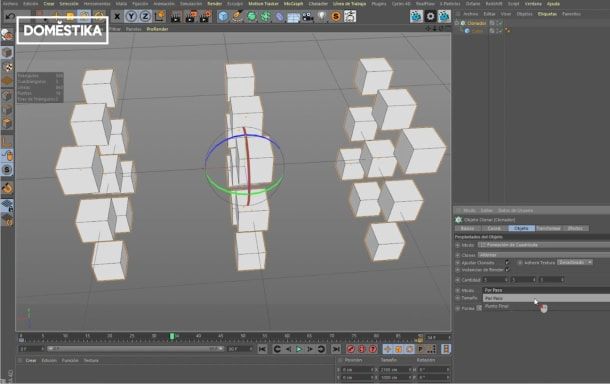
When you are working on this option with a cubic object, a compact cube formed by many compressed cubes can be formed. If you don't want this to be the shape of your project, you can separate them by alternating the ‘per step’ and ‘end point’ mode to control the total distance between the cubes themselves and their size.
You can also choose the shape the grid will follow and fill it with a cubic, spherical or cylindrical shapes or with the object you want.
Mode: clone object
If you want to have final control over the shape you want your clones or instances to fill, this is the mode you have to choose. In Zigor's example, we will use a sphere shape.
To do this, follow the steps below. First, create a cloner, with the idea of cloning a capsule into a gigantic sphere - to help you work, select the X-ray option in the sphere. To do the actual cloning, you´ll have the following options:
- Click on ‘sphere’ and drag it into the ‘object’ option.
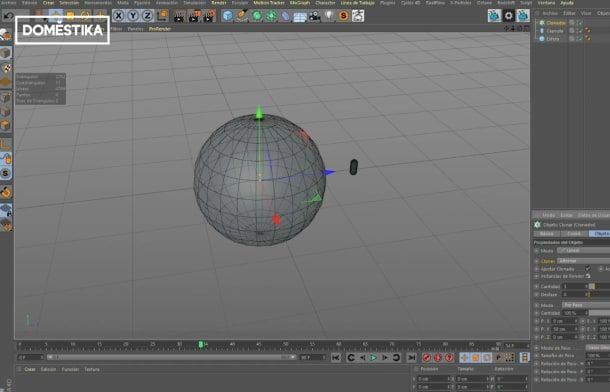
- By vertex: click on ‘clone’ and with that same arrow, indicate the software that you want to clone the capsule in the sphere shape. By default, the mode of distribution of the clones will be placed at the vertex, that is, a clone will be created for each vertex that the sphere has. With this option, you have to be careful not to clone this object directly into something that has many vertices because the processor might crash.
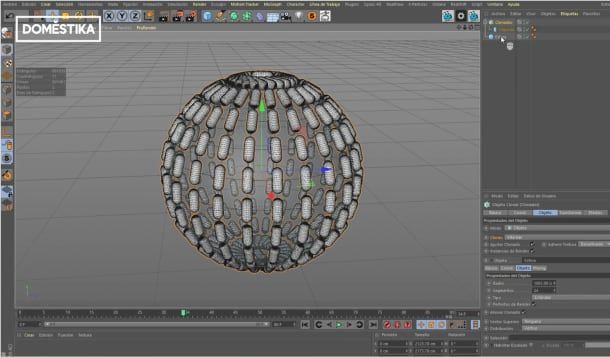
- By edge: this option will create a clone for each edge the object has.
Mode of distribution: surface
Very useful if you want to distribute some stones randomly across a surface since it will distribute the cloned elements in the sphere.
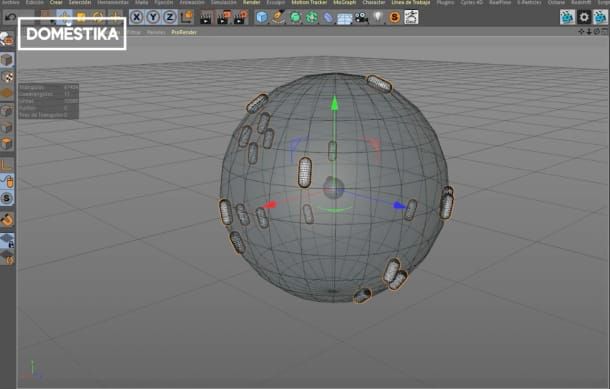
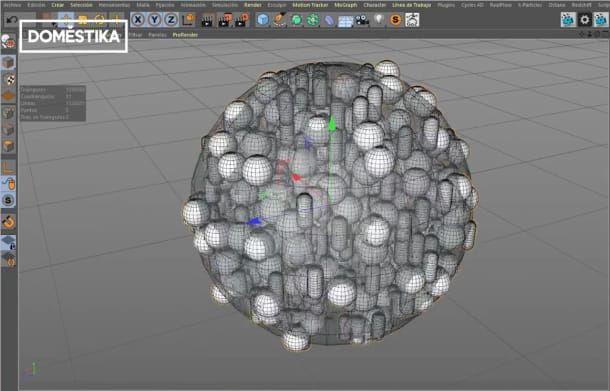
Distribution Mode: Volume
Another incredibly useful tool, this will allow you to fill the sphere with the clones. Here you can also transform and rotate objects, move them or scale them in different axis.
If you want to go deeper into Cinema 4D, the '3D Animation for Non Animators with Cinema 4D' course by Zigor Samaniego will teach you the keys to creating express animations for social networks.
You may also be interested in these tutorials:
- Illustration Tutorial: 5 Basic Tips on How to Shade with Ink
- Illustration Tutorial: How to Draw from Your Imagination
- Illustration Tutorial: The Color Wheel


0 comments