Unveiling Hidden Secrets: 5 Expert Tips and Tricks for Mastering Adobe Fresco

Are you prepared to take your Adobe Fresco skills to new heights? If you're eager to uncover the hidden gems within this remarkable app, then read on to learn 5 expert tips and tricks that will empower you to master Adobe Fresco like a seasoned virtuoso.
1. The Touch Shortcut: Superpowers and Efficiency

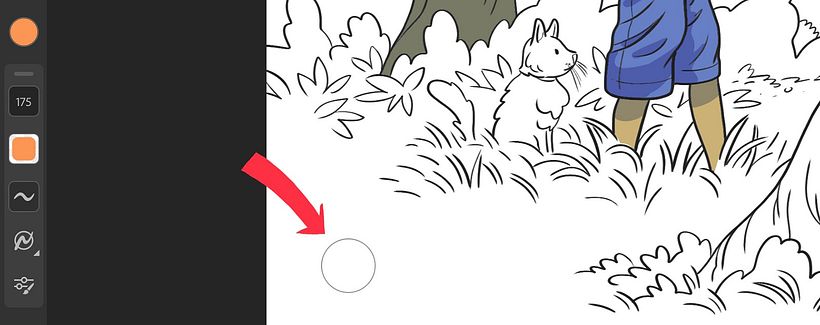
An often overlooked feature in Fresco is the powerful Touch Shortcut. Look for the floating translucent circle on your canvas and you have found the Touch Shortcut (TS, for short). You can drag it anywhere you like to suit your preference. But what does it do? Too many things to list in this article, but let’s cover some of the big ones:
✹ Hold it down to erase with whichever pixel brush you are currently using. If you don’t wish to hold it down, you can simply double-tap it to ‘lock’ it in eraser mode. Double-tap again to go back to drawing. If using the Live Watercolor brushes in Fresco, this action will allow you to paint with pure water and no color!
✹ Hold it down while you are using your rectangular or circular selection tool to create a perfect circle or square for your selection.
✹ When using vector brushes, double-tap the TS, then touch it once more to enter the ‘secondary’ mode of this powerful tool. This will allow you to now perform Vector Trimming - simply use your pencil to swipe through any overhanging lines in your drawing and watch them vanish perfectly at the point where they intersect with other lines. Magic!
✹With your Lasso tool, hold down the TS while drawing to remove parts of your selection quickly.
To learn more about the Touch Shortcut, check out the handy guide to this tool, found under the ‘?’ icon near the top left of your screen in Fresco. Select the ‘Touch Shortcut’ menu, and you’re all set.
2. Vector Brushes: Infinitely Scalable Art

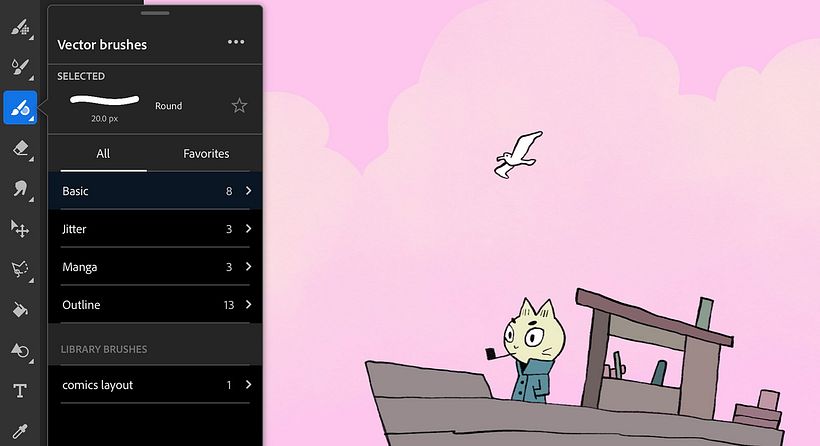
Fresco is that rare app that allows you to use vector and pixel brushes in the same documents. Vector brushes allow you to create infinitely scalable art with no pixelation, whatsoever. These brushes are perfect for creating artwork for large scale projects, logos, signage, stickers, and crisp animation. In fact, artists at Nickelodeon use Fresco’s vector brushes and animation features to create segments of some of their most popular titles, like Spongebob Squarepants! You will find the vector brushes third from the top in your toolbar. Experiment with all of the sub-categories and be sure to check out the Outline brushes that allow you to use separate colors for the outline and interior of your brush strokes – fantastic for lettering artists!
3. Multicolor Brushes: Paint with Any Number of Colors Simultaneously

Adobe Fresco’s Multicolor brushes are revolutionary. To get a feel for how they work, open the Pixel brushes and scroll down to the Multicolor category. Three-dimensional effects, unique textures, rainbows and more await! Best of all, you can create and save an unlimited number of your own multicolor brushes. Check out my Fresco course to learn the ins and outs of the Multicolor eyedropper and custom Multicolor brushes. You could build an entirely unique visual style and library of tools around this one feature!
4. Time-Lapse: Document Your Creative Odyssey
Ever wished you could capture your creative process and share it with the world? Adobe Fresco's 4k time-lapse feature is your secret weapon. Not only does it let you showcase your artistic journey, but it also provides an invaluable opportunity for self-reflection and growth. Timelapses are also great for social media sharing. You can even set a custom duration for the video right inside the app.
5. Paint Inside: The Fastest Way to Add Color to Your Art
This feature could have saved me so many hours over my long career as a digital illustrator! With Paint Inside, you can use any brush (even Fresco’s Live Watercolors and Oils) to paint on a separate layer from your line work and ALWAYS stay inside the lines. You have to try it to believe it! Simply set your line art as a ‘Reference’ layer, add a layer underneath, and then turn on the Paint Inside mode. Now try painting inside any area of your drawing that is enclosed by line art and there is no possible way to color outside the lines!

This means you can use large, textured custom brushes to quickly color any area (even those that are smaller than the brush stamp, itself) – no selections or careful hand control required. You’ll now be able to race through the color stage of your art and concentrate more on color choices than on keeping things neat and clean; Fresco will do that for you!
So there you have it, 5 expert tips and tricks to unlock the hidden secrets of Adobe Fresco. Remember, the true essence of mastering any tool lies in practice, experimentation, and a dash of fearless creativity. With these insights, you're armed and ready to embark on an exhilarating artistic journey. If you want to dive deeper, consider taking my course "Creating a Compelling Animated Illustration in Adobe Fresco." This course will teach you the skills to create captivating illustrated stories with subtle animation.
As a bonus, I also want to provide you with a free document which will help you check the visual hierarchy of your final illustration idea, an important concept for all your artwork. In the realm of digital art, achieving balance is akin to orchestrating a symphony of visual elements, where harmony reigns supreme.
Cheers to your newfound Fresco expertise—may your creativity know no bounds and I look forward to seeing your creations!
Join for Free and download
Check Visual Hierarchy.pdf


0 comments