Design and Animation of Playful Supercuts in After Effects

Course final project

A course by Santiago Avila , Graphic and Motion Designer

Graphic and Motion Designer. London, United Kingdom.
Joined October 2021
93% positive reviews (15)
656 students
Audio: English
Spanish · English · Portuguese · German · French · Italian · Polish · Dutch · Turkish · Romanian · Indonesian

About the final project for: Design and Animation of Playful Supercuts in After Effects

Design and Animation of Playful Supercuts in After Effects

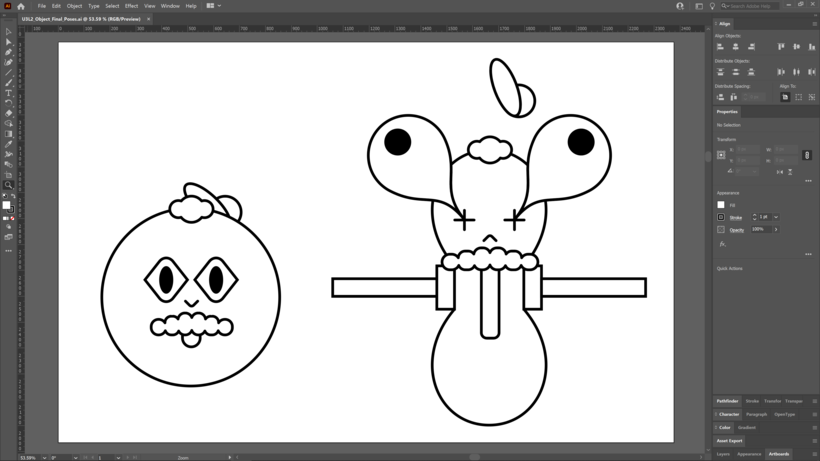
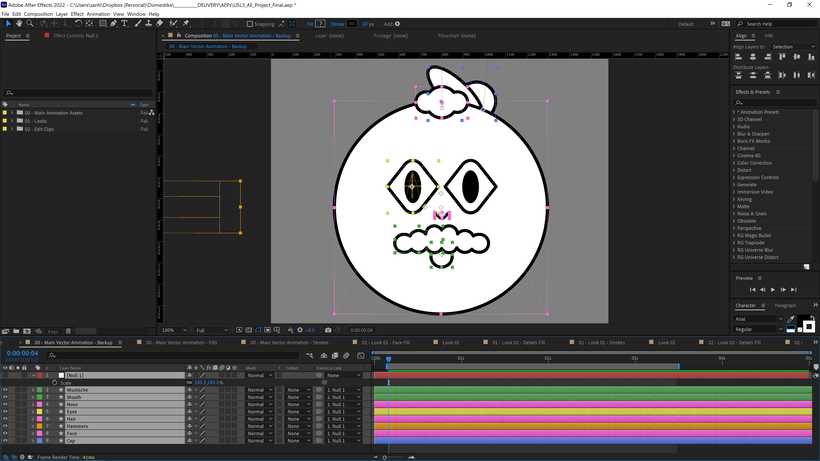
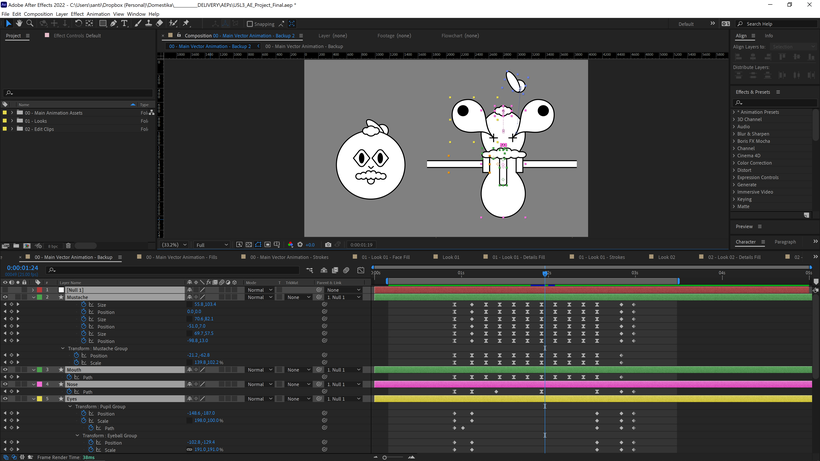
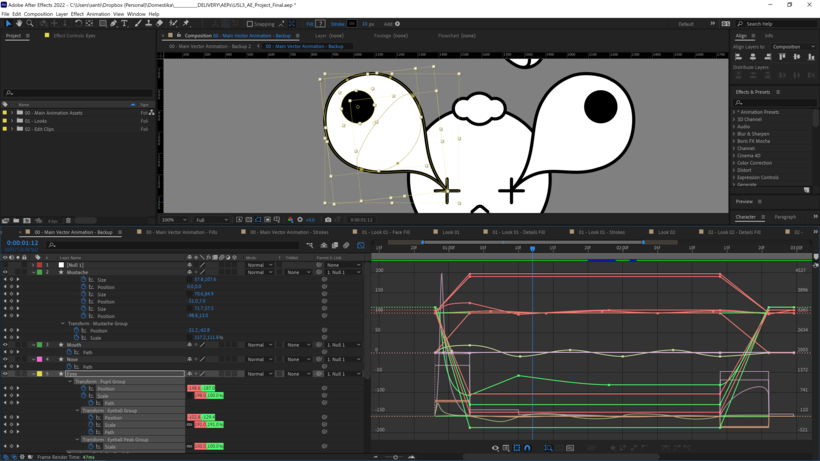
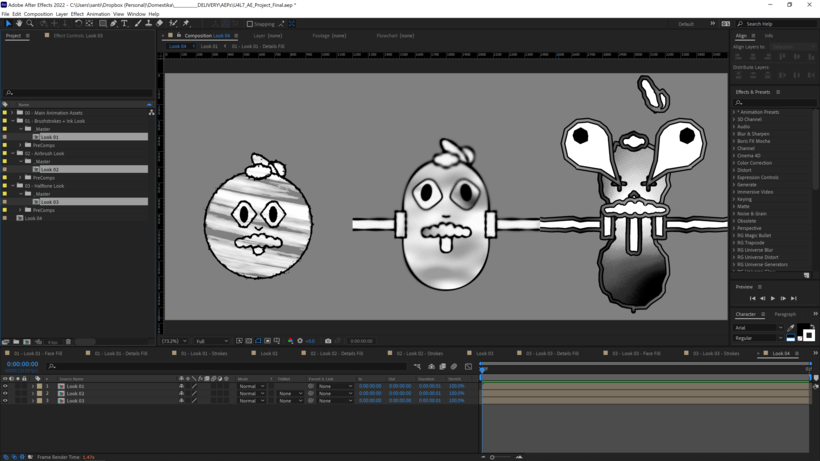
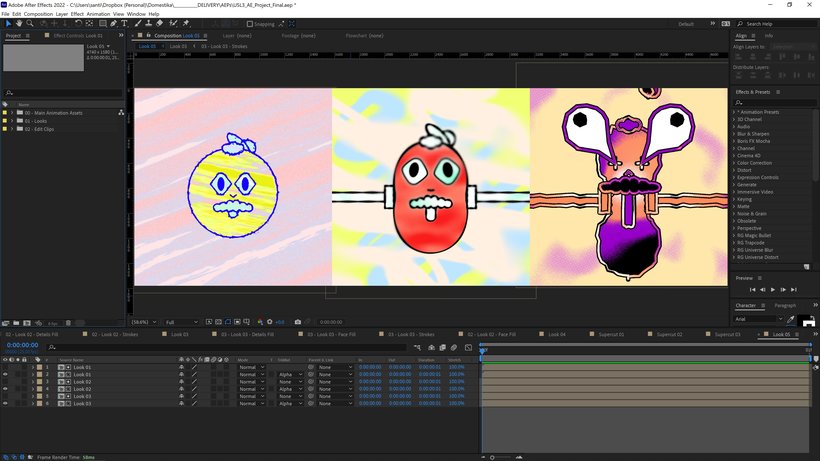
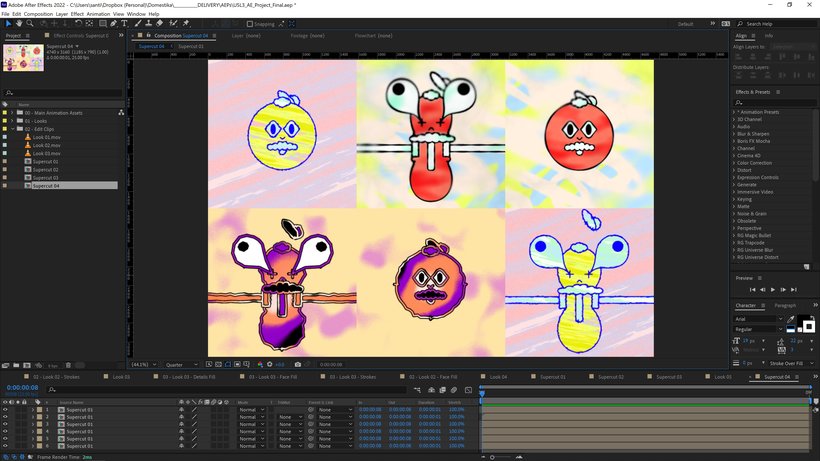
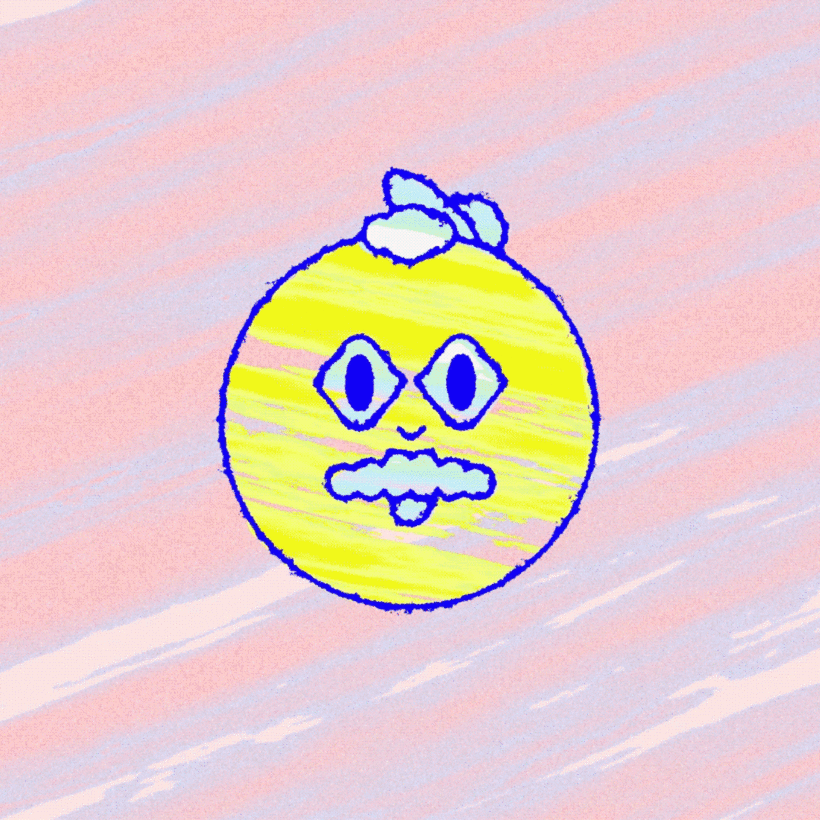
“Thank you so much for taking this course with me! I'm really excited to see what you come up with. It's now time to work on your project. This could mean finishing the concept you started by completing the course tasks or making a brand new project! Either way, I strongly suggest you take the time to gather inspiration and create a unique project of your own. Make sure to keep track of your progress with different pictures of each step. It'd be great if you could also explain the choices you've made along the way. This will help me understand your creative process and guide you better if you need advice. After all, I'll be in the forum to answer any questions or doubts you might have. Here are the main steps to follow: The Object First, choose an object with two distinct poses and design them in Adobe Illustrator. If you're not feeling confident about your illustration skills, go simple and geometric. Use references to your advantage in that regard; there are many incredible minimalist character and object designs out there to get inspired from.

From Adobe Illustrator to After Effects Next, move the vector design from Adobe Illustrator into After Effects using Shape Layers. Make sure you simplify your shapes as much as possible, using "Merge Paths" to unite or subtract sections of two geometric shapes instead of building an irregular one with those merges applied, as that will give you more versatility to animate the shapes separately. Also, use "Repeaters" when needed to achieve symmetrical movements and avoid having too many keyframes.
Once the object is in After Effects, adapt the shapes to conform to pose B and create a rough pass of the animation using two keyframes as a base. Keep in mind that sometimes using "Transform" values (position, rotation, and scale) will be more helpful than just doing the whole transition with "Path" keyframes, as it gives you more room to add that "Path" animation as a secondary line of motion.
Easing the Movements After keyframing all of the movements, it's time to ease them with intention and exaggeration. Get familiarized with the "Keyframe Velocity" menu. Solving your easings visually in the value graph will give you good results. You can trial different easings by animating a circle moving left to right with two keyframes and just tweaking the Influence values in the "Keyframe Velocity" menu. I personally like extremes, so I'll use 100% whenever I get a chance!
Developing the Look Once the vector animation is done, separate the "Fills" and "Strokes" and move into look development. Build 3 looks using "Reference Noise Layers" and linking them to effects like "Displacement Maps," "Compound Blurs," and "Set Mattes." Working with images and footage to achieve textural results is a tried and tested method, but getting deeper into noise-building is one way to achieve results that are more tailored to your needs and allow for modification and keyframing. This is incredibly useful! Noises are also a workflow present in other environments such as 3D texturing and material building. Parametric, editable values also allow you to test your limits and go to extremes. Exaggerate your noise values, go extra crazy with your wiggles, and see what results you come up with. You can tweak your values back at any point if you save your file frequently enough! So don't forget to do that either.
The Background and Color Once your looks are ready, add backgrounds and add color. Then, prerender them and start playing with the editing to build the supercut. There's no right or wrong way to approach this! You can be very methodical and do one loop per style, or you can use the hammers' impact to do the match cut like I did. You can even go quicker than that and have the styles alternate every couple of frames!
And that's all! Once you're happy with your supercut, render it and you're ready to go! I encourage you to think of any other variables you can tweak: maybe keeping the colors similar throughout the styles, or combining the edge treatment of one look with the surface treatment of another. A goal of this course is to explore variation at every step of the way, so enjoy experimenting and have fun.
I hope to see your projects in the forum very soon! So don't forget to share! You can do this by clicking on "Create your project." Remember to share both the final result and the steps that have led you to it. See you there!”

Partial transcription of the video

“ Final Project We've reached the end of this course. Hope you had fun learning as much as I did teaching. You've discovered first-hand how through a supercut, a simple animation can reach another level of depth by adding editing and rhythm decisions to it. Here, we saw how to combine design and animation techniques with essential tools in After Effects. To recap, here are the key steps to building your animation. Start with research and find inspiration for the object or character. Think of two poses this object or character might have and think of look developments that fit the style you ...”

This transcript is automatically generated, so it may contain mistakes.


Course summary for: Design and Animation of Playful Supercuts in After Effects

  • Level: Intermediate
  • 93% positive reviews (15)
  • 656 students
  • 5 units
  • 25 lessons (5h 22m)
  • 10 downloads
  • Category

    3D & Animation
  • Areas

    2D Animation, Animation, Motion Graphics

Santiago Avila

Santiago Avila
A course by Santiago Avila

Teacher Plus
Graphic and Motion Designer

Santiago Avila is an Argentinian motion and graphic designer based in London. He has been working in motion graphics and animation for over a decade, both in-house for companies and as a freelancer. He has contributed to projects that range from film, broadcast, music live visuals, and digital content. This has given him the opportunity to experiment with 2D and 3D animation for both graphic and character-driven storytelling.

He has worked for clients such as Nike, Disney, Coca-Cola, Spotify, Netflix, MTV, Condé Nast, Dell, the History Channel, FOX, ASICS, and BFI. Santiago has also collaborated with artists like Kylie Minogue, Disclosure, London Grammar and Anne-Marie.


  • 93% positive reviews (15)
  • 656 students
  • 25 lessons (5h 22m)
  • 23 additional resources (10 files)
  • Online and at your own pace
  • Available on the app
  • Audio: English
  • Spanish · English · Portuguese · German · French · Italian · Polish · Dutch · Turkish · Romanian · Indonesian
  • Level: Intermediate
  • Unlimited access forever

Category

Areas

Design and Animation of Playful Supercuts in After Effects. 3D, and Animation course by Santiago Avila

Design and Animation of Playful Supercuts in After Effects

A course by Santiago Avila
Graphic and Motion Designer. London, United Kingdom.
Joined October 2021
  • 93% positive reviews (15)
  • 656 students