Introduction to Fashion Draping: Create Custom Womenswear
Course final project
A course by Reagen Evans , Fashion Designer


About the final project for: Introduction to Fashion Draping: Create Custom Womenswear
Introduction to Fashion Draping: Create Custom Womenswear
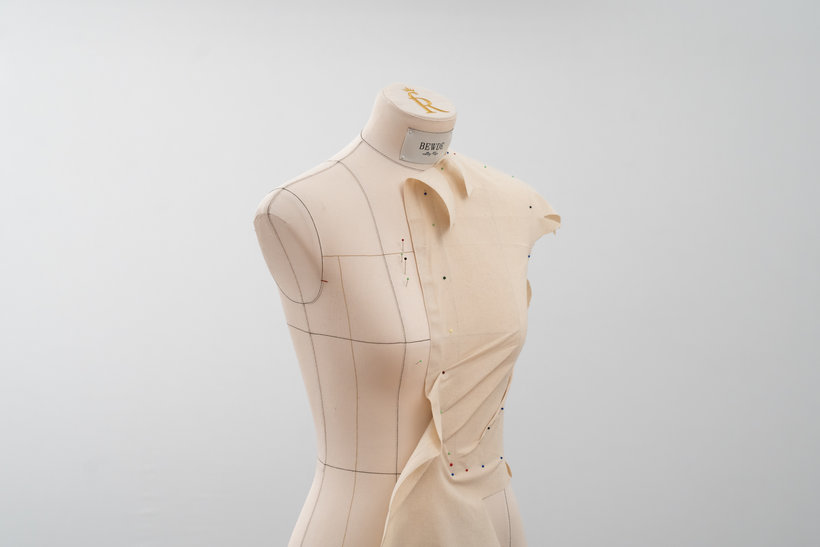
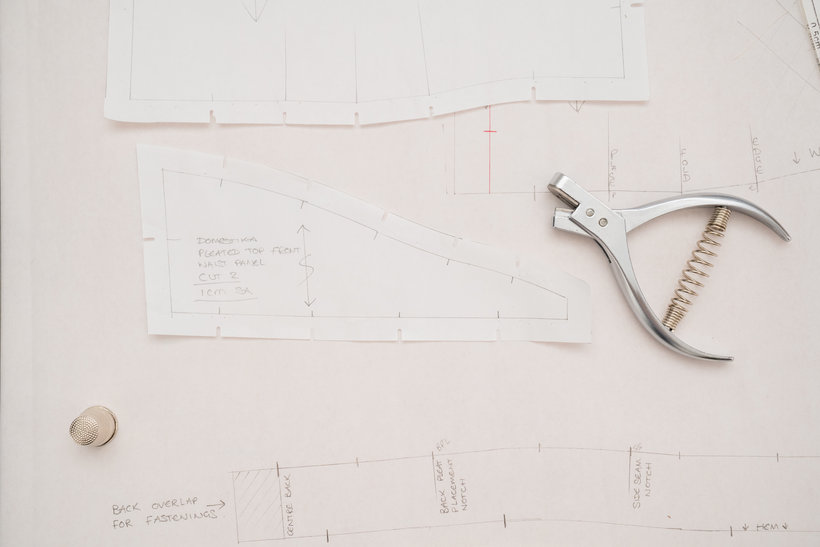
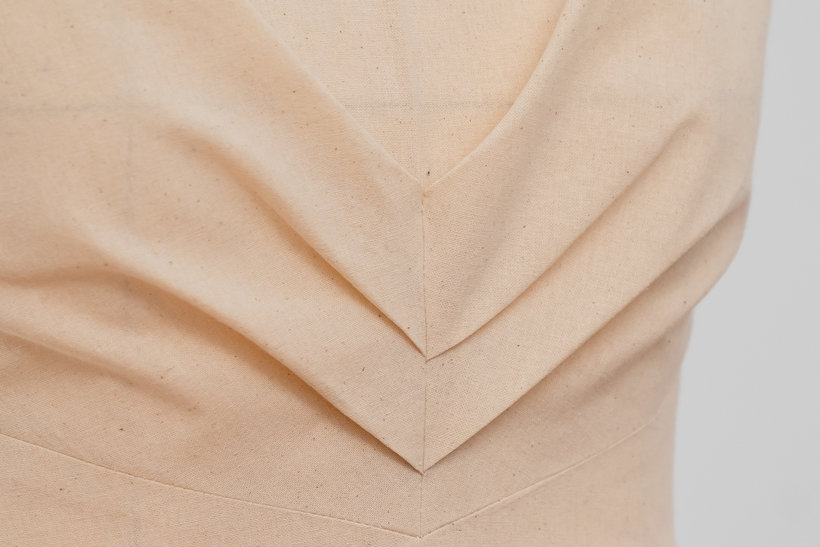
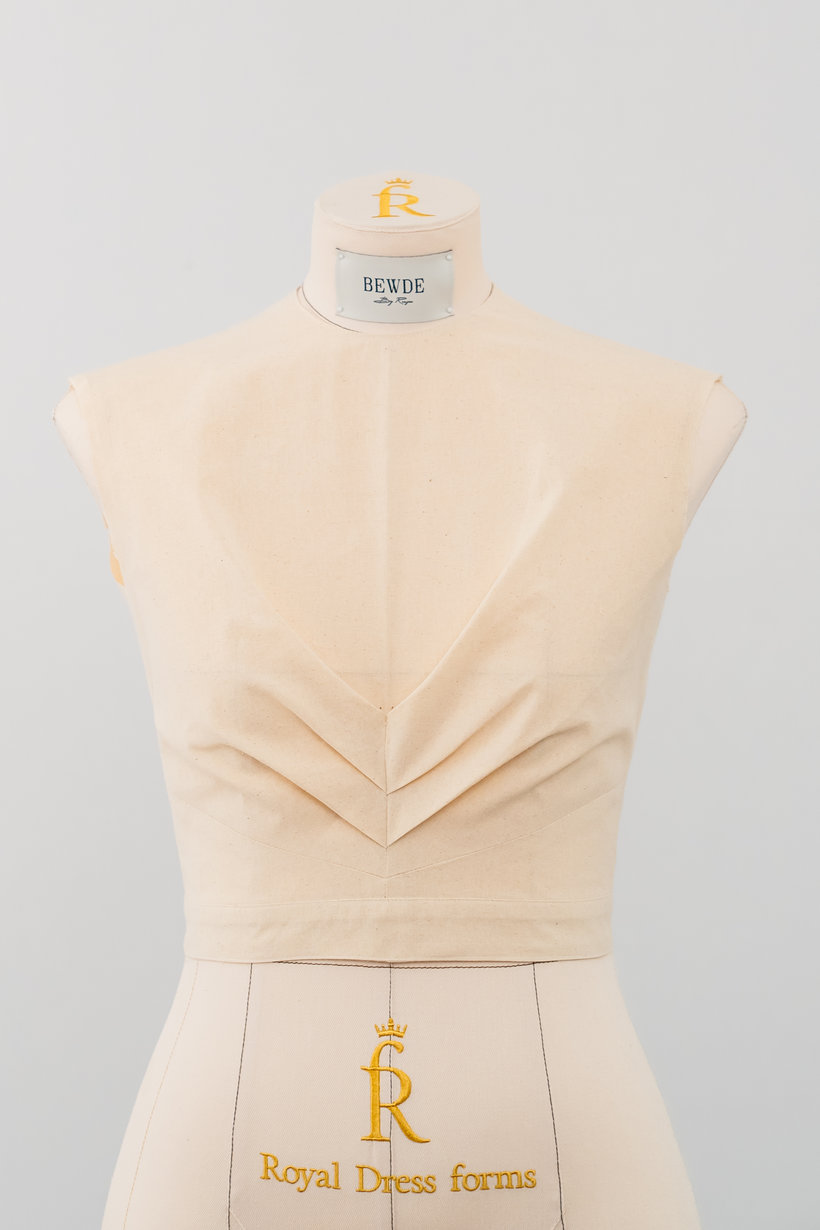
“We have reached the end of the course, and now you are ready to start your project. Before saying goodbye, let me give you some advice and sum up the steps I recommend you follow to complete the project. First, I would advise you to start the process without an idea in mind. Don’t think of designers you love and copy their work: this will just lead to a fairly mundane outcome. The best results are achieved when you just clear your mind and let the fabric and body (in this case, a mannequin) lead you and direct your design. The more comfortable you become with this technique, the more complex your drapings will become, and you will be able to create truly amazing, one-off pieces. Remember this tip: step away from your work! When we are so up close and personal with a mannequin or client, details can sometimes seem much bigger than they are. The best thing you can do is place your idea, step away, evaluate, try and view your creation from different angles and perspectives to make sure it is progressing how you want it to. I also recommend you to familiarise yourself with all the materials out there and which ones could be best suited to your technique and design idea by using your final fabric on the half scale mannequin. This will save you lots of fabric waste whilst demonstrating the abilities and properties of your chosen material. Calico and silk, for example, behave very differently, and if you wanted to make a slinky garment, calico just wouldn't give you the right results when draping. You can even buy half metre fabric samples to save on cost, but get the experience with the fabric. Once you have all the necessary materials organised, you are ready to start draping onto your mannequin. You can start with the front or the back to add the main design features. Remember to steam your fabric first and have enough material to cover the area you are working on.


Partial transcription of the video
“Congratulations on reaching the end of this Introduction to Draping course. You've achieved so much and done so well. It's wonderful that you've taken this journey with me and learned about what I truly love to do. We began the course by looking at the materials and tools that you would need. As well as investigating the different types of fabrics that you could use so that you chose the right one. Remember to iron and steam your fabric of choice before you start draping. We then looked at the correct positioning of your drape to work with your design. Remember to manipulate your fabric aro...”
This transcript is automatically generated, so it may contain mistakes.
Course summary for: Introduction to Fashion Draping: Create Custom Womenswear
-
Category
Craft, Fashion -
Areas
Fashion Design, Patternmaking & Dressmaking, Sewing

Reagen Evans
A course by Reagen Evans
Reagen Evans is a womenswear fashion designer from Shropshire, England. Growing up, he was always making things and was interested in fashion in particular from a young age. After graduating from school and working as a civil engineer, Reagen realized that engineering was not for him and decided to pursue his passion for fashion as a career. He founded Bewde, a couture fashion house specializing in contemporary womenswear, at just 22 years old.
Reagen’s designs combine art and fashion with the aim of making the women who wear his clothes feel confident. He has dressed clients including Emma Manners, the Duchess of Rutland, and he shares his designs with over 200K followers on Instagram.
- 95% positive reviews (169)
- 11,708 students
- 13 lessons (2h 35m)
- 18 additional resources (3 files)
- Online and at your own pace
- Available on the app
- Audio: English, Spanish (Latam), French, Italian, Portuguese, Turkish
- Spanish · English · Portuguese · German · French · Italian · Polish · Dutch · Turkish · Romanian · Indonesian
- Level: Beginner
- Unlimited access forever
Areas


