


Procreate Tutorial: How to Create Your Own Alphabet
Learn these simple Procreate tricks and tips to create a custom alphabet, with graphic artist Justin Poulter
If the fonts on Procreate aren’t working for you, you can create your own, custom-made alphabet. And, with a few useful hacks, it’s easier than you might think!
Justin Poulter (@justinpoulter) is a graphic artist based in London, UK. He has worked with many big brands—such as National Geographic, Easyjet, and Costa Coffee—providing their campaigns with beautiful artworks that combine typography with illustrations, and pop with bright colors.
In this tutorial, Justin will teach you how to make your own alphabet from scratch on Procreate. Check it out!

How to Create Your Own Alphabet in Procreate
1. Create the guidelines
First, create your guidelines. Simply draw a line, and hold the pen down so that the line straightens. Then, duplicate the line, and go to Uniform. Select the Snapping tool, making sure that Snapping and Magnetics are on. Then, drag the duplicated line down, until your guidelines are the width you desire. Finally, merge the two layers together and reduce the opacity.

2. Start the first letter
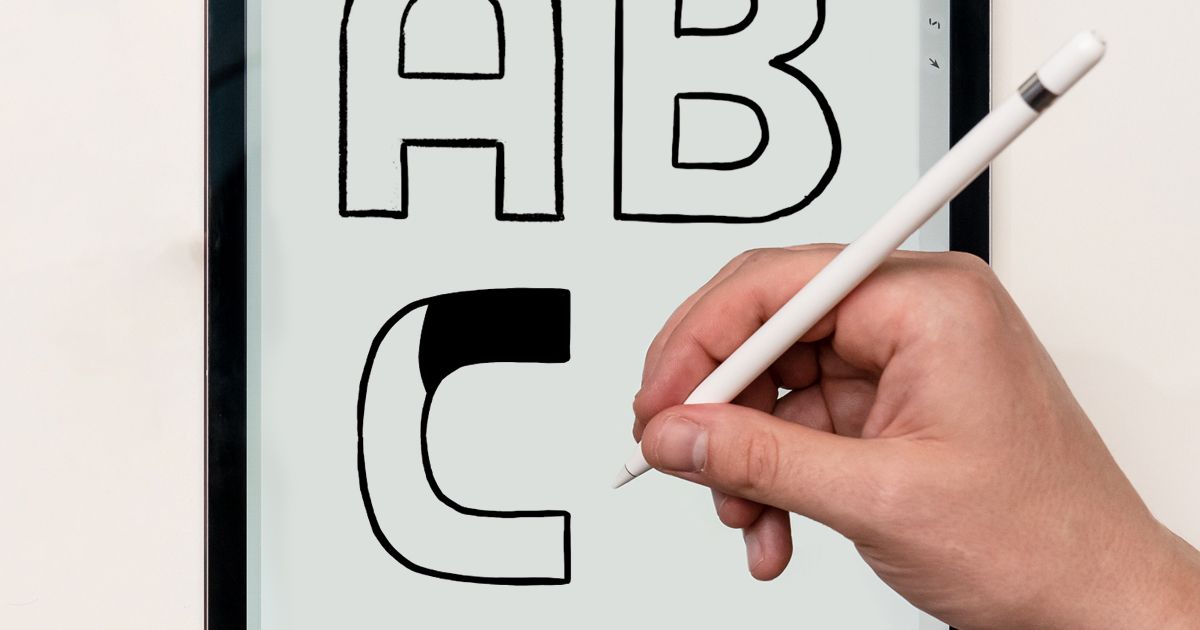
Create a new layer and select your brush—a thinner brush is ideal for the job. Draw a freehand A in the style you want to replicate across the alphabet. It doesn’t matter that it doesn’t look perfect at this stage; you will finesse it later.

3. Use the first letter as a guide
To make sure the widths of the letters are equal across the alphabet, select the first letter and duplicate it. Bring it to where you will write the B, and reduce the A’s opacity. Now, begin tracing the B over the top, using the A as a guideline.

4. Use some simple tricks
There are several shortcuts you can use to create your letters and ensure uniformity across the alphabet. For example, the B is symmetrical, so you can simply select the first semi-circle in the B with the selection tool, duplicate it, and group the two semi-circles together to create a B. Similarly, the C is also symmetrical. Once you have drawn half the C, duplicate it and use the Flip Vertical option, then merge the two halves together.

5. Finesse your final layer
Group your first draft of letters, and reduce the opacity so they can serve as your guidelines. Begin drawing over these rough letters with a thinner brush. You can hold the brush down to create perfect curves or straight lines. You can also adjust the size of the curve by holding and dragging the pen. Then, fill the letters with a color of your choice!

Did you like this tutorial? If you’re interested in learning more about Justin’s process, and how to create beautiful artworks combining lettering and illustration, then check out his course Expressive Illustration and Lettering for Editorial Design.
For more free tips and tricks, keep an eye on the creativity tutorials section of our blog.
You may also like:
- Procreate for Beginners: Digital Illustration 101, a course by Brad Woodard
- 8 Must Try Calligraphy and Lettering Apps for iPad
- Drawing Tutorial: Exercises to Boost Your Creativity
- How do You Create a Portfolio on Instagram


0 comments