


How to Crochet a Halloween-themed Amigurumi Pumpkin
Get crafty this Halloween and learn to DIY a simple jack-o'-lantern amigurumi with this step-by-step pattern
Hi! I'm Nati Dorado, a crochet designer, and creator of the 2D Amigurumis concept and technique that you can learn more about through my brand, Virreinata.
In Argentina (my country), we don't usually celebrate Halloween, but having always been a lover of the dark side, I really like this time of year. There's also another reason why I like Halloween, and that's because my birthday falls on the following day. It's with this sentiment that I've designed a 2D amigurumi pumpkin for others who also love the mysterious and want to learn a new technique.
The guide is designed for both beginners in 2D Amigurumi and those who already have some experience. It's a simple creation and an excellent way to familiarize yourself with the technique - especially for those who may be attempting this for the first time.
If you haven’t had a go at crochet before, I'm sure this pumpkin will convert you. To get started, you'll only need to know how to crochet half stitches and chains. Do you dare?

The materials you'll need
Before I show you how to make an amigurumi pumpkin, I'm going to explain the materials you’ll need to create the piece:
- 10 grams of orange or terracotta yarn for the pumpkin in whatever thickness and type you have available at home.
- 2 grams of green yarn (the thickness and type you have available at home).
- 2 grams of black fingering weight yarn (the type you have available at home).
- A crochet needle suitable for the thickness of the orange and green yarns.
- Yarn needle for the finishing touches.
- Silicone or natural fleece for the stuffing.
You can read more about amigurumi materials in this Domestika article.
My references
Before we begin, make a note of the following abbreviations that I will use to detail the pumpkin pattern:
sc → Single crochet
ch → Chain stitch
sl st → Slip stitch
BLO → Back loop
rnd → Round
dec → decrease
inc→ increase
[nº] → Total number of stitches woven in the round
So, are you ready to crochet with me?
Step-by-step guide: the pumpkin
Now, I'm going to share all the pictures and instructions for the rounds, points, and necessary steps to crochet the pumpkin.
1. Take the orange-colored yarn and create a chain of 12 chain stitches (ch). Then work around the chain in the following order, leaving the first ch unworked:
Rnd 1: inc, 9 sc, 4 sc together in the ch, 9 sc, inc [26]
Rnd 2: inc, 11 sc, 2 inc, 11 sc, inc [30]
Rnd 3: inc, 13 sc, 2 inc, 13 sc, inc [34]
Rnd 4-8: 34 sc (5 rounds) [34]
Rnd 9: 34 sc (4 sc, BLO 9 sc, 8 sc, BLO 9 sc, 4sc) [34]
Rnd 10: dec, 13 sc (BLO 2 sc, 9 sc, BLO 2 sc), 2 dec, 13 sc (BLO 2 sc, 9 sc, BLO 2 sc), dec [30]
Rnd 11: 15 sc (BLO 1 sc, 13 sc, BLO 2 sc, 13 sc, BLO 1 sc) [30]
Rnd 12: inc, 13 sc, 2 inc, 13 sc, inc [34]
Rnd 13: inc, 15 sc, 2 inc, 15 sc, inc [38]
Rnd 14-15: 38 sc (2 rounds) [38]
Rnd 16: dec, 15 sc, 2 dec, 15 sc, dec [34]
Rnd 17: BLO dec, 13 sc, BLO 2 dec, 13 sc, BLO dec [30]
Rnd 18: 30 sc (1 sc, BLO 2 sc, 9 sc, BLO 2 sc, 2sc, BLO 2 sc, 9 sc, BLO 2 sc, 1 sc) [30]
Rnd 19: inc, 13 sc (2 sc, BLO 9 sc, 2 sc), 2 inc, 13 sc (2 sc, BLO 9 sc, 2 sc), inc [34]
Rnd 20-25: 34 sc (6 rounds) [34]
Rnd 26: dec, 13 sc, 2 dec, 13 sc, dec [30]
Rnd 27: dec, 11 sc, 2 dec, 11 sc, dec [26]
Rnd 28: dec, 9 sc, 2 dec, 9 sc, dec [22]
2. Cut the strand long enough to sew the end. First, stuff your amigurumi with fleece, and then sew both ends using one sc with another sc.

3. Once the pumpkin is stuffed and sewn together, we need to touch up the distinct lines of its body. To do this, we take the orange yarn and the crochet needle, make a slip knot on it and fasten it with a slip stitch (sl st) on the exposed strand of the sides of the pumpkin where the curvature is. From there, we go all the way around crocheting slip stitches in each exposed strand.
4. Repeat the process on the other side of the pumpkin, also where the exposed strands are.
Take a look at the process in the photos below:


5. For the green stalk, we crochet a chain of 7 chain stitches and work over it from the 3rd ch with slip stitches (one sl in each ch).
6. Cut the long strand to sew into the center of the top part of the pumpkin. This thread is used to sew the stalk as well as to shape its base with several stitches around it.


So, that’s how we crochet our first 2D Amigurumi pumpkin.
Types of pumpkin
If you want to explore more ideas for your pumpkin, here are some variations on the theme:
Smooth pumpkin
If you want a smooth pumpkin, follow the guide but without crocheting the sc in BLO (back loop).

If you go for a smooth pumpkin, you can still add the lines with a few stitches of orange thread.


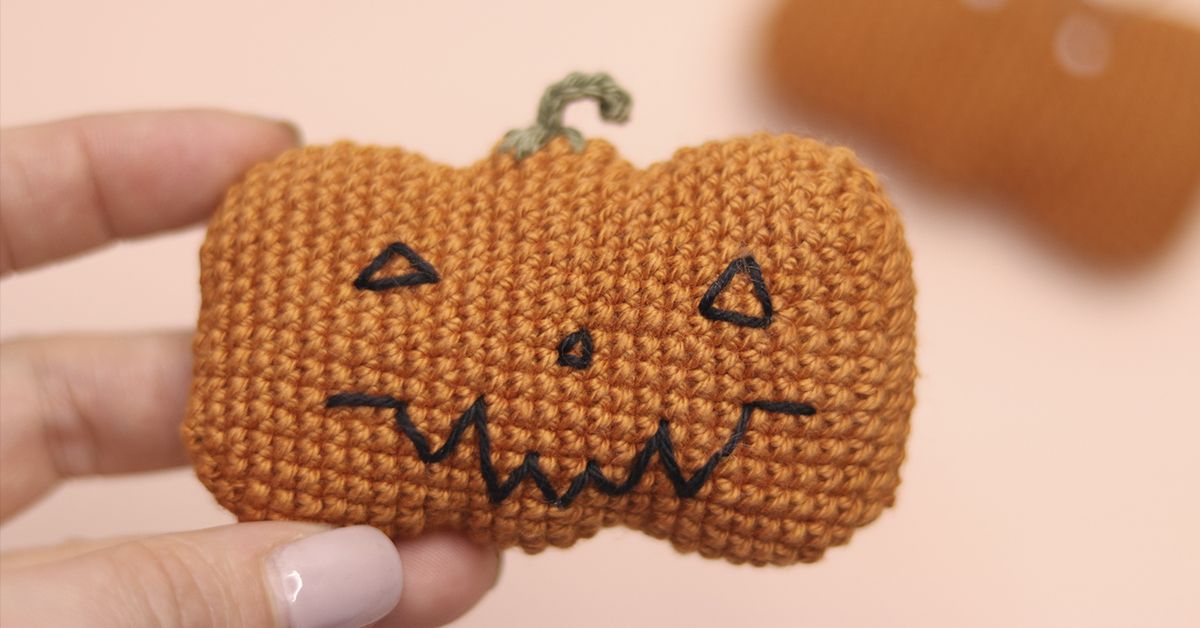
Jack-o'-lantern design
If you crochet a smooth-sided pumpkin, you can add some extra details to create a Jack-o’-lantern design using black fingering thread and a needle.
Give it a pair of eyes, a nose, and a creepy smile, for example:


Now that you've crafted your 2D amigurumi pumpkin, let me know in the comments below if you’ve enjoyed the process and what personal touches you decided to give it. I'm really curious to find out!
This article was written by Natalia Dorado, creator and designer of characters and objects in 2D Amigurumi. Founder of Virreinata, she is a self-taught crocheter and has been practicing for seven years. Natalia will soon be publishing her first online course on Domestika. Meanwhile, click here to see more of her amigurumi projects.
English version by @acesarato.
You may also like:
- 5 Amigurumi Artists and Their Inspiring Characters
- 11 Online Courses For Learning Crochet From Scratch
- Amigurumi Tutorial: Basic Magic Circle Technique


0 comments