

DIY Tutorial: Dying and Marbling Concrete
Learn simple, step-by-step, DIY concrete design techniques, with La María Living
Concrete may seem like a cold material, but careful handling can really bring it to life. Mother and daughter team María Alexandra and María Camila joined forces to create the interior design studio and brand: @lamarialiving.
These professional interior designers love being artisans, as it allows them to play around with concrete and bring beautiful, functional objects to life.
In this tutorial, La María Living teaches you how to dye and marble concrete. Discover how to add color to this traditional material in the video.
Materials
You will need these materials for both techniques:
- Vegetable oil
- Concrete
- Your preferred color of liquid vinyl
- A stick
- Molds

Step-by-step guide to marbling concrete
1. Grease the mold
This technique gives concrete items a beautiful marble effect. The first thing you need to do is grease the mold with a vegetable oil. Then take a little bit of concrete. It needs to be moldable, you have to be able to handle and work the material.

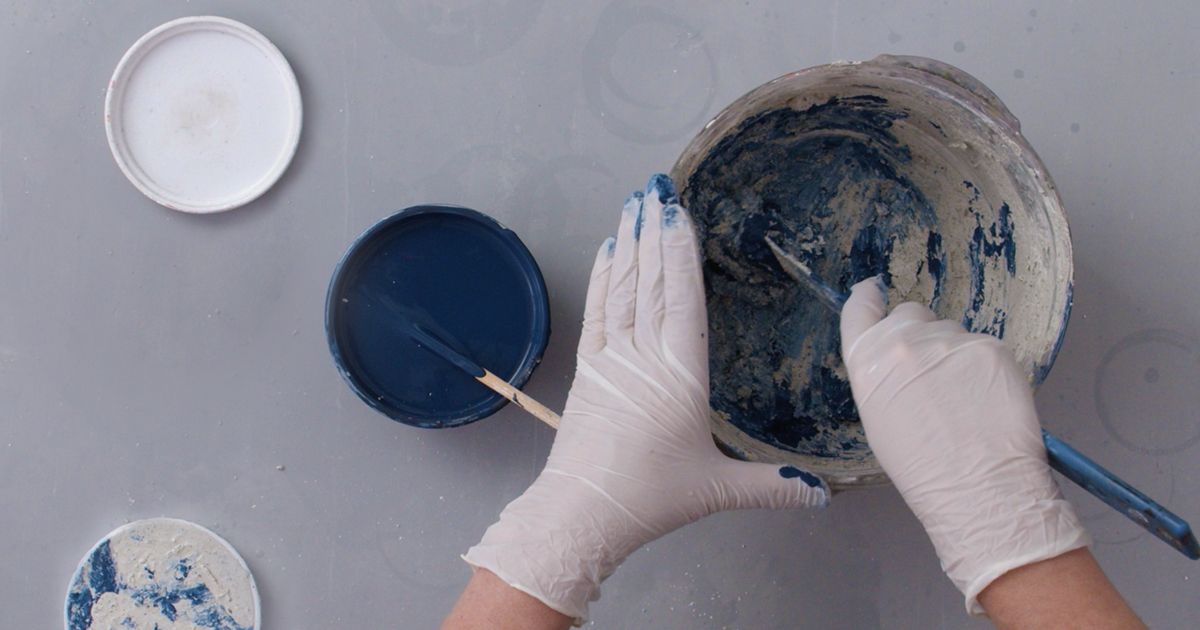
2. Mix the vinyl into the concrete
Shape the concrete into a little roll and paint it using your stick dipped in liquid vinyl. Roll the cement so that only some parts of it become colored. Repeat this step as often as you need. In the example used in this tutorial, we only needed 3 concrete rolls.

3. Fill the mold
Once you’ve made your 3 concrete rolls, you can fill up the rest of the mold with more cement. Gently tap the mold to ensure it’s evenly distributed and leave it to dry.

Step-by-step method for dying concrete
1. Dye your concrete
After greasing the mold, dye your concrete using your preferred color. Remember that it’s a good idea for the concrete to be a little harder than the concrete you used in the previous technique, as the plastic vinyl will moisten the mixture. Add as much color as you like and mix well.

2. Fill the mold
Once you have achieved an even color, carefully fill your mold with the dyed cement. Tap it on the sides to ensure it fills the mold evenly, and press down on it with your hands if you need.
This concrete is harder than the previous one, so it’s a good idea to remove any excess with a plastic spatula.

3. Remove both samples from the mold
Leave both molds to dry. The marbled concrete will dry faster and should be ready in about 24 hours. You will need to wait 48 hours before removing the dyed concrete from the mold.
Love this tutorial? If you’d like to learn how to create and decorate objects with concrete using techniques ranging from dripping to marbling to achieve spectacular designs, don’t miss La María Living’s online course: Decorative Techniques With Concrete.
You may like:
- Concrete Furniture Creation for Beginners, a course by En Concreto
- Introduction to Kintsugi: Repair Your Pottery With Gold, a course by Clara Graziolino
- Decoration Techniques With Acrylic Resin, a course by Tarareo
- Ceramics Tutorial: How to Create a Simple Clay Vase
- Craft Tutorial: How to Marble Acrylic Resin
- Ceramics Tutorial: How to Add Texture to Your Plant Pots


0 comments