Photoshop Tutorial: How to Add Directional Lighting
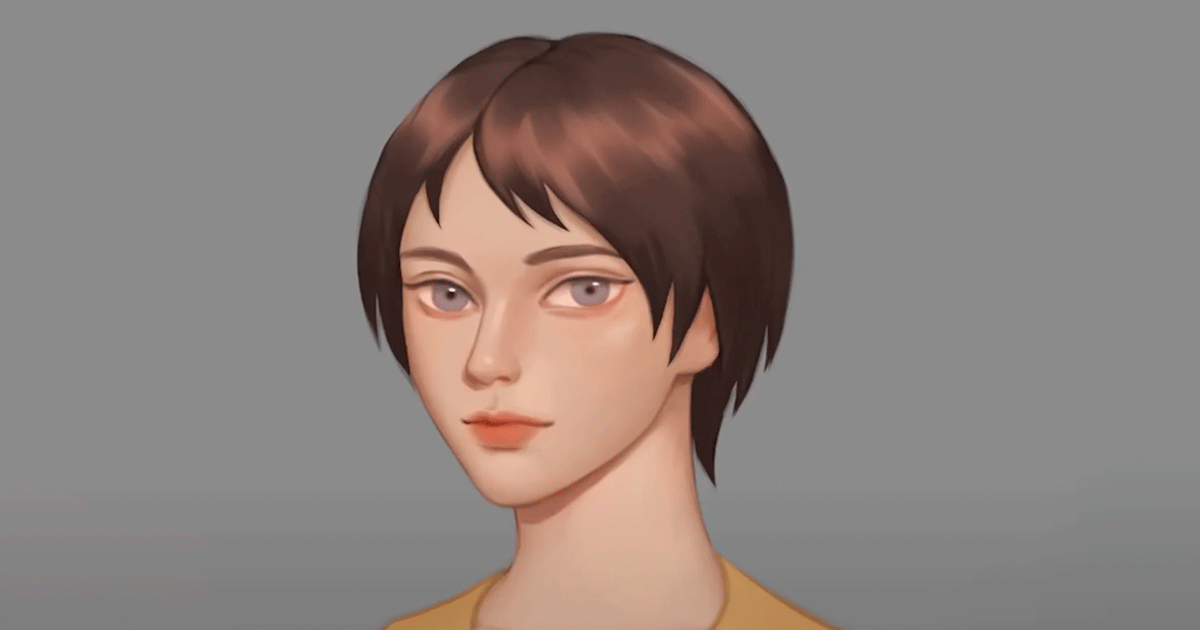
Learn how to add different types of lighting to an illustrated portrait in Adobe Photoshop, with this step-by-step guide
Your best allies for capturing mood or a concept are color and lighting. Together they can transform a work, bring it to life, give it charm and convey specific feelings or emotions.
Artist and illustrator Karmen Loh aka Bearbrickjia (@bearbrickjia), is a master at using Photoshop to capture tones and dreamy highlights in her portraits. In the following video, she shows you how to add different kinds of lighting to an illustrated portrait with Photoshop in the following video:
First, select a photo you can use as a reference for the direction of the light and that allows you to see the most intense highlights and shadows. This will help make your drawing even more realistic.
1. Add shadow under the nose, chin, and mouth
You can use your preferred brush for this step. To define the color of the shadows, use the same tone as the skin then gradually increase the saturation and decrease the shine.
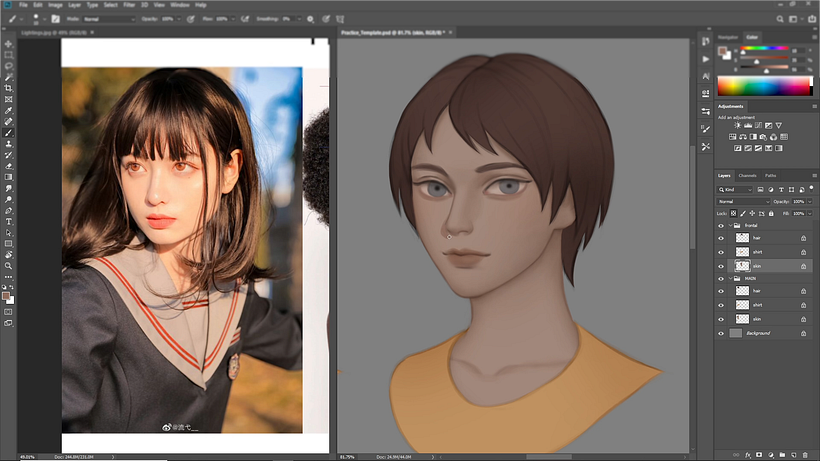
2. Select a darker shade to define the shadow outline
To set the shade's tone, use the same color as the skin, darkening this tone. Be careful not to darken it too much, otherwise the result will be a marked and unnatural shadow. Remember to always follow the image and light reference you have chosen exactly so that you can create as real a shadow as possible.
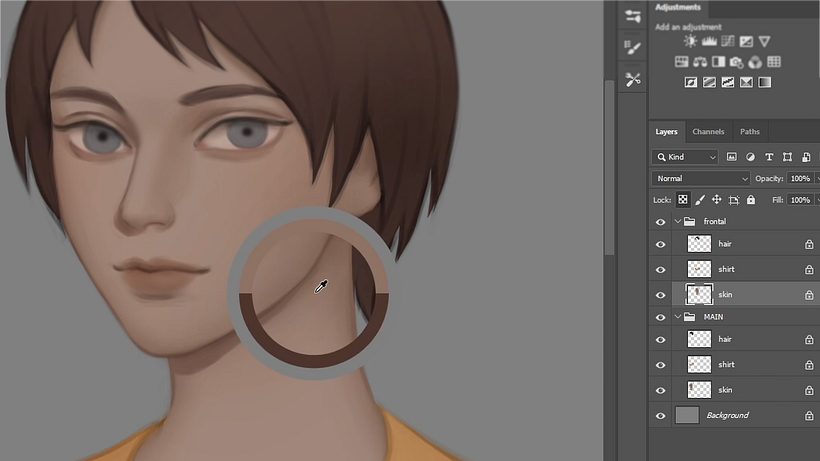
3. Add shadow below the ear
The shade below the ear should follow the pattern you have already established for shadows, harmonizing also with the hair.
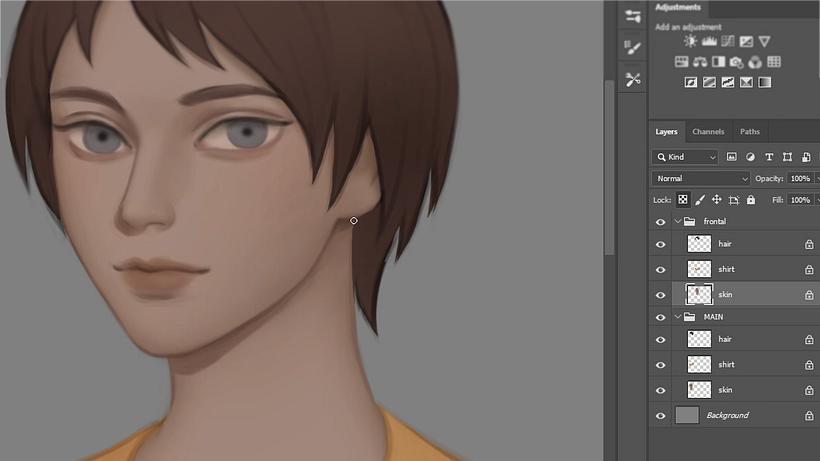
4. And add shadow down the side of the cheek
It is important to put shadows on the cheek to give volume and depth to your drawing, as well as more realism.
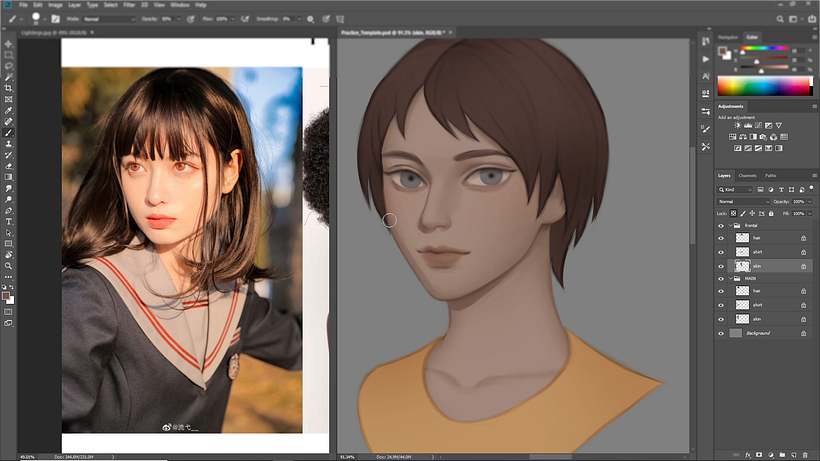
5. Add a shadow below the upper lip
Explore the shadows in small details such as lips, under the eyes, and hair details. They will make all the difference.
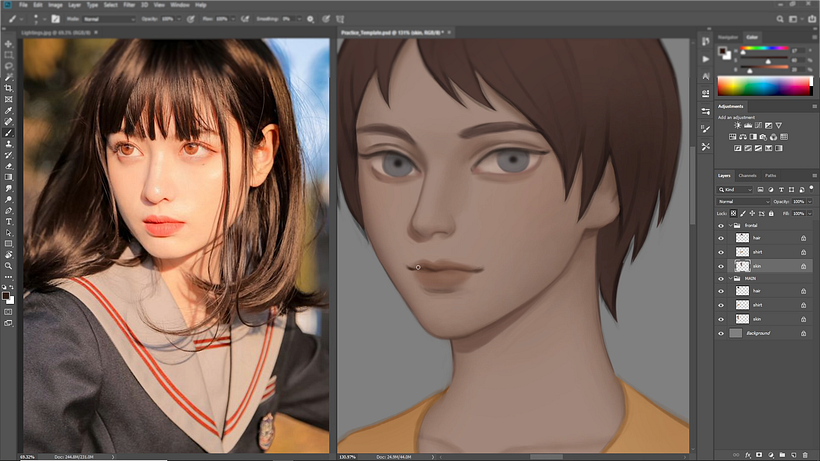
6. Add shadows to the hair
To achieve the right shade, select the hair color, then increase the saturation and decrease the shine.
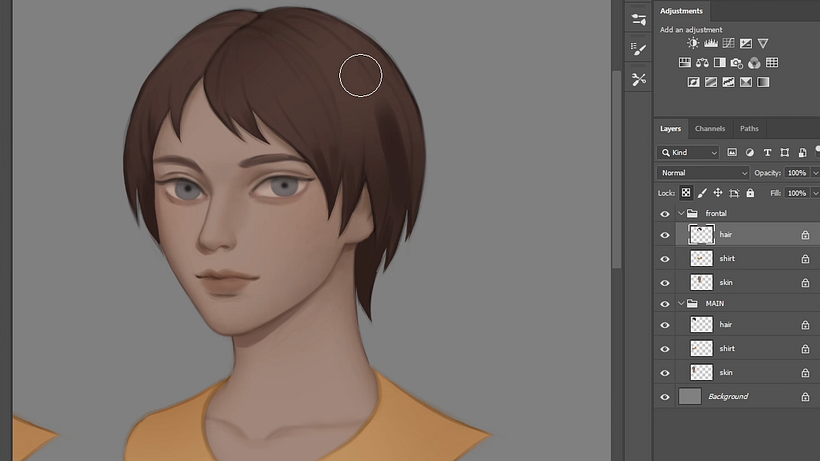
7. Make sure this layer is blocked
This key step avoids applying color to areas you want to keep clean. It can help you keep everything inside the hair, for example.
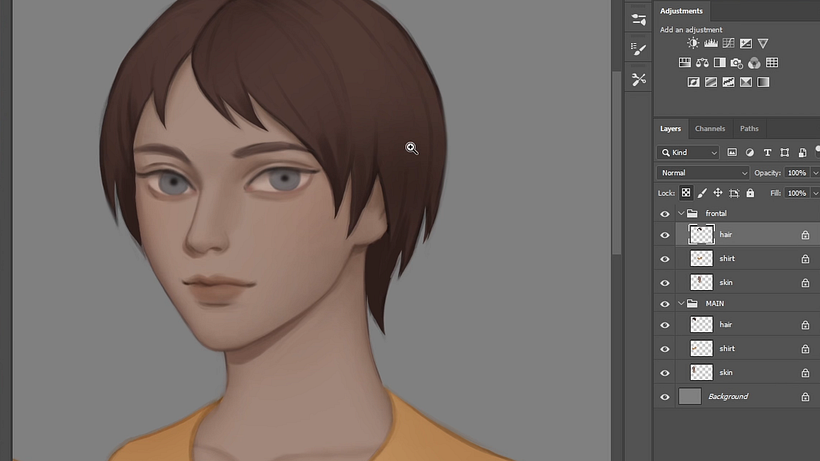
8. Add highlights
Use your reference photo to add highlights to the right areas, and include your own personal touch. In this example, Karmen highlights the hair and eyes.
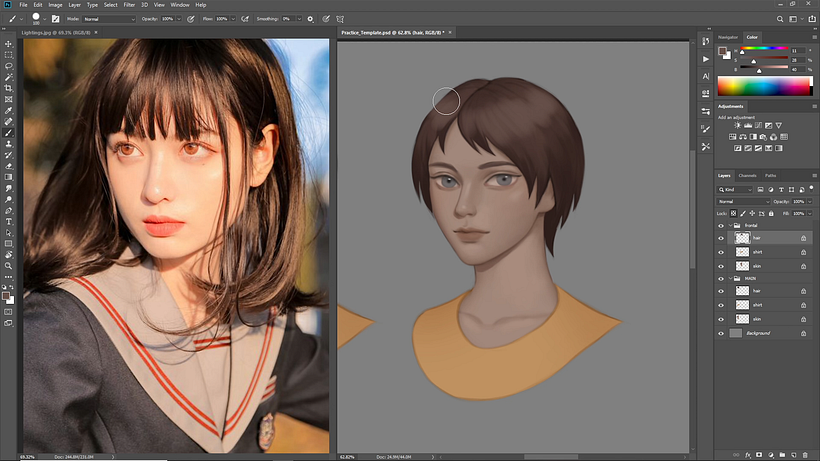
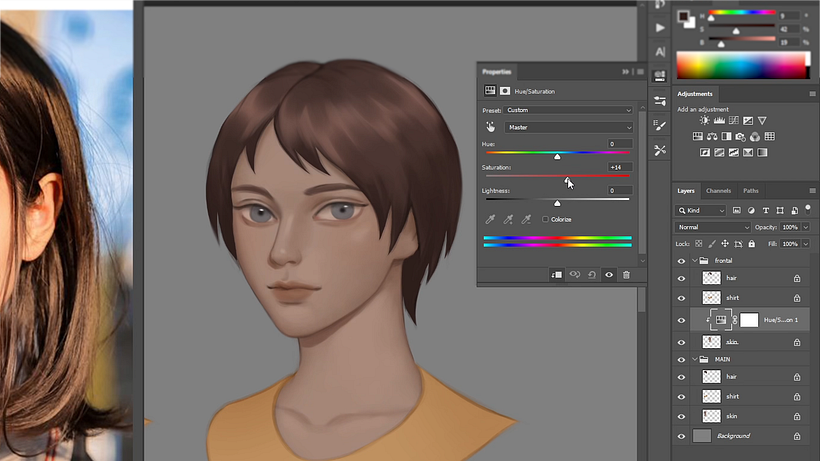
9. Use Tone and Saturation to give your work more color
It is here that you will define not only the colors that will be more intense but the temperature of the illustration. Explore what you like best to give it a personal touch.
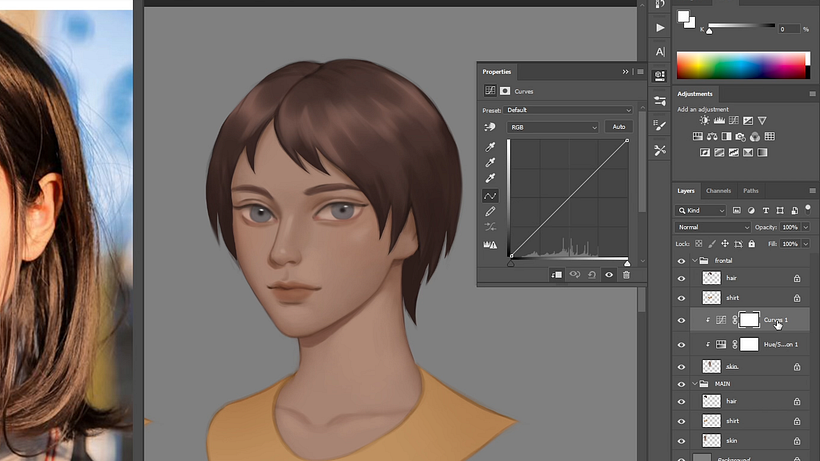
10. Use Curve to adjust shine and contrast
These elements are important to put the finishing touches on your project, highlighting the points where the luminosity will be more intense.
Love this tutorial? If you want to discover how to create atmosphere in your work using lighting and coloring techniques, don’t miss Karmen Loh’s online course: Lighting and Color for Digital Portraits in Photoshop.
You may be interested in:
- 10 Artists and Designers to Draw Inspiration From for Your Botanical Watercolors.
- Sonia Pulido: Illustration Fosters Reflection and Change
- Female Character Portraits in Procreate, a course by Natália Dias
- Graphic Illustration Laboratory, a course by Weberson Santiago


0 comments