


Children’s Illustration Tutorial: How to Create Characters Using Collage

Learn a basic exercise to create illustrated characters for children using graphic research and collage techniques
You need an open mind to let your creativity and ideas flow when building a children’s character. Gathering references makes it easier to create something new. Experimenting with new ways of developing a graphic idea is important for building innovative visual narratives.
In this tutorial, illustrator, writer and teacher, Weberson Santiago (@webersonsantiago), teaches you a basic exercise for creating children’s characters based on collage techniques and graphic research.
Check it out:
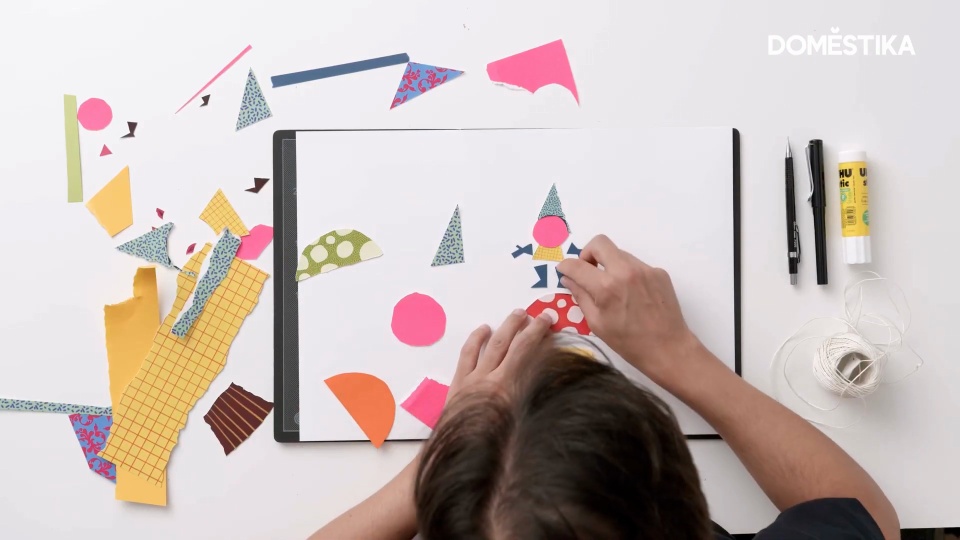
1. Cut
The first step involves selecting a variety of colorful papers, which could include magazine clippings, colored card, newspapers, pamphlets, old books, illustrations or anything that produces a good visual result. Give your creativity free rein!

Start thinking about your character’s basic structure, as you’ll need to cut to the shape of your idea. Weberson created an imp for this tutorial, comprising a pointy hat, a little body, arms, legs and other details like the eyes, mouth and mustache. Use scissors or a cutter to cut them out.

Top tip: when you’re using a cutter, always cut along the top edge of a ruler to avoid any accidents. It acts as a protective barrier between you and the blade.

Tearing your paper is a good way to create different textures.

Create a circle out of your choice of paper and cut a triangle to make the hat. You can cut out other shapes, like squares, rectangles or triangles using the full variety of papers available.

2. Assembly

Use your imagination to construct your character. You can mix colors and prints, and create new shapes for the body and legs. Don’t be afraid to experiment as this helps you discover what work’s best and what you think looks best. It’s time to create a character you’re happy with.

Once you’ve chosen the pieces you’re going to use, tidy things away to get your desk ready for your collage. You can use a glue stick, liquid glue or sticky tape. It’s important to use whatever you most enjoy working with.
3. Stick things down
Consider the basic shapes as you’re sticking as this will help create something that’s a little different from what you’re used to seeing and doing. Stick everything down, then start adding details using other techniques, like marker pen or pencil.

You could draw in the eyes, mouth, mustache, hair, arms, legs, scars or any other features that provide added personality.

You can also draw in flowers, leaves and other details to add richness.
This creative exercise will help you come up with children’s stories based on your visual creations. It’s a good way to relax and discover new possibilities.
Like this tutorial? If you want to learn composition techniques for illustrating stories, don’t miss Weberson’s online tutorial: Illustrated Children’s Books: Create a Unique Story.
English version by @studiogaunt
You may be interested in:
- What is Children’s Book Illustration?
- A Guide to Children’s Book Categories.
- Introduction to Children’s Illustration.


0 comments