

Pyxel Edit Tutorial: How to Create an Idle Animation
Find out how to create this basic animation and why it is so important to video game design with Daniel Benítez
Where does the success of a video game rest? In its narrative? In its design? In a combination of everything? What is unquestionable is that, in a discipline where the player is surrounded by a whole world created for them, the details are very important. The details can be what leaves a player satisfied or not. And one of the most important details is the waiting animation.
In the following video tutorial, art director Daniel Benítez (@dabntz) shows us how to create this basic animation and why it is so important in game design. Discover it below:
What is idle animation?
Basically, a waiting animation is the animation we see when a player stops moving their character, when they're not interacting with the character itself. Its function is to show that the character is still alive, active, and waiting for you to pick up the remote again and continue with the adventure.
There are two stages of a typical waiting animation:
- Idle or stop animation, usually accompanied by an exaggerated breathing that brings a small bounce to the character's movement.
- Waiting animation, usually occurs after a few seconds of the stop animation. In this animation, the character changes their posture or gesture to inform us, generally, that we are taking too long to play again.
Poses and keyframes
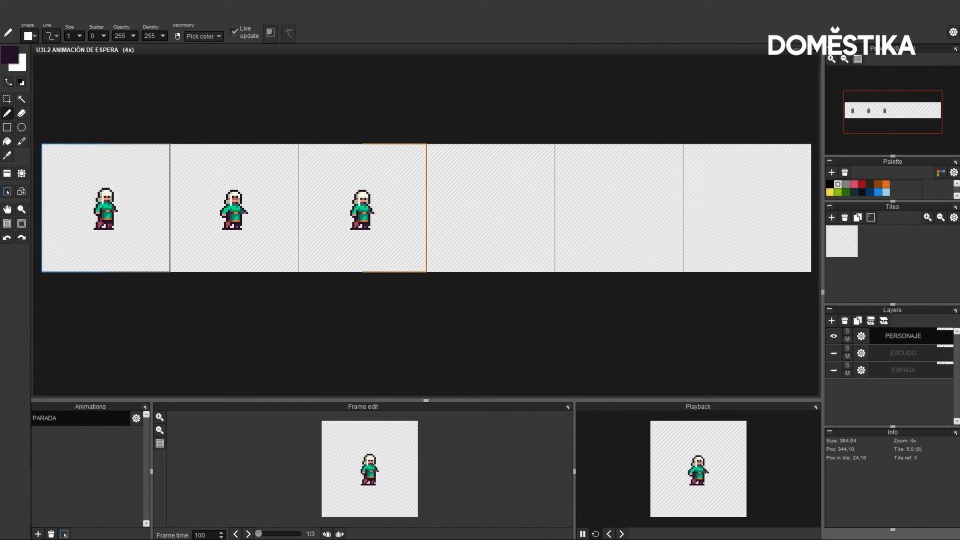
Once we have Pyxel Edit open, we have to think: what are the most descriptive poses I am going to apply to my character animation? These keyframes are the basic points of a movement: for example, if we think of a bouncing ball, the keyframes will be the point where it is on the ground, the point it rises to at the top, and the point where it touches the ground again.
To start creating the keyframes, duplicate the first frame with your character using Tile Position. Once duplicated, make your character slightly shorter in the second frame by moving their trunk one pixel down.


Now create an animation 2 frames long, to see how your character moves. Change the speed to 200 in Frame Time Multiplier if it moves too quickly.
Now, add a new frame by copying and pasting the second frame you just created. Change the length of the animation to 3 frames. If you want to make the bob a little more dynamic, you can lift the animation's head and open their arms a little in the second frame.


Motion interpolation
Motion interpolations are the intermediate frames that are placed between key frames to make the movement more fluid. In order to create them, change the length of your animation to 6 and distribute the 3 frames you have already created: place the third one at position 6, the second one at position 3, and leave the first one where it is.

Now, fill in the gaps by copying the frames that precede them. We are going to work on frames 3, 4 and 5: the idea is to edit the hair, clothes and objects the character wears to accompany their movement, lowering or raising them according to the character's position.
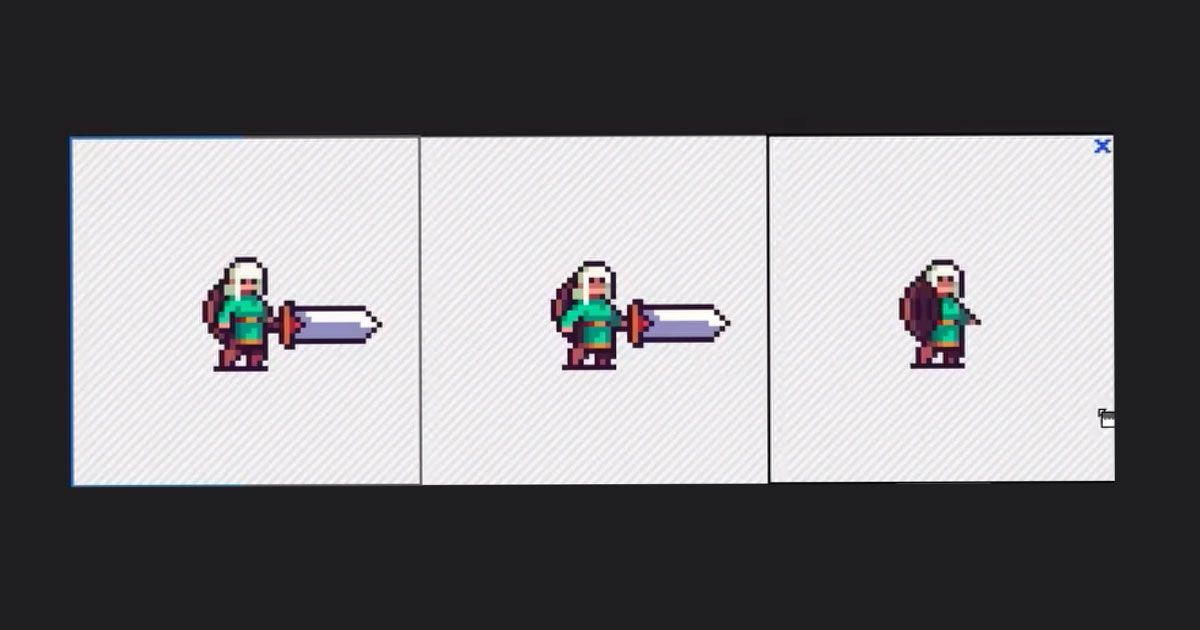
Especially important are the weapons, which always play an important role in every adventure: you should animate them to catch people's attention. In this case, Daniel Benítez animates the sword back and forth and the shield up and down. Finally, set the speed of the animation back to 100, now that you've tweaked it.

Did you like this tutorial? Learn more about how to bring your video game characters to life frame by frame with Pyxel Edit from Daniel Benítez on his online course Pixel Art Character Animation for Video Games.
You may also like:
- Introduction to Character Design in Pixel Art, a course by Daniel Benítez
- Illustration Techniques in Pixel Art, a course by Galamot Shaku
- Introduction to Unity for 2D Video Games, a course by Juan Diego Vázquez Moreno


0 comments