


Photoshop Tutorial: How to Enhance a Scanned Illustration
Award-winning artist and illustrator Mika Takahashi teaches us how to improve a digitized illustration by touching up imperfections and small details on the paper step-by-step
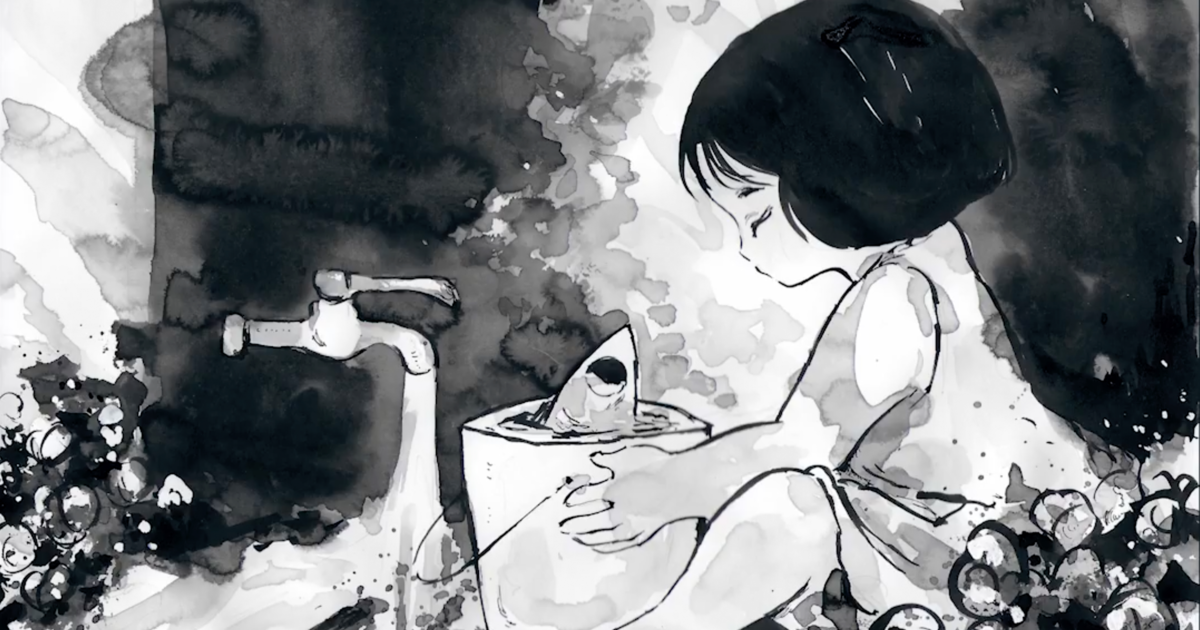
If you like to use traditional techniques to create your illustrations and paintings, digitizing is an important step in the process, as it will allow you to make small adjustments to refine the final piece.
In this tutorial, Mika Takahashi (@takamiks) teaches you step by step how to retouch your scanned illustration in Photoshop, correcting imperfections and small details that show up on the paper when you use ink or watercolor. Watch the video below:
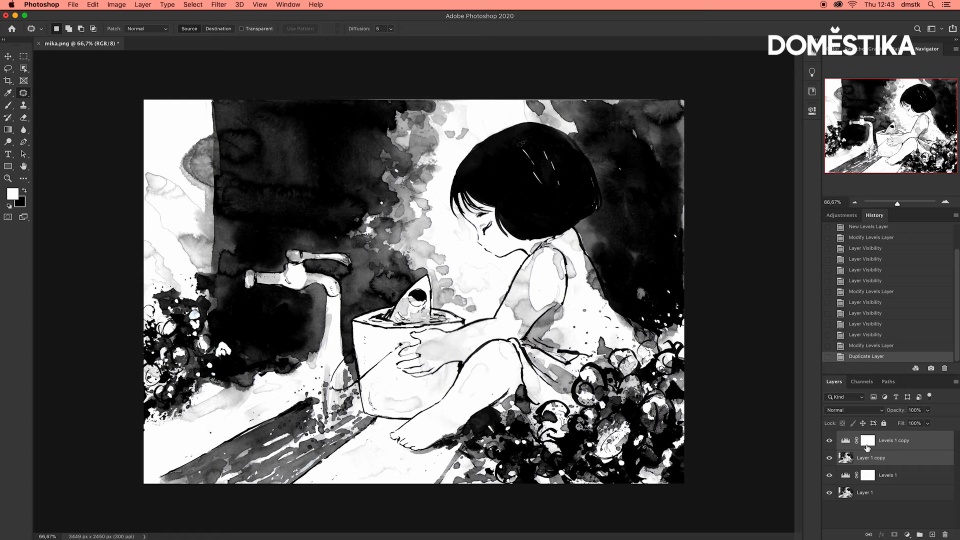
When you finish scanning the painting or illustration, the next step is to open it in Photoshop, where any necessary adjustments can be made. Once inside the program, follow these steps:
Select the Levels tool
This tool is used to correct the tonal range and color balance of your illustration, allowing you to adjust the intensity of shadows, mid-tones, and reflections in the image. To do this, move the small arrows in the properties window.

The aim is to recover any contrast lost in the scan and to work the light a little more.
When you are satisfied with the result, select the layers you were working on and click on duplicate. Merge the original layers by clicking on Merge layers to ensure you have a backup of your image, to be safe.
Select the Patch tool
After correcting shadows and colors, click the Patch tool to correct any specific areas that need adjustment. This tool is used to remove stains, dirt, or other imperfections in the image.

To do this, select the area you want to correct and drag it to a new area where the color is the one you want. The new selected area will overlap the first one, adjusting and balancing out small details.
When you've made all the necessary adjustments, save the image.
Did you like this tutorial? Learn how to create an ink composition from start to finish with Mika Takahashi, using the brush with precision and creating contrasts, light, and shadow effects that convey emotions through traditional methods on her online course India Ink Illustration with Japanese Influence.
You may also like:
Illustration Tutorial: Japanese brush strokes with the Sumi-e technique
Basic Materials for Sumi-e Painting
What Makes Something Kawaii?


0 comments