


Mobile Photography Tutorial: How to Take Photos of Models with Natural Light

Learn how to take professional photos at home with your mobile phone using natural light, with Nay Jiménez
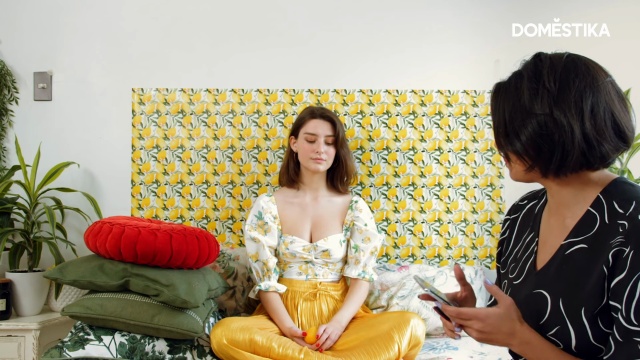
Although professional photographic equipment and studio lighting are ideal for a good photo shoot, we don't always have access to that kind of material. However, if we know how to take advantage of the resources we have, a smartphone and natural light may be enough to achieve professional results in our modeling photo sessions.
That's why Nay Jiménez (@nayjimenez), a publicist and photographer specialized in art direction, has shared this series of keys to an at home photo shoot, with natural light, using only our smartphone. You can see the tutorial here:
5 tips for taking photos of models with a mobile phone and natural light
1. Start with a wide-angle
Choose a wide-angle setting to take the first pictures to assess what our photo shoot set is like. As this lens covers a lot of space in the image, we will be able to see all the elements of the composition and determine what works best in our photos.
We can work with the wide-angle, for example, from a slightly offset angle (i.e. oriented from the bottom up). Remember that wide-angle can distort your subject if you get the camera too close, so position it accordingly.

2. Dynamic focus
One option many smartphone cameras have is dynamic focus. This allows us to blur the background or the subject of our photo, depending on what we want our composition to be focused on. This gives us the opportunity to experiment with different compositions and resources. For example, if our background is very simple and not very detailed, like a monochromatic wall without texture, there is the option of placing a new object in the foreground (for example, a flower) and blur it.
This effect need not be used only in portrait mode, it can also be used in more open lens modes. Ideally, you should try different colors, shapes, and compositions until you find what suits your vision best.

3. Alternatives to a white background
Have you taken loads of pictures in front of a white wall? One low cost option to switch things up, is to use gift paper as an alternative backdrop: it is easy to place, cheap, and can be adapted to all kinds of photo shoots.
Natural light is less intense than studio lighting, so this will cause less glare on the paper and so be less likely to affect our images.

4. How to take advantage of natural light
Natural light is ideal for home photo shoots. Facing our model towards a window or placing them laterally to the light source will help us achieve a professional effect without the need for studio light.
If we see that the light is too weak, we can always help ourselves with a white poster board: we will place it near the model, on the opposite side of the light source. This will help bounce the light so it hits our subject's face differently. If, on the other hand, we prefer to create shadows and contrast on our model's face, we can use a black poster board.

5. Experiment with angles, poses, and props
One of the most important aspects of a photo shoot is experimentation. If we start with low angles, we can switch to high angles, taking pictures from top to bottom. In the same way, we can try different poses with our model to explore the variety of compositions we can capture. Using multiple props will help our model vary their poses and therefore allow us to take more natural looking pictures.

If you do not have a photo studio or a professional camera at your disposal, these tips will help you improve the results of your photo sessions at home.
If you liked this tutorial, remember that you can learn to create quality content from your smartphones for Instagram with Nay Jiménez on her course Professional Mobile Photography and Videos.
You may also like:
- Photo Composition and Editing for Instagram, a course by Derio Ilari
- Minimalist Photography for Instagram, a course by Emilio Chuliá Soler
- Creative Photography for Social Media, a course by Anna Devís and Daniel Rueda


0 comments