


How to Set up a Sound Recording Studio at Home
Advice for recording and producing your own audio projects at home
Whether you work in audiovisual, music, or a specialized area of audio production, going that extra mile will not only help you stand out amongst the competition but will make your experiences more enjoyable and improve the quality of the work you produce.
Where and how best to record audio at home is one of the first hurdles those looking to develop their own audio projects are currently facing (whether you’re looking to launch your first-ever podcast or to improve the quality of your video projects). While the amount of money and time you invest in a home studio is entirely your choice, it’s important for you to consider the following information before you decide for certain that you want to go ahead.

You need a home sound studio!
The first pro on your list of reasons to have a home studio is that you can put your ideas into practice immediately, in a way that is hassle-free and comfortable. Having all the equipment you need at your disposal, around the clock, means you can take advantage of every moment in which you feel a wave of inspiration come over you, optimizing your creative output.
If you have a space in your house which you can dedicate to this, as well as the finances to make it a reality, then go for it!
Think twice!
Don’t make a rash decision, make sure you think it over, especially if it’s a big investment for you–even if you are planning to use minimal resources. Whether or not a home studio will help you generate more income will depend on a number of factors (such as having regular clients and the essential skills to put your studio to professional use). If on top of these doubts, you also lack a physical space big enough for it, then think twice!

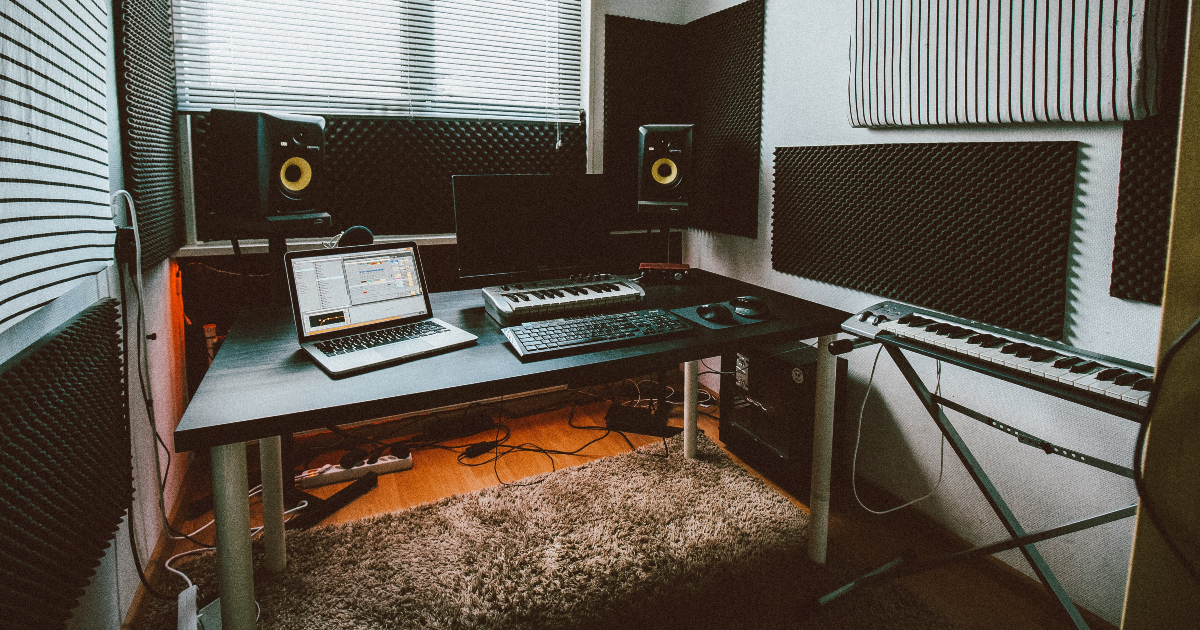
If you have already decided that you are going to set up a sound studio at home, here’s information about the basic equipment you will need to get the most from your new space.
The sound
As obvious as it sounds, before you launch your home studio project, it’s important to think very carefully about where it should go, taking into account the minimum requirements relating to acoustics. These are the basics:
The ideal space: Choose a windowless space. If your space has windows, then seal the frames to block out as much exterior noise as possible. It is also important that your studio doesn’t share a wall with your neighbors’ house–as you’ll be working with volumes that could bother them–or with another room in your home, which tends to be noisy.
Prevent echo: To prevent the recording from picking up echo, use carpet and rugs on the floor, as well as cardboard and foam rubber on the walls and ceiling. They will work as insulating panels and contain the sound waves.
It’s important, however, that you don’t cover the walls of the room entirely, as this can cause recordings to have lots of peaks in the sound. Cover between 20% and 40% of surfaces to achieve the right acoustics. Bookcases and furniture also help make the room less symmetrical and distribute the sound harmoniously.
Get professional assistance: If it’s an option, contract a sound expert to help perfect the acoustics in your new workspace.


Computer
Before choosing microphones and other accessories, start by thinking about the computer equipment you’re going to use in your studio. This will be the brain of all your projects. Choose a computer (laptop or desktop) with enough space and memory to install the production software and video and audio files.

The interface
This is the hardware that will connect your computer to all of your exterior production equipment. All of the audio signals will travel through it to become the digital material that you will work on. Below, we take you through the basic points you should consider before choosing yours:
The number of inputs: This will depend on how many audio levels you want to record at the same time. An interface with two entrance channels should be enough for simple projects.
Headphone outputs: Make sure that it has at least two (this way, two people can listen as you’re recording).
The connection type: The interface can connect to your computer via USB (most recommended), Firewire (ideal for Apple users), or Thunderbolt (less common on the computer, however it is also faster).
Price: There is a range of options meaning they come at a range of prices (on average, between 100 and 300 dollars).

Monitors or headphones?
The bad news is that it is impossible to mix well with headphones or earphones, so you should consider investing in some decent studio monitors, which will help you to work on the sound ranges you need to fine-tune detail. Choose monitors that deliver neutral sound, and take into account the size of your studio when making a decision. When purchasing, speak to the sales expert so that they can give you expert advice regarding your needs. Here are some points to take on board:
Sound quality: If you are going to set up a studio at home, what matters is not that they sound “good” but that they sound “reliable”. The idea is that you will be able to detect whatever’s wrong with your mix.
Equipment quality: Give that it’s an investment, it’s recommended that you choose monitors with a robust structure that can handle peaks in the sound level, power outage, and any other inconveniences that could cause damage.
Price: Once again, you will find a range of prices for different budgets: from 100 to 1600 dollars.
Once you have chosen the right monitors for your studio, position them in line with your screen, placed at a symmetrical distance.

Software
The DAW (Digital Audio Workstation) that you use will depend on the type of project you’re planning to carry out in your home studio. It’s the platform you use to record, mix, process, and master your audio. Some of the most popular options are Logic Pro X (for Mac users), Ableton Live, Audition, or Pro Tools (choose the option that suits your budget).
If you are also interested in audio design, we recommend that you also consider installing plugins to equalize, compress, distort, and manipulate voices.

Microphones
Over time, you will continue to add to your studio and make it more and more professional. To start, you should get one or two microphones for your initial projects. To choose them, think about whether you’ll be using them to record musical instruments or voices, and how much you’re willing to spend (of course). There’s a great variety of brands offering a range of features at numerous price points–from 50 to 600 dollars on average. The two most recommended brands are Shure and Sennheiser. It shouldn’t be difficult to find one that’s right for you.
If you want to improve the quality of your recording, we recommend that you also think about stands to support your microphones–floor or desk–and pop filters.

We hope this guide has been useful!
You may also like:
Sound Design and Post-Production for Video and Animation, a course by Aimar Molero
Introduction to Ableton Live, a course by Cristóbal Saavedra
Audio Post-Production in Pro Tools, a course by Nadine Voullième Uteau


0 comments