Photoshop Tutorial: How to Flatten Your Character

Learn the steps and techniques to color your illustrations on Adobe Photoshop, with Joel Santana
Where do we start coloring our new character, once we've decided on how it will look? How do we choose the right color palette to communicate its personality? How can we apply all this to its digital illustration?
Character design specialist Joel Santana (@themaddhattr) shows us how to color our creations with Photoshop, using the flattening technique, in the following video tutorial:
What does flattening consist of?
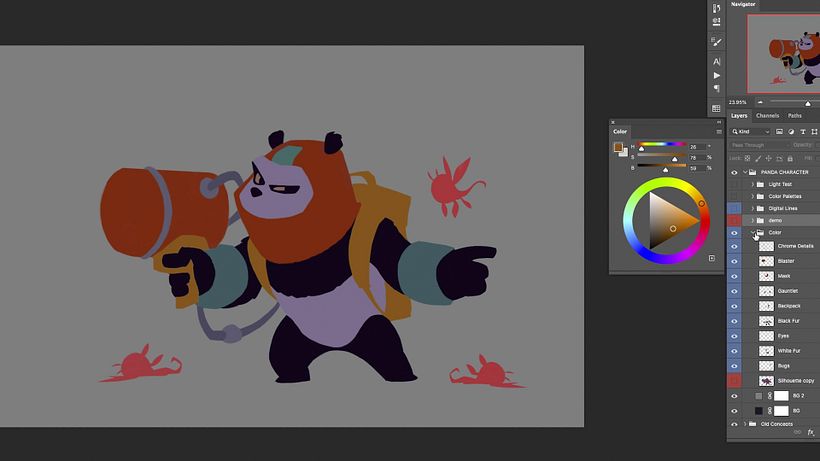
The first step in coloring our character is finding the flat colors we're going to fill it with, without adding shades or other dimensional effects. To do this, Santana separates each element of the character by layers (extremities, body, face, and other details), and colors each one.

The importance of the color palette
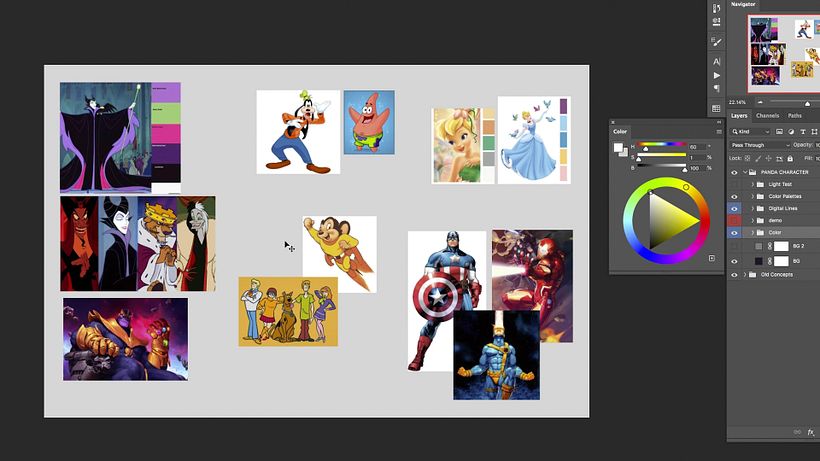
Different color palettes communicate different personalities, and it's important to choose colors that transmit your character's personality well. Think, for example, of the color palette many Disney villains share: dark blues, purples, blacks, dark reds. Meanwhile, positive characters in fantastical and childish worlds are likely to have soft pastel colors or bright garish ones that are playful.

Painting your character by layers
Once you've decided on the colors of your character, we can return to Adobe Photoshop. To start, you should import a sketch of your character and fill it with a neutral color that will contrast from its outline. It's also important, as we have indicated, to separate the parts of the figure, making a layer for each one.
Choose a hard pencil that allows you to fill the different zones of your character with color. You can deactivate the layer that contains your sketch to see how it looks when you remove the lines of the drawing. Now, you just need to finish each layer until you've added all your character's colors.

If you liked this tutorial by Joel Santana, you can bring the sketches of your characters to life with light and Photoshop on his online course Digital Painting for Characters: Color and Light.
You may also be interested in:
- Creation of Manga Characters, a course by Andrea Jen
- Digital Illustration: Use Your Imagination to Create, a course by Vals
- Geometric Illustration with Volume, a course by Edgar Rozo
- Animation and Design of Characters in After Effects, a course by Moncho Massé


0 comments