


Cinema 4D Tutorial: advanced techniques for letter modeling

Learn "old school" techniques to model lettering, creating plane by plane the whole object with Zigor
Cinema 4D is one of the most widely used software on the market for modeling all kinds of 3D elements: characters, objects, lettering... Although its learning curve can be scary at first, the truth is that its interface is not as complex as it seems at first glance and once we overcome the initial bumps, we can try more and more customized techniques
To get you into the world of 3D modeling of letters, we have a master in the field: the illustrator and 3D designer Zigor Samaniego, a professional teacher with a very long career related to the management of Cinema 4D.
Discover below his advanced techniques for 3D lettering modeling:
1. Import the image from Photoshop
We are going to place as a reference, in the background, the image with the lettering that we have created in Photoshop. Playing with its transparency, we can arrange it to make it easier to have it as a reference when we start modeling.

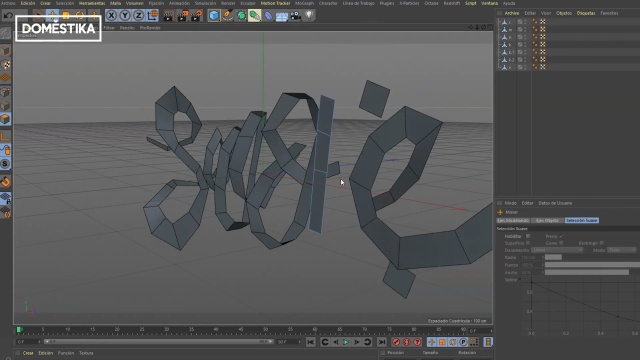
2. Start the modeling with a Plane
Zigor proposes that we model the letters the old-fashioned way, using a Plane to which we will give the shape we are most interested in. To do this, we start by selecting the Plane and scaling it to the width of the letters in our imported Photoshop image: the idea is to match the size of the letters.
Next, we remove the height and width dimensions of the Plane, as they will not be necessary, and duplicate the same Plane over each of our letters, to make our work easier. Finally, we just have to convert the Plane into an editable object, and we can start modeling.

3. Let's get to work
.The "old school" method means that we will have to "dress" our reference drawing with Planes, little by little and being careful to respect the edges, edges and dimensions that we imagine in our head. A good tip is to use the Quick Menu that opens with "V" to select edges and other elements.
In that sense, and while working, it is important not to overuse subdivisions. The fewer subdivisions we make at the beginning, the better, because it will allow us to have more control. We will have time later to refine our modeling.
When you have all the letters modeled, there are two things to keep in mind: first of all, you can remove the reference photo imported from Photoshop, so you can see your lettering without disturbing references; and it is important that you copy and paste the modeling in another folder in Cinema 4D, to keep a clean version in case the work you do next does not convince you.
Finally, you will have to join all the letters together, using a Connector element. You will now have your lettering forming a compact pack, and you will be able to work on the textures of all the letters at the same time.

4. Working with the letters
Now, with Ctrl+A we select all the faces of our letters and, right-click, choose "Extrude". The extrusion will round our edges and give the letters a more attractive appearance, making them swell. To continue working on specific points of our text, remember that you can select a section and, keeping Shift pressed, add to your selection as many adjacent sections as you need.

5. Placing the camera
Once your letters have a look you like (you can give them more volume with the "Volume Builder" or add more reshaping and smoothing layers), it's time to place the camera. Go to the Redshift menu and select, under "Cameras", the standard one. From here, it is a matter of placing it in the place you are most interested in to build your final rendered image.

If you liked this tutorial, remember that you can discover with Zigor the new modeling features to give character to your letters, and learn how to render with Redshift in his online course 'Advanced 3D lettering techniques with Cinema 4D'.
You may also be interested in.
- Animated lettering, a MEMOMA Estudio course.
- Domestika Basics: Adobe Illustrator for typography, lettering and calligraphy, 5 courses by Andrés Ochoa.
- Calligraphy and lettering for Instagram with Procreate, a course by Nubia Navarro (nubikini).
- Digital lettering with Illustrator and Photoshop, a course by Daniel Hosoya.


0 comments