


DIY Tutorial: How to customize espadrilles with colored ribbons

Transform your espadrilles in a simple way and get a unique shoe
Summer is the season of color in fashion, a time that invites us to experiment and create unique garments that are not only trendy, but also a reflection of who we are.
Isabel Río (@antonia_s) has worked for big brands such as Alexander Wang, Calvin Klein Collection or Carolina Herrera and it is from that commitment to quality and authenticity that ANTONIA´S was born, her brand of handmade espadrilles deluxe.
In the following tutorial, Isabel teaches you how to personalize your espadrilles to give them a second life and explore your skills in the world of design. Don't miss her explanations and learn how to customize!
Materials needed to customize espadrilles with colored ribbons
In order to make this tutorial and follow in the footsteps of designer Isabel Río, founder of the ANTONIA'S brand, you need the following materials:
- Thin ribbon of any color and approximately 2.5 meters
- Measuring tape
- Scissors
- Tapestry needle, remember that the tape must go through the hole
- A pair of espadrilles
Decorate your espadrilles, step by step
1. Start customizing your espadrilles from toe to heel
To do this you have to start by marking the approximate center of the blade and the heel. It's very simple, the upper refers to the tongue of the espadrille, you just have to measure the width and mark with a pin in the middle. You can also measure the heel or fold it in half and mark it again with a pin.

2. Mark the first stitch
Now you are going to mark where you would like to place the first stitch depending on the shape you would like to draw.
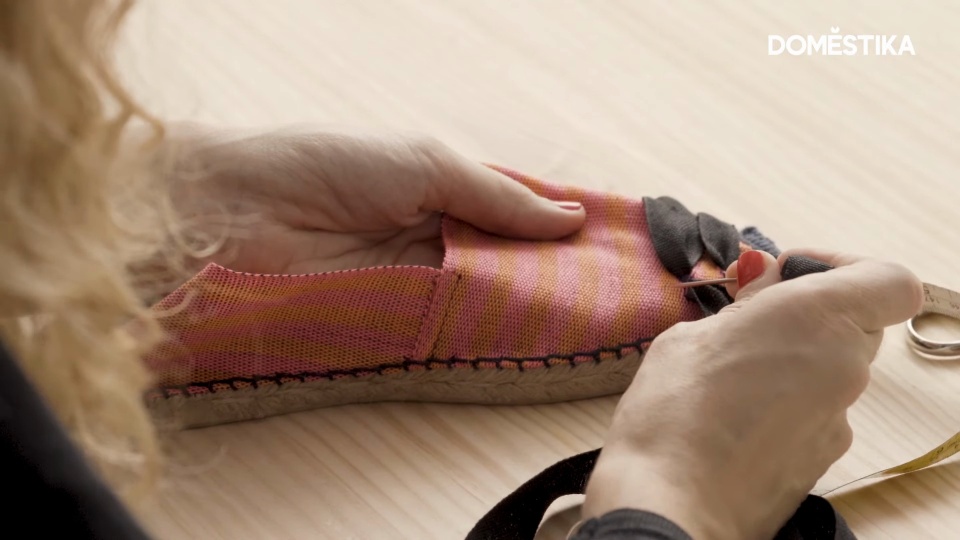
It is important to measure and pin each stitch to achieve a professional result. Thread the needle and prick the first pin from the inside, take out the ribbon and prick again at the next marked point.

3. The tapes
You already have your first stitch. The rest of the design places the crossed ribbons, to do this you must measure again and mark the following points. With the threaded needle, prick from the inside of the espadrille on the mark opposite to the direction of the ribbon. Take out the tape and perform the same process with the other end.

4. Now touch the extremes
Remove both ends of the ribbon, thread again and punch parallel to the previous stitch. With the remaining end, thread and prick in such a way that the new stitch is very close to the previous one, but without overlapping.

5. Finish from the center
Once you have finished your design, it is time to finish from the center. This action will allow you to take out your ribbons and tie them to your ankles. Thread one of the ribbons again and pierce the center of the upper from the inside, this time on the part with espadrille fabric and ribbon.
This fabric is thicker, so it is important to be careful and a little patient. Repeat the same process with the other tape.

6. Final step
To finish, you are going to remove the ribbons from the back ends of the espadrille. With the center of the heel marked, prick one of the ends on the outside side and remove the tape from the inside.
Repeat this process with the other strap and you already have your customized espadrilles ready to stomp.

If you liked this tutorial and want to learn how to create your own espadrilles with unique designs, don't miss Isabel's course, Design and manufacture of espadrilles.
If you also want to explore your skills in fashion design, take advantage of this Pack 2 courses and convert your creativity in fashion.
To learn more about accessories and fashion design:
- Cutting and tailoring: design your own clothes, a course Lantoki.
- 5 free lessons to get you started in sewing, some one of the best lessons to start in the world of sewing.
- Embroidery: garment repair, a course by Ofelia & Antelmo.


0 comments