

")
Procreate Painting Tutorial: how to color the new Little Mermaid with Cristina Gómez
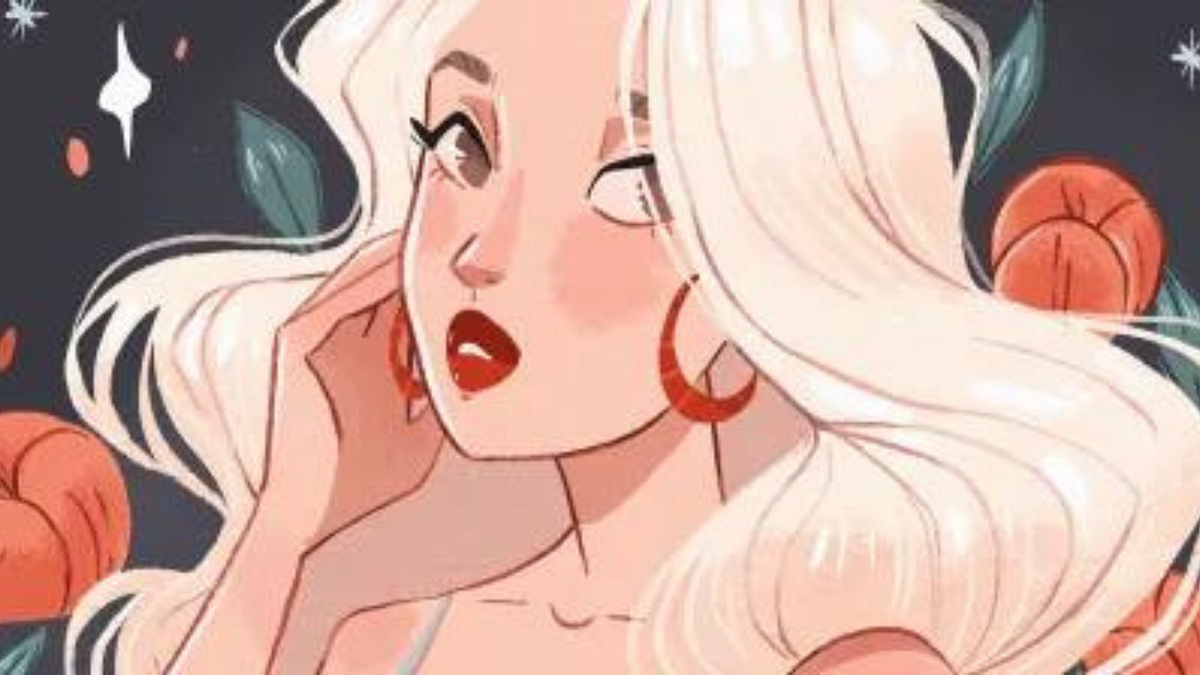

Cristina is a designer by profession and illustrator by vocation. Paper and colored pencils have been part of her life since she was very little, creating characters and stories. Her source of inspiration begins with Disney, manga and comics. She likes to create characters with a lot of color, apply light and shadow effects and, above all, draw hairstyles.
In this tutorial she will accompany you to make a version of the Little Mermaid in Procreate, since she considers it a very intuitive and easy tool to work with.
Before starting, download this sketch to follow all the steps:
Join for Free and download
Poses de referencia para retratos.jpg
And now, follow the tutorial:
1. The sketch of the Little Mermaid
Crossing you start any sketch, first look for references. In this case, Cristina has looked for references to Ariel's pose and face. Cristina uses the tilt sketch brush, which gives texture as if it were on paper. You can find it in her brush set in her Domestika course.
2. Paint the sketch
Hide the sketch layer and leave it at 30% to 50% opacity. It is important that the sketch is always done on a new layer. Adjust the brush thickness if your clean sketch line is too thick.
Once the body is outlined it is time to start giving details to the face. Continue working on the clean sketch and begin to give more depth to the character's eyes, nose and mouth. If the shapes in the rough sketch do not convince you, it is time to start giving more detail. Fluid, “s”-shaped lines will draw the hair. You have to establish which lines are going to be most important when creating the hairstyle. You can adjust the stabilization of the line to make it look straighter in the “stabilization” option within the Procreate brushes window and set the amount of the streamline.
3. Paint the Little Mermaid
Create a new layer below the sketch layer and start painting the drawing surface. Start by painting the color of the skin: for dark tones Cristina I recommend starting with a tone that leans more towards lilac than brown, since a lilac tone is not very saturated. And she fills the silhouette. The transparent part of the tail is not filled in now, but the line is left to fill in the skin part. She outlines the shape of the tail.
Now that you have the silhouette closed, it is time to fill the elements with the “Color Drop” technique. Drag the color to the silhouette you want to fill and start coloring.
She uses a color that is not the final one to draw the lines that separate the face from the hair or the body. And adjust the colors of the drawing. You can do this using the hue, saturation and brightness options until you get the color you like.
And for transparency choose a color similar to the base color but that stands out a little more.
4. Face details
Whites of the eyes: Choose a color similar to your skin tone, but lighter.
Eyelashes: place the layer above the hairstyle layer, so you will always have the layers visible.
Iris: always work with layers. Create a clipping mask so that you have everything you cut visible within the layer.
Blush: creates a new layer on top of the base layer of the skin. Base it on the character's base color. Choose a soft brush with a little texture and use the blending mode.
5. The shadows
Use a brush with a little texture so it doesn't lie flat. In this case, Cristina uses the Shadow texture brush, also available in her brush set.
6. Ariel's hair
Start with the base layer of hair and create the first clipping layer. Make the strands lighter. Change the brush to one that allows you to have more control over the path, the Detail taper is a good option. She uses fusion mode and multiplies. As you make details, adjust the color to make it darker or lighter.
If you want to draw more and continue practicing with Procreate, don't miss Cristina Gómez's course: Portrait of cartoon-style characters with Procreate.


0 comments