


Illustration Tutorial: How to Draw Different Body Types
Learn how to design female and male characters with curvy, muscular, or slender body shapes, using digital illustration software Procreate
In the world of character design, it's important to understand how to draw body types in different shapes and sizes to create diverse and distinctive characters.
Whether you want to illustrate slim, plus-sized, or muscular figures, it all starts with understanding how to break your design down into simple shapes and define your proportions—as character designer Magdalina Dianova (@magdalina_dianova) shares in this Procreate tutorial.
In the video below, Madgalina—who works in the animation industry for clients like DreamWorks—teaches you how to digitally illustrate curvy, slender, and athletic female and male characters step by step using an iPad.

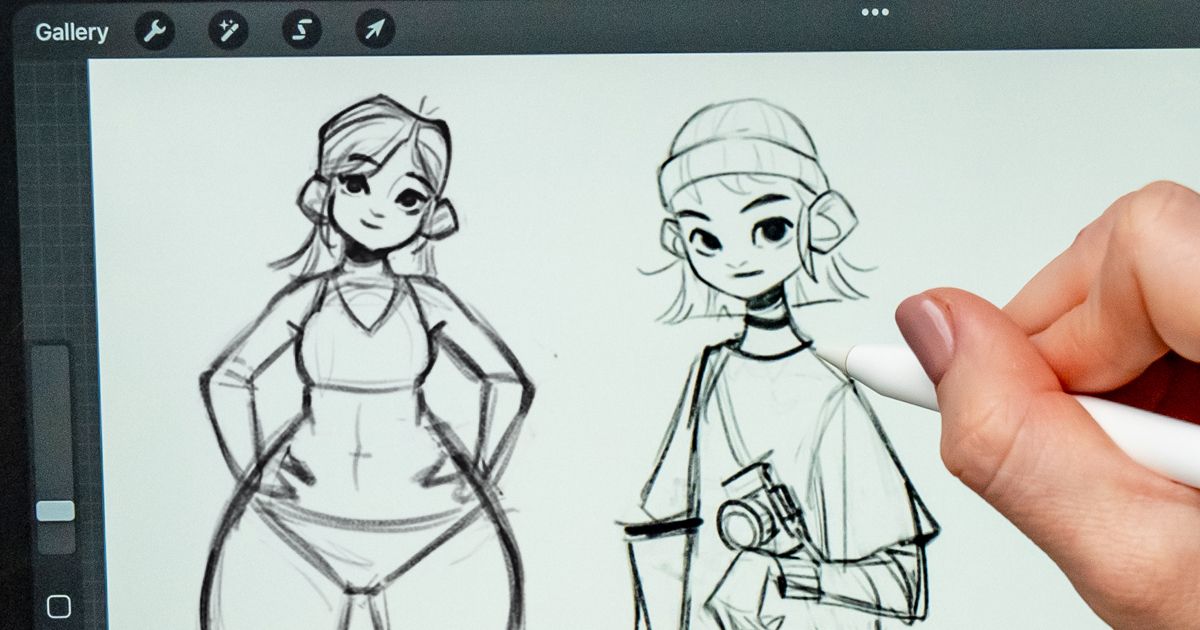
1. Curvy woman
Magdalina explains that curves really stand out when you create contrast between larger and small areas of the body, so in this design she draws the torso with a small upper body and a larger lower body.
If you’re using a reference image, Magdalina suggests taking note of which proportions of the body stand out, and exaggerating these features for strong character design, making them bigger or smaller to enhance the contrast.
She also notes that round shapes and smooth lines work well for this body type.

Procreate tips: Magdalina uses a custom brush with low opacity to sketch out the initial shape and makes sure that her brush is big so she isn’t filling in unnecessary detail. She also uses the select, transform, and liquify tools to move body parts around and adjust proportions.

2. Athletic man
Magdalina recommends using simple geometric shapes for this body type. She keeps the shoulders wide, the hips small, and the legs long and lean.
To define posture, it's helpful to mark your character's center of gravity—making sure it falls down the center of the drawing. On human bodies, the center of gravity runs from under the pit of the neck down to the ground, so Magdalina recommends drawing a line straight down from your character's neck to the feet as a guide.

If you want to give your character energy, move the torso away from the center of gravity as a way to create movement in their stance. If you're using Procreate, you can easily do this using the liquify tool.
Check for mistakes: Flip your picture to check for any inconsistencies in your anatomy, proportions, and angles as you go. You can do this in Procreate and other digital illustration software.

3. Tall and slender
This character's proportions are based on a rectangular shape, with the features kept long and thin.
To help define the posture, again draw a line through the torso from the neck to the feet to create a center of gravity, then use the liquify tool to move elements around with the line as your guide. For example, Magdalina pushes the hips forward and the torso back to add a lean in the body, which also creates a lengthening effect.

Anatomy drawing tips: Even if your final character should be fully clothed, Magdalina suggests sketching out the characters only wearing underwear first. This way, you can check and refine your work on the anatomy, and make sure it's accurate. Additionally, adding clothes later on in the process will help you create a more cohesive character, as you can design the clothes aligned with the body shape you’ve created.
Finishing touches
Once you’ve created the basics of the body, take the time to play with proportions and have fun experimenting with different proportional adjustments. For example, Magdalina explains that on a real human body thighs are normally the same size as the lower leg, but sometimes she makes the lower leg shorter than the thighs to break the silhouette and make the overall look more engaging.
Courses and tutorials to learn more about character design
- Check out Magdalina Dianova's course Drawing Appealing Characters With Personality. Throughout, she teaches you how to tell a story through expressions, poses, clothing, and more.
- From facial features to figures, learn how to draw female characters that convey strength, wisdom, and diversity with 12 female character design courses for beginners.
- Discover new techniques for digital illustration, lettering, and animation with 12 quick Procreate tutorials.


0 comments