


Free PDF: Beginner’s Guide to Digital Illustration in Procreate
Illustrate an orange with sketching, color-blocking, and texturing techniques in Procreate, by following this step by step tutorial download
Procreate is an iOS-exclusive app that has been making waves since it launched in 2011. Playful tools and gestures are balanced with precision and speed, making Procreate an intuitive tool, whether you’re doodling or producing professional level work. So, how do you start drawing with Procreate?
Digital illustrator Bett Norris (@bettnorris) has collaborated with the likes of AirBnb and Calvin Klein, and teaches a Domestika course on creating vibrant scenes in Procreate. Here, she shares a downloadable practice drawing task, using simple shapes, brushes, and textures to create an orange sat on a table with a plain background.

How to get started with Procreate
When you open Procreate, you’ll immediately find your gallery, where your artwork is stored. Tap the plus sign in the top right of the screen to open a new canvas.
Along the top left, you’ll find several menus.
1. Actions. Here you can add in files, share, turn on guides, find animation options, and find a timelapse video of your work.
2. Adjustments. Here you’ll find settings like your work’s hue, saturation, blurs, noise, etc.
3. Selection. This menu is for choosing areas of your image to edit.
4. Transform. Here you can make modifications to your selections.

In the top right you’ll find your tool menus:
1. Brush Library. Here you’ll find all shapes and hardness of brush.
2. Smudge. This tool creates a smearing effect.
3. Erase. This tool comes in the same varieties as the brush tool.
4. Layers. Here you can view and organize the layers of your project.
5. Color. This menu provides a color wheel and other tools to choose different values.

How to color digital illustrations
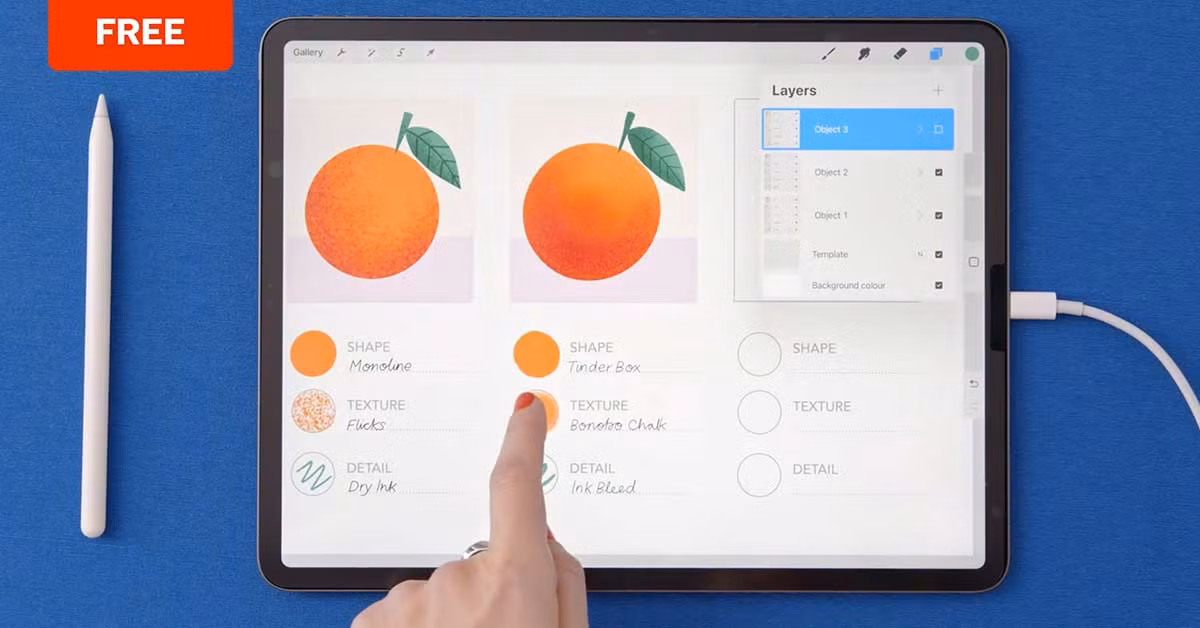
After you’ve made a sketch on a new canvas, you can follow Bett’s system of threes that’s easy to remember and can help you color any object.
The basic rule is that for every object, you make three layers: shape, texture, and details. Each layer has its own unique brush, so you only need three brushes to make your digital artwork.
The brushes
1. “Monoline” is for the shape layer. Turn the StreamLine setting up to make it super smooth.
2. “Flicks” is for the texture layer.
3. “Dry Ink” is added to the detail layer at the end.

Color and texture an orange illustration with this guide
The practice composition based around an orange will allow you to create straight edges and curves, exploring grids and guidelines while also trying out some freehand drawing.
In the document, Bett also explains concepts like clipping masks, opacity, and layer blend modes, to make your process as fluid and simple as possible.
Ready to start sketching and adding color to a simple orange illustration? After clicking the download button, you’ll find a PDF file titled Digital Illustration Guide by Bett Norris in the Downloads folder on your computer.

This resource will be available until July 13, 2022. If you want to access the material after that date, you can sign up for Bett’s course, Colorful Digital Illustration in Procreate. There, you’ll create a vibrant illustration featuring a character in their everyday life, surrounded by interesting shapes and objects.
More illustration resources to expand your skillset
1. We have twelve more Procreate tutorials to grow your knowledge of this app.
2. Try these quickfire illustration exercises with any medium and unlock your creativity.
3. Different drawing apps offer different tools and options: check out these ten great iPad drawing apps to discover alternatives to Procreate.
4. Create a visual narrative with Procreate via this editorial illustration course by Laura Wächter.


0 comments