Art Direction and Set Design for Product Photography
Course final project
A course by I'm blue I'm pink , Creative study


About the final project for: Art Direction and Set Design for Product Photography
Art Direction and Set Design for Product Photography
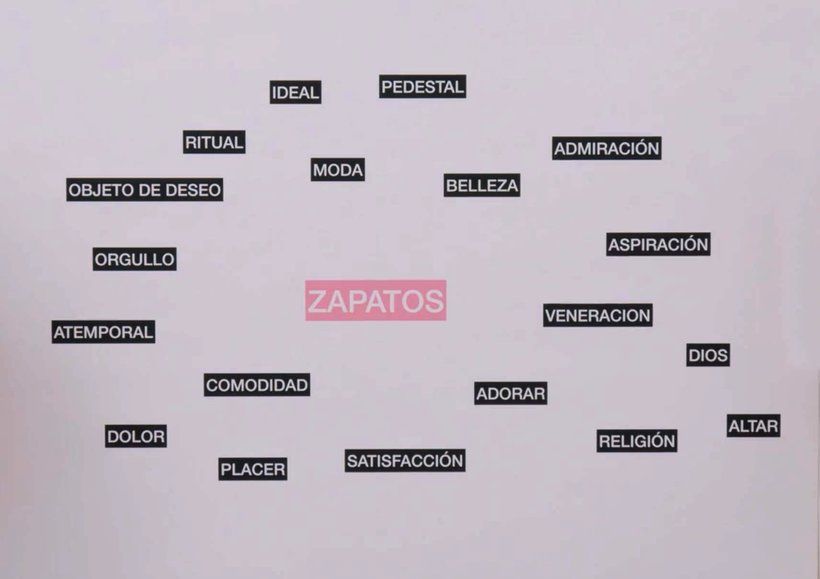
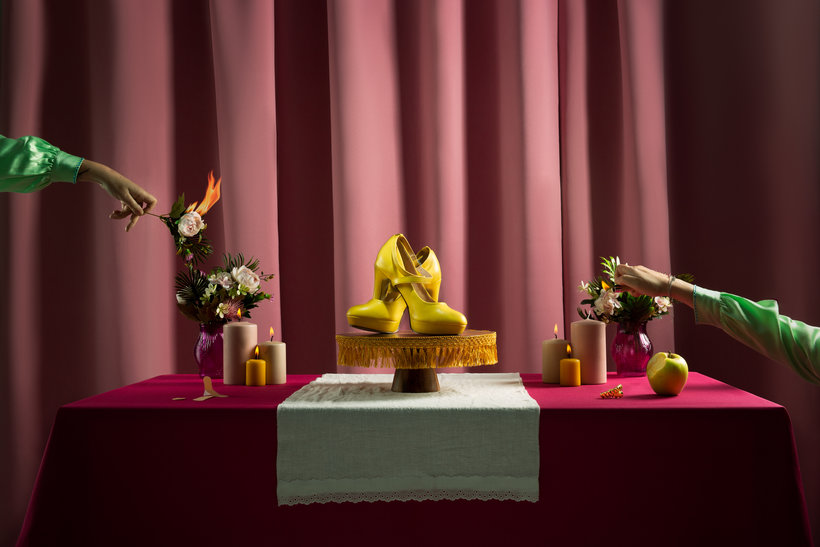
“You have now reached the last unit. Thank you very much for joining us. We hope that you have learned something new and that you now have more tools to give added conceptual and aesthetic value to your photographs. Now it's your turn to show us your project! Below, we have summarized the essential steps to follow to complete it. Remember to document the entire work process to be able to see the evolution. Our project can serve as an example and guide to develop your own, but the goal is not to copy it. Rather, we encourage you to experiment and find your own style, since we all have a unique imagery and way of communicating. The concept Make a visual map with keywords to find the concept of the story that your photographs will explain. Remember to follow the brief that you have created or that your client has given you, when you are working on a real project.


Partial transcription of the video
“Final project Thank you for having come this far. Now we will give you some tips to face your final project. We receive the brief from the client and it is very important that you understand perfectly what is expected of you. Remember that sometimes the client is very clear about what he wants, but other times you don't know very well what you need. That is where you have to help him to redefine his goals. Having a good organization is very important, that's why we advise you that you have a well-defined planning, with partial deliveries, and so you can better reach the final delivery. To g...”
This transcript is automatically generated, so it may contain mistakes.
Course summary for: Art Direction and Set Design for Product Photography
-
Category
Photography & Video -
Areas
Art Direction, Creativity, Product Photography, Set Design, Studio Photography

I'm blue I'm pink
A course by I'm blue I'm pink
Teo and Pedro González are the siblings behind the creative studio, I'm blue I'm pink, specializing in art direction, set design, photography, and video. These two curious minds, passionate about art and design, are dedicated to creating brands with their own identity.
Their style is defined as sophisticated, elegant, and surreal, and they are experts in playing with different types of materials, textures, and colors. Teo and Pedro are enthusiastic about working with clients who love design and want to develop their message in a very personal way, such as Baileys, Hornimans, and Fútbol Club Barcelona.
- 100% positive reviews (10)
- 530 students
- 13 lessons (1h 58m)
- 14 additional resources (2 files)
- Online and at your own pace
- Available on the app
- Audio: Spanish, English
- Spanish · English · Portuguese · German · French · Italian · Polish · Dutch · Turkish · Romanian · Indonesian
- Level: Beginner
- Unlimited access forever
Category
Areas

