Realistic Portrait Embroidery

Course final project

A course by Yamila Yjilioff , Fashion Designer and Embroiderer

Fashion Designer and Embroiderer. Buenos Aires, Argentina.
Joined November 2019
99% positive reviews (138)
2,725 students
Audio: Spanish
Spanish · English · Portuguese · German · French · Italian · Polish · Dutch

About the final project for: Realistic Portrait Embroidery

Realistic Portrait Embroidery

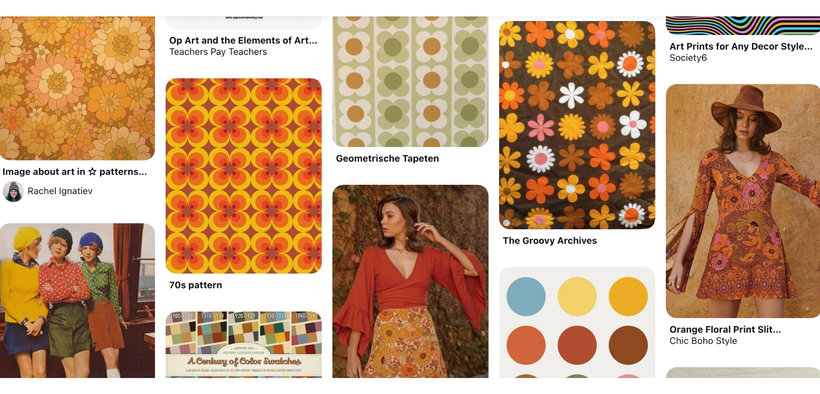
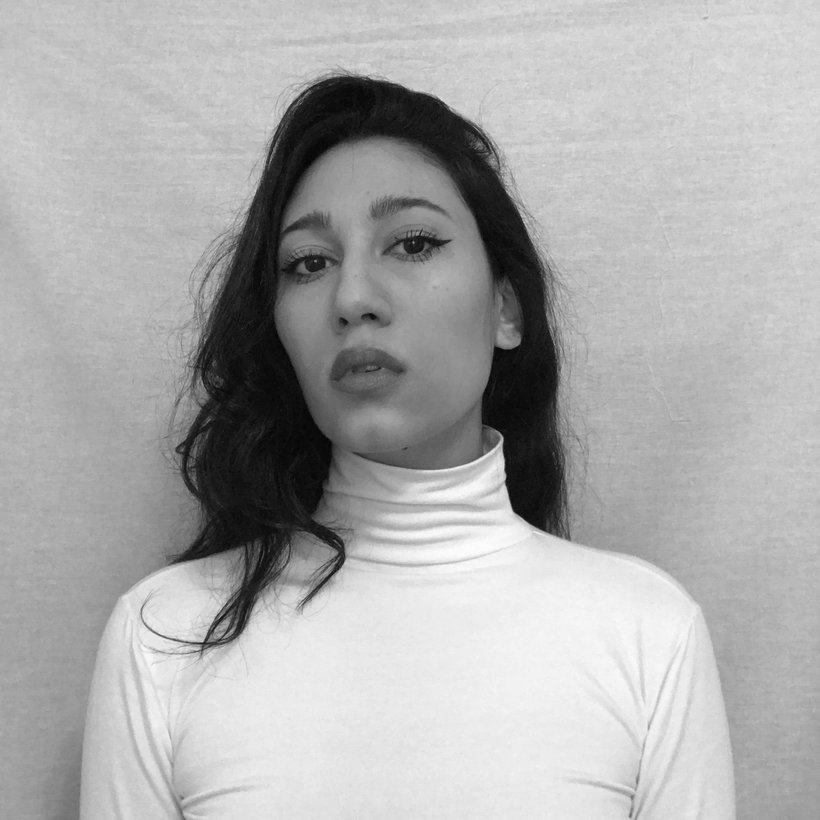
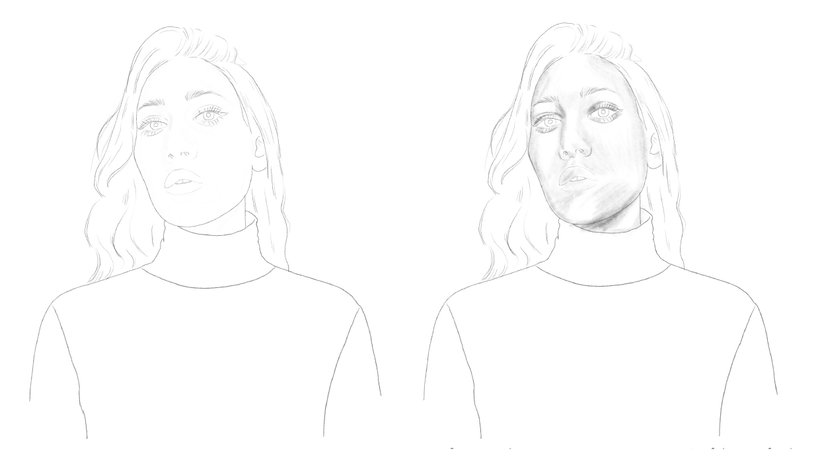
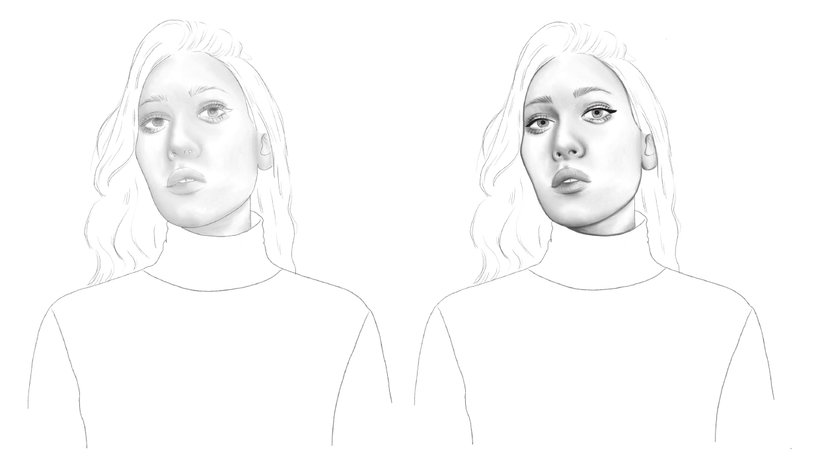
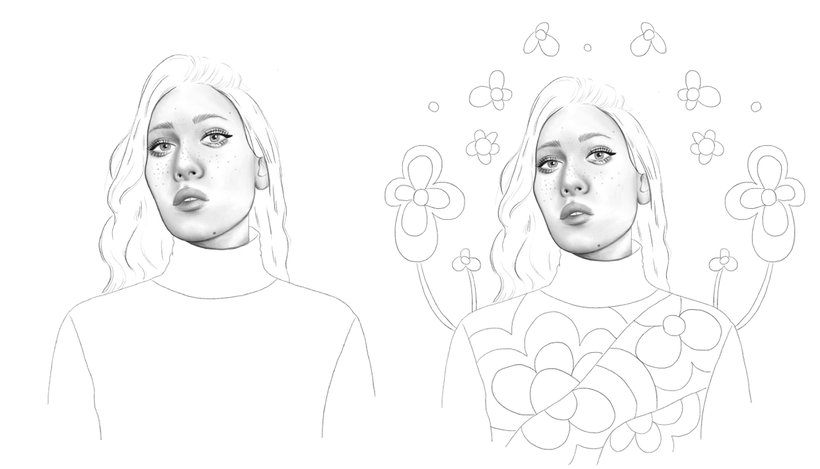
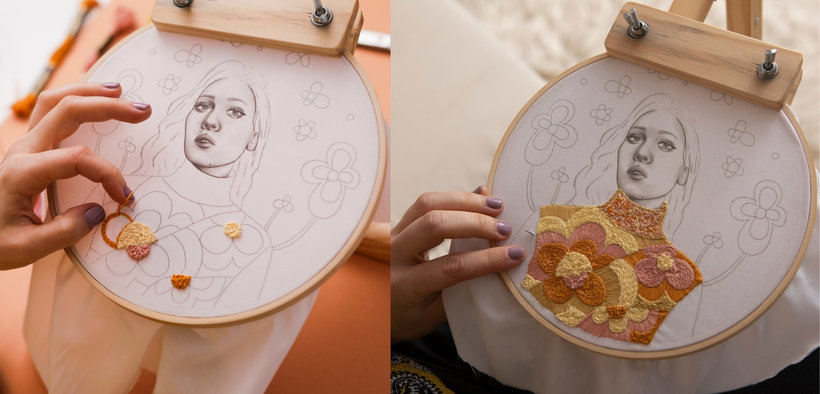
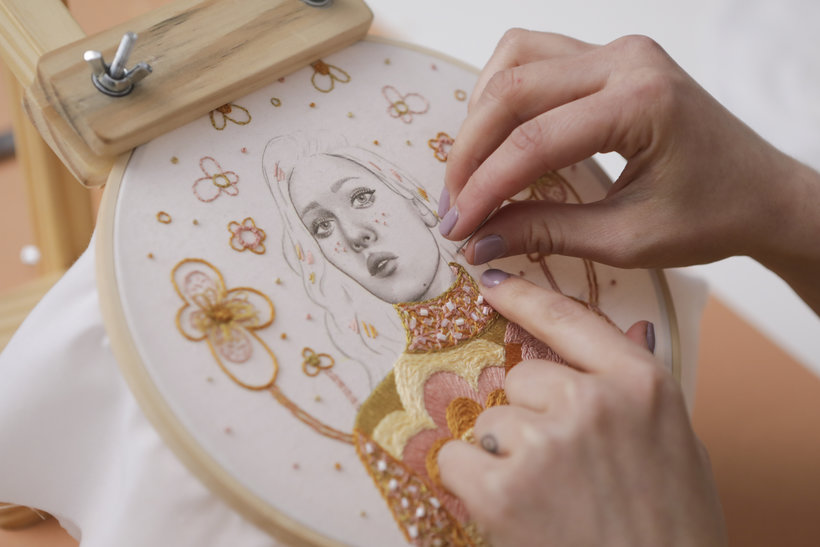
“Congratulations! You have reached the end of the course. Thank you very much for joining me during this process. I hope it was helpful to let go of your hand and inspire you to explore with these beautiful techniques. Remember that you will not go alone on the road. If you want to accompany me and use the same image as me, perfect! But I recommend that you choose someone close to you that you want to portray or make a self-portrait to make it a more personal project and you can feel free to play. If you have any questions about your choice, share your photo on the forum so I can see it and help you. I share the steps to follow so that you can create your embroidered portrait, please do not forget to share the path you have traveled uploading your project. Find your inspiration! Create your mood board on Pinterest, choose a decade of fashion or artistic movement, with images of color palettes, patterns , deco and any image within that theme that you breathe in. These images will help you define the aesthetics and colors that you will apply to your portrait.

The model Choose your model making sure that the image has good light and is a medium shot that allows you to see the garment. Ah! And ... the eyes boy, they never lie . The look is a fundamental part of a portrait. It can transmit intensity, fatigue, happiness, anger, that will depend on you.
Draw When you have chosen the image you will start to draw. You can do it with pencil and paper by printing the photo in grayscale or digitally with a drawing program like Procreate, in my case. In both ways you will start with an A4 size sheet and the photo of the model to which you are going to trace the features of the face, the outline of the hair and the garment. Then, you will begin to build the volume of the face starting from the lightest gray to the darkest, shading with the pencil and blurring. I recommend you keep a gentle pressure on the pencil and increase as you need. I used and looked at photography a lot to help you understand the values of light and shadow. Once you're satisfied, for the final details you can add skin tags like freckles, moles, or whatever comes to your mind. It does not matter that it is not exactly the same, in fact better! Thus, it will give it a more personal touch.
Embroidery map Now that you have finished your portrait, you will use the space that was left empty in the garment of your drawing to create the embroidery map. If you are doing it digitally, I recommend creating a new layer to be able to modify it without affecting all the work already done and if the drawing was done with paper and pencil, then a tracing paper will help you to test your map until you are satisfied with the result and you can finally pass it on to your final portrait. You will take resources and forms that you have found in your Moodboard and create! They can be abstract, geometric, flower shapes but keep in mind that they must be simple and relatively large. At this point you will also define the colors of the threads that you are going to use. It helps me a lot to make this decision beforehand so that later I can embroider in a more fluid way.
Make your transfer! In the next step you will print the portrait on the transfer. It is very important not to forget to mirror it before printing and always in photographic quality. When you have it printed, you will cut the excess of the paper so that it is the same size as your frame and you will place it facing the drawing to the fabric to transfer it using your iron, which has to be at the maximum temperature. In general, it is about 3-4 minutes ironing on the paper and pressing. Then you will take it out carefully and you will have your portrait transferred to the fabric! If it doesn't look good on you the first time, don't be discouraged. Each paper and plate are different, you may need other times and pressure. For this reason, it can be useful to test the fabric first, printing your portrait small to see what works best for you. To find out, you are going to see that if there is part of the ink that remains on the transfer paper and not on the fabric, it is because it lacked ironing time and pressure. If all the ink has transferred from the paper to the fabric, but the lines appear odd or open on the fabric, it's probably because you've been out of hot weather. Trial and error, no more!
The frame With your portrait on the fabric, you will place it in the frame, stretch the fabric so that it is very firm and start embroidering starting from the fill stitches such as the French knot, chain stitch, satin stitch and the variation of the seed stitch. I recommend using mouliné threads since they will allow you to try different thicknesses depending on the number of threads you use.
Continue with embroidery Then you will move to line stitches such as back stitch, split back stitch, stem stitch, seed stitch, overcast hem stitch. You can combine them however you want. Add details with the volume stitch and to finish, I invite you to use other materials such as beads to apply them to the garment or small stitches on the face and hair. This is completely optional and to your liking! As a last detail, you will finish the back of the hoop with felt and the satin stitch.
Finally, after so many tips and dedication, your creation is ready. Don't forget to share your process and your final project on the forum. Remember that all learning takes time and practice, but don't forget that surprising results can emerge from mistakes and improvisation. Dare to play with pencils, threads and try different colors, thicknesses and stitches! I will be in the forum whenever you need for all the questions and comments you have, so do not hesitate to ask. I will be very happy to be able to accompany you more closely during your process. I can't wait to see what wonders you create! Good luck and see you soon! ”

Partial transcription of the video

“Final project We've reached the end of the course. Thank you for spending this time with me. I'll do a brief summary of what we've done. I introduced myself and talked about my story and how I got into this. I then shared some of my influences, the artists who inspire me and motivate me to create new things. Then we chose the photo we'd use as a reference to illustrate. I showed you some tips to choose the photo that best adapts to the project. Then we chose and did our mood board. For the mood board we took inspiration from a fashion period or art movement to help us to choose the color an...”

This transcript is automatically generated, so it may contain mistakes.


Course summary for: Realistic Portrait Embroidery

  • Level: Beginner
  • 99% positive reviews (138)
  • 2725 students
  • 4 units
  • 18 lessons (2h 28m)
  • 6 downloads
  • Category

    Craft
  • Areas

    Embroidery, Fiber Arts, Textile Design

Yamila Yjilioff

Yamila Yjilioff
A course by Yamila Yjilioff

Teacher Plus
Fashion Designer and Embroiderer

Yamila Yjilioff of Argentina is a self-taught clothing designer and embroiderer. She enjoys experimenting with different techniques and combining her two passions: illustration and embroidery.

In 2017, she began uploading her work to Instagram, leading her to participate in local fairs and exhibitions where she could sell her work. She currently divides her time between designing for a textile company, and combining illustration and embroidery for different projects and commissions.


  • 99% positive reviews (138)
  • 2,725 students
  • 18 lessons (2h 28m)
  • 17 additional resources (6 files)
  • Online and at your own pace
  • Available on the app
  • Audio: Spanish
  • Spanish · English · Portuguese · German · French · Italian · Polish · Dutch
  • Level: Beginner
  • Unlimited access forever

Category
Areas
Realistic Portrait Embroidery. Craft course by Yamila Yjilioff

Realistic Portrait Embroidery

A course by Yamila Yjilioff
Fashion Designer and Embroiderer. Buenos Aires, Argentina.
Joined November 2019
  • 99% positive reviews (138)
  • 2,725 students