


Craft Tutorial: How to Make Paper Tree Baubles
Get into the festive spirit and learn the art of paper-folding to create tree baubles with Kate Colin
Make your own festive decorations by trying your hand at “paper-folding.” Inspired by origami, Bauhaus, and Scandinavian design, this versatile craft involves folding paper to create two or three-dimensional decorative designs.
Paper artist and designer Kate Colin (@kate_colin_design) works with origami and paper-folding to create original, 3D geometrical designs that lend a unique and stylish touch to any space.

In this tutorial, she shows you a simple paper-folding technique to create colorful and original decorations perfect for hanging on your tree or decorating any space this holiday season. It’s a great (and creative!) way to add a unique, stylish touch to your home and get you into the holiday spirit

How to Make Paper Tree Baubles
You’ll need:
- A sheet of paper 65cm long
- A short and long ruler
- Double-sided sticky tape
- Scissors
- A knife
- A bun folder
- Needle
- Hole Punchers
- Pencil
- Scoring tool
- String
Step 1:
Take your sheet of paper measuring 65cm long and 14cm wide and add a piece of double-sided tape to one of the shorter ends, so that it is covering around 1cm of the paper. You can use your knife to trim off any excess tape.
Note: Your paper is now 64cm long as you don’t need to count that extra 1cm with double-sided tape in your calculations when folding the bauble.

Step 2:
Score a line on the paper that runs along the inside edge of the double-sided tape. Use your ruler to make sure the line of your score is straight and precise.
Step 3:
Turn your piece of paper over and fold the 1cm section with double-sided tape to remind you not to include it in your calculations. Now, taking a ruler and your pencil, begin making marks every 2cm along the top and bottom of the paper. When you have done this, you can match up the lines using your scoring tool. Use the smaller ruler to keep the scored lines straight.

Step 4:
Now you’ll do what is called a “valley fold” which is making folds along each of your scored lines. When you have finished, turn the paper over and begin folding the other way so that each score has been folded in both directions. This is called a “universal fold”. You will end up with 32 folded sections in total.

Step 5:
Turn your paper over so that the taped side is facing downwards. Take your ruler, and at either end of the 14cm side, make a pencil mark 6cm down and another 8cm down. Join each end up by making a line with your pencil. Use the long ruler to make sure the lines are straight.

Step 6:
You’re going to use the spaces between these lines to make v-shaped scores along the middle of the paper. Take your short ruler and your scorer and, in the first of the 32 folded sections, make a diagonal score that extends from the 6cm to 8cm line. In the next section, make a diagonal score going the opposite way so you end up with a scored zig-zag pattern running along the middle of the paper.

Step 7:
Turn your paper over to the other side and, with one hand underneath and the other on top, gently push the V-folds so that they become raised along the paper.

Step 8:
Starting at the end furthest from your double-sided tape, begin to gently gather all the folds and press them firmly together. Release the paper and you will be left with a rigid, folded structure—a bit like an accordion.

Step 9:
Now, take your hole puncher and punch holes all the way along the top and bottom of each fold, about 1cm in.

Step 10:
Attach the ends of your paper by pressing one end directly on top of the other end with the double-sided tape. Try to match up the edges as neatly as you can so that they form a perfect "V".
Step 11:
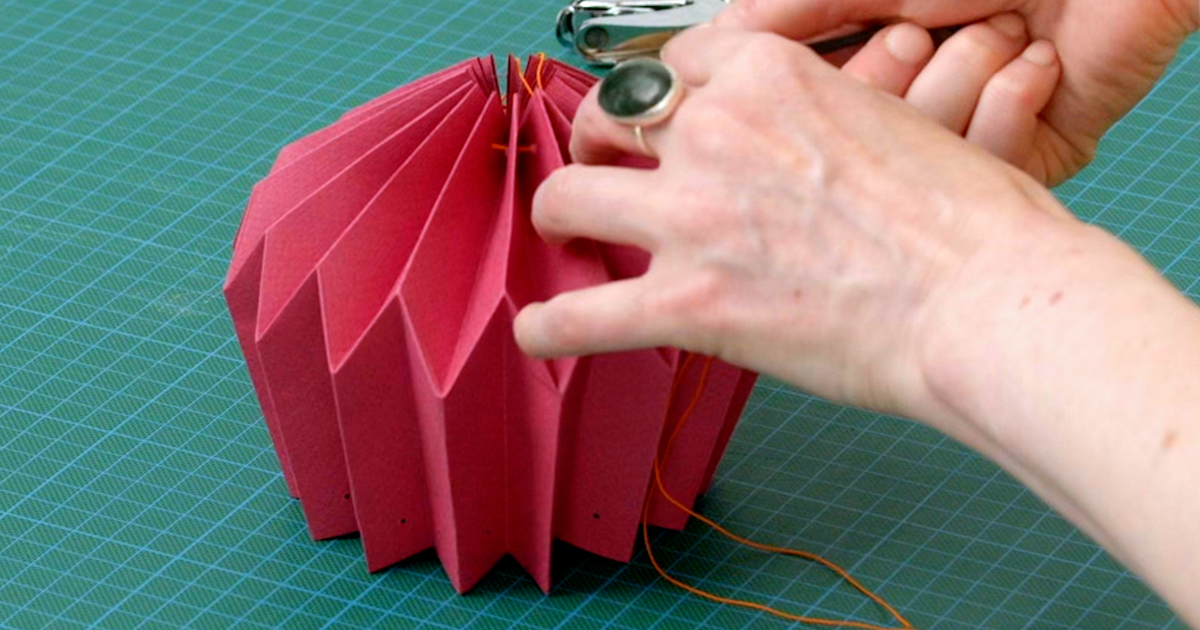
Take your string and trim it to a length of around 60cm. Using a needle, thread it through the holes around the top of your bauble and then pull it tightly together and tie in a knot so that you close the top of your bauble. Trim off any excess string.

Step 12:
Repeat this same process with another piece of string around the other end of your bauble, but before you pull the ends together, take a second piece of string and thread it through either side of the circumference. This is the piece of string you will use for hanging your bauble.
Now, with your first piece of string, pull the ends together, tie in a knot, and cut off any excess string. Take your second piece of string and tie the ends together, ready for hanging on your tree!

If you enjoyed this tutorial, why not check out Kate’s course Design Your Own Paper Lamp.
You may also like:
- Origami for Beginners: Materials and Basic Folding Techniques
- Creation of Origami Lamps with Paper, a course by Estela Moreno Orteso
- 5 Interesting Facts About Origami
- Make a Traditional Origami Tato


0 comments