


@ntams
Basic Materials for Coloring Photos with Watercolors
Discover which materials you need to start experimenting with paint and photographs
After Joseph Niépce produced the first photograph in 1826, around 100 years passed before the first color film arrived. However, you would be mistaken to think that all photographic records produced during that century were in black and white.
Long before the legendary Kodachrome, one of the first great photographic color films, color was added by hand using processes such as photo painting, also known as hand coloring.

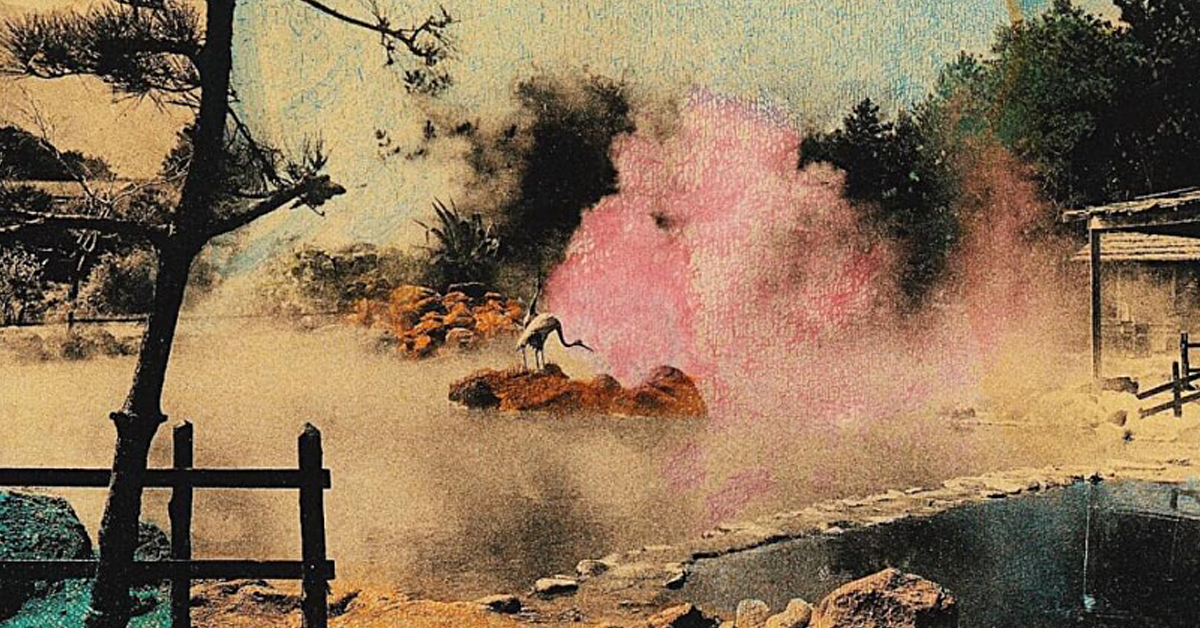
Today, this technique is still practiced. Brazilian documentary filmmaker, cinematographer, photographer, and visual artist Carine Wallauer (@wallauercarine) applies watercolor techniques to photographs, merging reality and imagination.
Below, Carine shares the materials you will need if you’re interested in experimenting with this technique. Discover more and be inspired by the incredible work of this visual artist!

Liquid watercolors
You will need a selection of liquid watercolors in various colors. These are different to solid watercolors, which are most commonly used for watercolor illustrations, but they are also easy to find.
![[fim], Carine Wallauer.](https://imgproxy.domestika.org/unsafe/w:767/rs:fill/plain/src://content-items/008/206/020/02-original.jpg?1623866400)
Brushes
You will use these to paint the details. It is best to get a selection of brushes in different sizes while remembering to prioritize brushes with soft bristles.
Cotton swabs and cotton balls
Carine likes to use these as painting tools. The cotton ball can be used for coloring larger sections of your photo while the cotton swab is easier to control and can be used for the in-between areas.
![[tarde], Carine Wallauer.](https://imgproxy.domestika.org/unsafe/w:767/rs:fill/plain/src://content-items/008/206/022/03-original.jpg?1623866400)
Two glasses of water
Two glasses of water are essential for every painting project: one glass is used to dilute the paint and the other to clean your brushes.
Masking tape and scissors
The masking tape will be used to fix your image to the surface you are working on. As Carine explains, "it makes everything easier".
Palette
This is used for mixing paints.
![[interior], Carine Wallauer.](https://imgproxy.domestika.org/unsafe/w:767/rs:fill/plain/src://content-items/008/206/040/04-original.jpg?1623866452)
Pipette
This tool makes it easier to add paint and water to your palette.
Cloth or paper towel
Accidents happen, so it is important to always have a cloth or paper towel nearby to avoid damaging the piece you are working on.
![[sonho], Carine Wallauer.](https://imgproxy.domestika.org/unsafe/w:767/rs:fill/plain/src://content-items/008/206/119/05-original.jpg?1623866980)
Old toothbrush
Finally, this additional tool can be used to create "special effects" when coloring your image.
Now you’ve got to grips with the different materials, why not try out Carine Wallauer's techniques? Check out her course, Coloring Photos with Watercolor, and learn how to color black and white photographs by hand.
English version by @eloiseedgington.
You may also like:
- 5 Contemporary Artists Who Color Photographs with Paint
- What Is Fine Art Photography?
- Fine Art Self-Portrait Photography, a course by Danny Bittencourt
- Children's Illustration with Watercolor, a course by Juliana Rabelo


0 comments