

Drawing Tutorial: how to make an illustrated map in 10 steps
Learn how to draw a map in a few steps and in a simple way, with Stef Maden.
Creating an illustrated map can be a great way of bringing a city to life as well as a wonderful way of remembering your favorite place.
Illustrator Stef Maden (@stefmaden) has worked with clients such as Sainsbury’s, Hallmark, and Tesco. She loves to travel and create maps of places she’s been, using illustration to help capture the essence of each place.
In this step-by-step guide, she shows you how to create your own illustrated map using Photoshop.
10 Steps to Create an Illustrated Map
1. Research and Setup
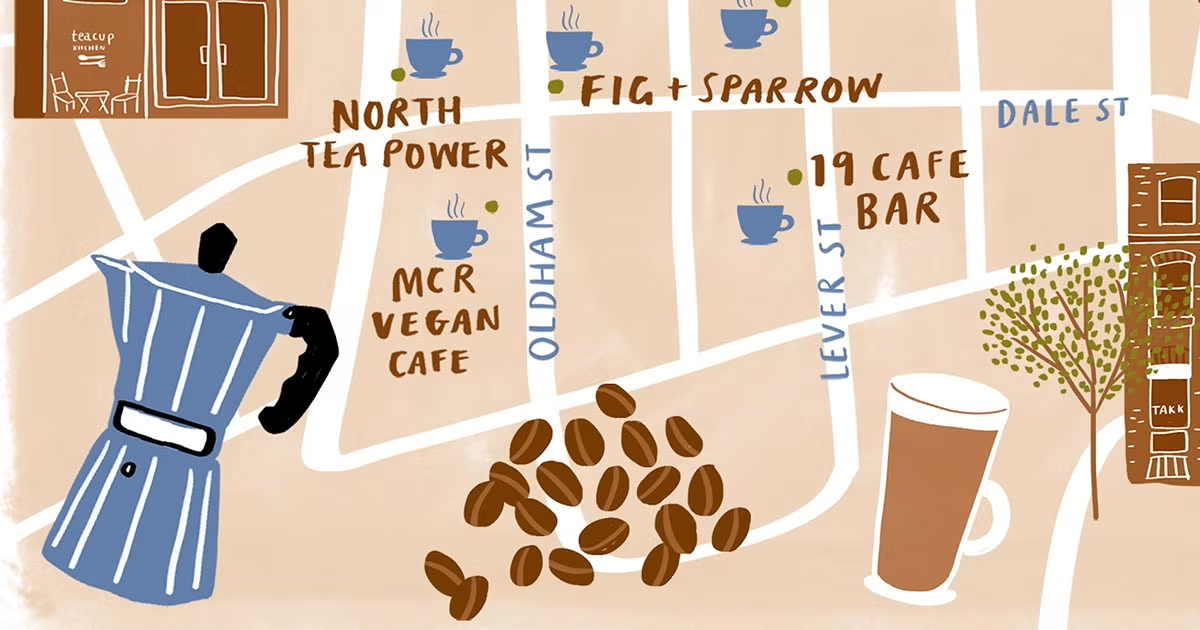
Take your time with the research and think about everything you’d like to include in your map. Then create a file with some images and icons in it that you can use throughout the process of creating your illustrated map. For example, for Stef’s coffee shop map she created a file with images of coffee cups and beans to add to the map at a later stage.

2. Format
The next step is for you to think about the platform you want your illustrated map to be published on, as this will determine the format that you create it in. If you’re going to post your illustrated map on Instagram, then a square format works best.

3. Background
A good background color can really make the details of an illustrated map pop, so it’s worth spending some time to get this right. A white frame, like in Stef’s coffee map, can also give the illustration some much needed space, which works well if there are lots of details in it.

4. Roads
Now it’s time to draw your roads. You can use Google Maps as a reference. Once you add these, you’ll really start to see the structure of your illustrated map coming together.

5. Plot
Next, plot the points of interest. In Stef’s coffee shop map of her local area, she’s plotted all the local coffee shops onto her road markings. Which areas are prominent in the city that you want to illustrate? Plot these.

6. Street names
Street names can be added now. You don’t have to put every single street name in your map, so think about significant streets and consider adding them in a different color so that they stand out.

7. Icon Markers
Remember those illustrated icons you created before in a spare file? You can start to add these to your map now. These icons will add character to the map and represent the different places on the map that you’ve included. For example, on Stef’s coffee shop map, she’s added some coffee cups and cafés to illustrate the coffee shops.

8. Doodles
Take a step back from your illustrated map and look at the areas that are less filled in. What doodles could you add and where could you add them to create more of a balanced image? These doodles will help to liven up different areas of the map.

9. Titles
When you add the title, think about where the best spot for it might be, and how much space it should take up. Is there a space that works perfectly for it? Also think about your font choice. Stef uses a handwritten font for her title, since it works well alongside the map’s illustrations.

10. Final Touches
You’re almost there… Now, for one last look at the map. How’s the color balance across the image? Are there any spaces you’d like to fill in? You can go back to your file of reference images and add a few more details to your illustrated map until you’re happy with the finished look.

Did you enjoy this tutorial? If you’d like to learn more about how to Create an illustrated map to represent iconic places of a city using manual techniques and digital collage, check out Stef Maden’s online course Illustrated Map Creation: Reflecting a City’s Essence
You May Also Be Interested In:
Introduction to Photoshop for Illustrators
Architectural Illustration: Capture a City’s Personality
Illustrated Recipes: Making Delicious Art
Drawing Tutorial: 3 Ways to Unblock Your Creativity
Adobe Illustrator Tutorial: Basic Shortcuts for Vector Illustration
Design Tutorial: 5 Ways to Be a Better Illustrator


0 comments