


Watercolor Tutorial: How to Paint a Banana Tree Leaf

Learn how to easily paint, step by step, a banana tree leaf in watercolor, with Isabela Quintes
Watercolor is a simple technique, but there are many small details that can make a big difference in your final result. Knowing things like what brush size to use, the best direction to make your strokes, and the amount of water to apply will help ensure success during your watercolor process.
With that in mind, artist Isabela Quintes (@isabelaquintes) teaches us how to paint a banana tree life, demonstrating her simple and each technique from start to finish.

1. Always start by painting from light to dark
For a leaf, it is important to begin by painting the lighter base layers before adding darker details to its surface. This is because while it is easy to add darker colors with watercolor, it is difficult to remove them, which is why you should begin by painting lighter areas like the stem.
2. For the stem, use a number 5 brush
The ideal brush size to use for a stem is a number 5, since it has the ability to paint both the thick and more delicate parts of the stem.

3. Place the paper horizontally to draw the central line
To create the part of the step that runs the length of the leaf, turn your paper horizontally. By painting it from one side to another, you will be able to better control the line.

4. Wait for the stem to dry before continuing to paint
This step is very important for any watercolor illustration, because if you do not let your paper dry between each step, your watercolor will get muddled and lose its detail.
5. Use a number 10 brush to prepare your paper
Use the number 10 brush to wet your paper. This is an ideal brush size because it allows you to quickly moisten your paper without getting it too wet. Remember that your water, and your brush, must be clean, otherwise they will leave stains on your paper.


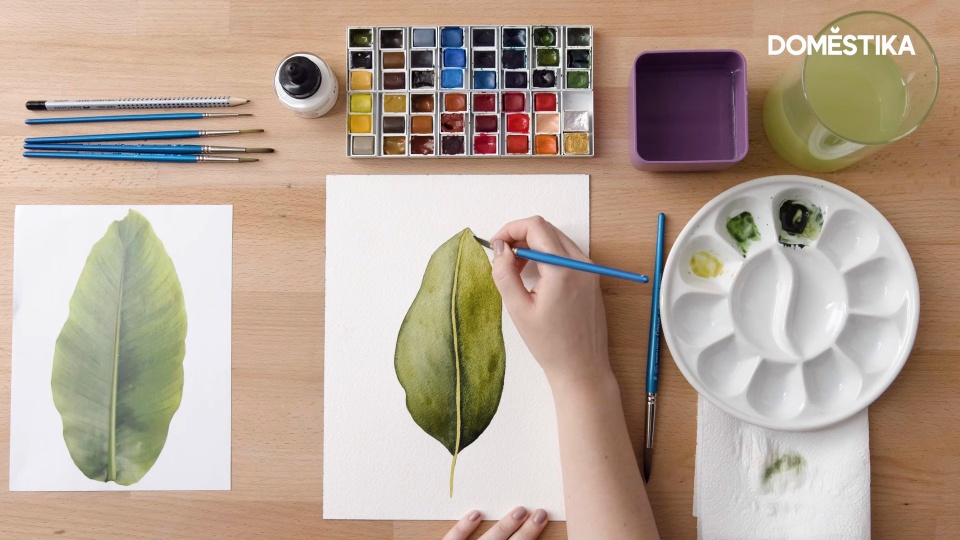
6. Use number 8 brush to begin painting
To add color, use number 8 brush. If you are right-handed, paint from left to right (and if you are left-handed, vice versa). This way your hand will not touch the wet paint and inadvertently spread the color.


7. Wait for your painted leaf to dry
After filling in the banana leaf with color, let your paper dry completely. This is very important to do before you move onto your next step.
8. Draw the veins of the leaf with a graphite pencil
To create the veins of your leaf, draw guide lines using a graphite pencil. Graphite is ideal because you can use a simple eraser to remove it.

9. Paint over the graphite lines using a number 0 brush
A number 0 brush is perfect for creating fine and delicate lines, so use it to create the veins of the leaf using a darker green. Make sure not to use too much paint, gently dipping your brush in your watercolors and reapplying when needed.


10. Let your watercolor dry
Wait for the painting to completely dry before passing over it with an eraser to remove the graphite lines. It is normal for a sheet of paper to become deformed because of water and the humidity of the watercolor, but once dry it will return to its normal shape.
To learn more about how you can use watercolor techniques to create your own botanical illustrations and patterns, check out Isabela Quintes's online course Botanical Watercolor for Patterns.
You may also like:
- Naturalist Bird Illustration with Watercolors, a course by Antonia Reyes Montealegre
- Watercolor Illustration: Recreate Your Most Iconic Scenes, a course by Carlos Rodríguez Casado


0 comments