


How to Create a Portrait in Photoshop in 8 Easy Steps
Spanish illustrator Elena Pancorbo gives a quick tutorial for portraiture in Photoshop
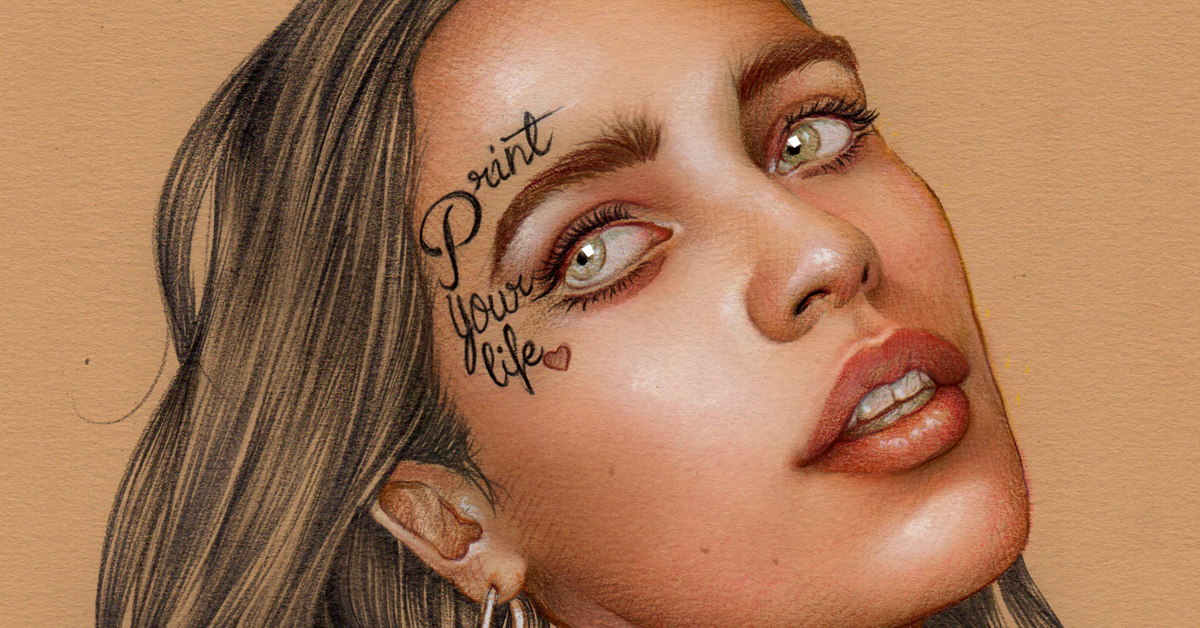
Elena Pancorbo (@elena_pancorbo), who specializes in editorial illustration, and has had a love for drawing since childhood, gives us a few Photoshop tips and eight easy steps to add depth to a face, intensity to a glance, and brightness to a smile.“Her girls”, as she refers to them, are characterized by excellent use of pastel tones and colored pencils.

This one-minute timelapse shows how Elena goes through the steps needed to complete a portrait illustration:

#1 Complete a freehand sketch, then define the lines.
#2 Fill the face with the base color.
#3 Add small shadows and brightness to bring out the nose and eyes.
#4 Paint the eyebrows and the lips in different tones to give them depth.
#5 Add texture to the skin to give it a realistic look.
#6 Paint the hair and outline each different lock of hair.
#7 Select colors to add extra details, such as flowers.
#8 Add final touches in composition, color, and brightness, and the portrait is complete.

If this little taster has intrigued you, check out the linked illustration and drawing courses, or delve into Adobe Photoshop, for courses at all levels of ability.
Learn more about Elena in her course Illustration with Pastel and Coloured Pencils, and develop realistic and delicate drawings through creative manual techniques.
You may be interested in:
- Add Emotion and Poetry to Portraits in Procreate
- 5 Timelapses That Highlight Photoshop's Possibilities
- Photoshop Tutorial: Rendering Hair and Eyes


0 comments