


Tutorial: How to Cut an Image in Photoshop in Less Than 5 min
Learn how to cut out objects from photos using the Polygonal Lasso Tool in Adobe Photoshop, and get them ready to animate in After Effects
Photoshop–the most popular editing software in the world–is the best tool for cutting out objects or figures from photos. Once the selected part of the photo has been cut out, you can add any background, correct mistakes, or apply it to other images to create a collage. Today, we share a step-by-step guide, which is suitable even for those who are new to Photoshop. Given that the edges of an animated object needn’t be perfect, this is a great exercise for those who haven’t used this technique before and need some practice.

How can I cut out an element of a photo in Adobe Photoshop?
While Photoshop has many different tools for cutting out elements of a photo, on this occasion, we are going to use the Polygonal Lasso Tool. It is an easy, quick, and simple option that is ideal for those who are still getting to grips with Photoshop.
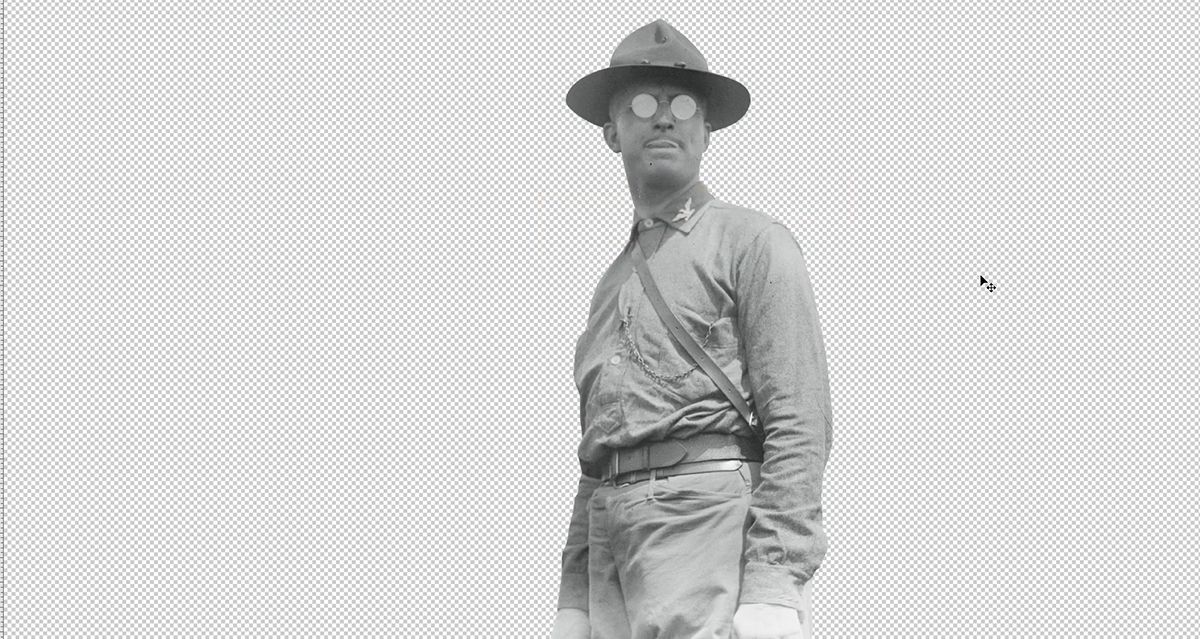
1. Open the image
Start Photoshop and load the image from which you want to cut out a figure or object.
2. Choose the Polygonal Lasso Tool
You will find the Polygonal Lasso Tool in the toolbar on the left-hand side of your workspace.

3. Select the object or figure that you want to cut out
Manually mark the outline of the figure or object that you want to cut out with the Polygonal Lasso Tool. With each mouse click, you will mark a new point to which a line will be drawn from the previous point. Repeat this process until you have drawn a complete outline around the object you want to cut out. Join the last point with the first to finish the selection.

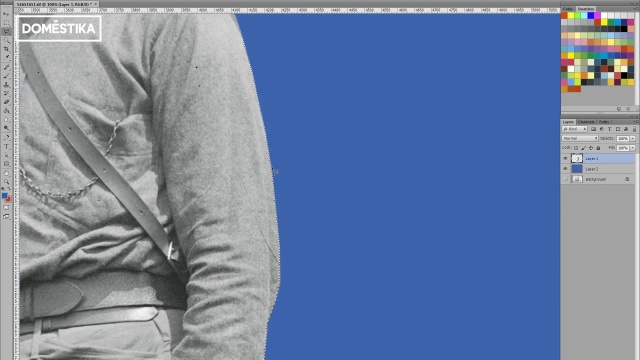
4. Create a new layer to correct detail
Pressing Ctrl+J (Cmd+J for Mac users) will automatically create a new layer that only contains the figure that you have cut out from the photo. Add another layer underneath the layer you have just created in a color that contrasts with your selection. This way you can easily see any mistakes and correct them. Pay attention to the edges, select the mistakes, and hit Backspace.

5. Contract the selection so that you can eliminate any other mistakes
Deleting one or two pixels around the edge of the selection will help you correct any final errors. To do so, choose the layer containing your figure in the layer menu on the right-hand side of your workspace. Pressing the keys Ctrl+Shift or Cmd+Shift at the same time will re-select the outline of your figure. Now, go to “Select”, “Modify”, and finally, “Contract”, and contract the selection by a pixel. Now, pressing the keys Ctrl+Shift+I (Cmd+Shift+I for Mac users), inverse the selection, and click Backspace.

6. Fade the edges as a finishing touch
To reduce the definition of the borders, select the layer containing your figure by clicking the layers menu and press Ctrl+Shift (Cmd+Shift for Mac users). Contract the selection again, this time increasing to 3 pixels. Inverse the selection again but, this time, go to “Blur” and “Gaussian Blur”. You can adjust the blur and choose how much of the effect you want to apply to the outline of your selection.

7. Export to After Effects so that you can animate your cut-out
Save your figure as a PSD file, and open After Effects. Import it into the program by clicking on the icon in the top left-hand corner of the screen and click “Open”, and select your cut-out.

You can learn this and many other retouching or animation tricks in Photoshop and After Effects with Joseba Elorza in his course, Retro Movement in After Effects.
You may also like:
Introduction to After Effects
Animated Collage with Adobe After Effects
Express Animation for Social Media with After Effects
After Effects, Expressions for Motion Graphics


2 comments
davismiller846
This is a good tips for cut out from photos using the Polygonal Lasso Tool in Adobe Photoshop. Thanks for sharing this awesome technique.
clippingpath
Very Awesome tip & points and Help full blog. It really helps me.