


Watercolor Tutorial: Tips to Overcome Your Fear of Water and Get Started
Learn basic wet-on-dry and wet-on-wet watercolor techniques with Canela Estudio
According to Paulina Maciel, designer and illustrator, founder of Canela Estudio and teacher of the Domestika course Botanical Illustration with Watercolors, watercolor is more than a technique: it’s an attitude. Learning watercolor is not always easy: the balance of water and pigment will always determine the outcome and only with practice, will you be able to master it.
To help you overcome your fear of water and enjoy this painting technique, Paulina will show you her basic wet-on-wet and wet-on-dry watercolor techniques. You will put different methods into practice, armed with water, colors, and brushes.

Materials
Before starting to paint and applying Paulina’s methods and tips, you will need to prepare the following materials:
- Block grid paper: required to experiment with the different techniques and to avoid color bleeding.
- Two water containers: one to clean the brushes and one to create mixes with clean water.
- Palette: this is where you’ll create color mixes with water.
- Two shades of watercolor: choose two different colors to practice the techniques.
- Medium-sized rounded brush: if you own a smaller brush, you will be able to practice stippling too.

8 techniques, practices and tips to start in watercolor
The key aspects to consider when starting with this medium are:
first of all, we always paint from light to dark in watercolor, i.e., we start with less and then add more pigment; second, we do not paint in white but leave out blank spaces on the paper; finally, it is essential to let the water flow when we are painting.

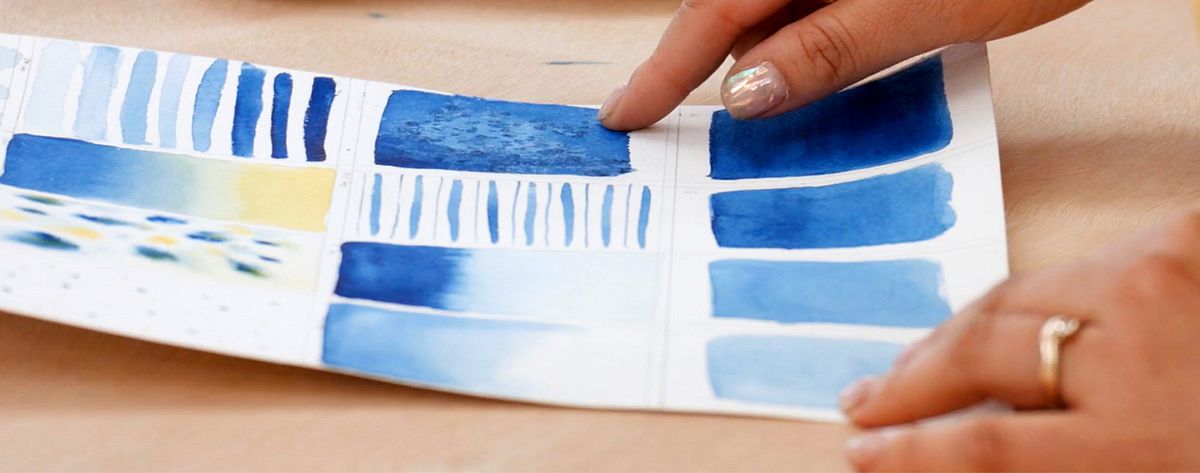
1. Wet-on-dry technique
The aim of this technique is to obtain a solid color base. As the name suggests, the surface we will paint cannot be wet. The first step will consist of painting on top of the area with a mixture of water and pigment that you’ll spread along the square quickly to avoid the paint drying out. This way, you’ll avoid any streaks of paint on the paper. If you run out of color, pick up more pigment, and carry on with the process until you’ve filled the whole area with paint.
With this technique, it is normal for water to concentrate in some parts of the paper, but you can fix this easily: you can absorb the excess water with your brush by dipping it in the affected area and then drying it on a napkin.

2. Wet-on-wet technique
One of the most used watercolor techniques, it consists of wetting the paper we are going to use with clean water before painting and then applying the pigment to the brush and extending it along the area. With this technique, we do not need to add any water because the paper is already wet. Also, the paint applied will not cause any streaking.

3. Creating color chains
This technique helps you learn to combine two different colors and to achieve new ones. For this purpose, the two washes must be ready, and the painting process must be very quick so that the paint does not dry out. The first step consists of creating dots in one color and, immediately after, dots in the other color, very close to the first ones, to the point that they touch. In this way, the two shades will interact and create pretty effects where different shades appear.

4. Experimenting with brush tips
Another key factor in mastering watercolor is managing different brush sizes. To overcome the fear of smaller brushes and to practice stippling, Canela Estudio invites you to paint small dots in each color over the area with size 8 and size 4 brushes.

5. Variegated wash technique
One of the most fun watercolor techniques, it allows for new shapes to appear as the water flows and different pigments blend in. Since this is a wet-based technique, you will have to wet the whole area to start with, and then stipple over it with your brush, allowing the water to flow.
Do the same process using the other color, even painting inside the first one. The wet base will make the two colors bleed and create movement in the paint.

6. Two colors graded wash
This technique is ideal if you wish to capture both colors equally on the paper and, at the same time, achieve a graded effect from their combination.
Concentrate one pigment in the upper part of the square; paint in the center with a brush without any color, underneath the first color. In other words, fill up the middle of the square with water. The following step will consist of painting the lower part of the square with the other concentrated pigment and continuing to paint upwards until the two colors connect.

7. Graded wash on a wet base
As the name suggests, this process is achieved by applying the wash to a wet area. Therefore you will need to wet the square before applying the color. Apply the pigment on the wet paper and allow it to flow on the water.

8. Graded wash on a dry base
For this graded wash technique, you’ll need to reduce the intensity of the pigment–similarly to the two colors method. To begin with, apply the concentrated wash to the upper part of the area and, moving down, paint with a clean brush, merely adding water until the end of the square.

You may also be interested in:
- Illustration Tutorial: watercolor lettering
- Illustration Tutorial: The Color Wheel


0 comments