

")
Easter cookies with VanilleCouture
Hello, creative baking lovers! We are Lili and Willie from VanilleCouture, and we are here to sweeten your day with a couple of delicious and amazing cookie decorations for this Easter. Are you ready to enter the magical world of decorated cookies? Then get ready to surprise everyone with your creations!
We are going to make two cookies, the first one will be a cupcake with bunny ears and the second one will be a pair of mini bunny and bunny cookies with their carrots.
Remember that as part of this tutorial we are going to share with you the illustrations, and if you want to learn more about how to make our icing, cookie dough and consistencies, we recommend to you our course in Domestika "Advanced Techniques for Cookie Decorating".
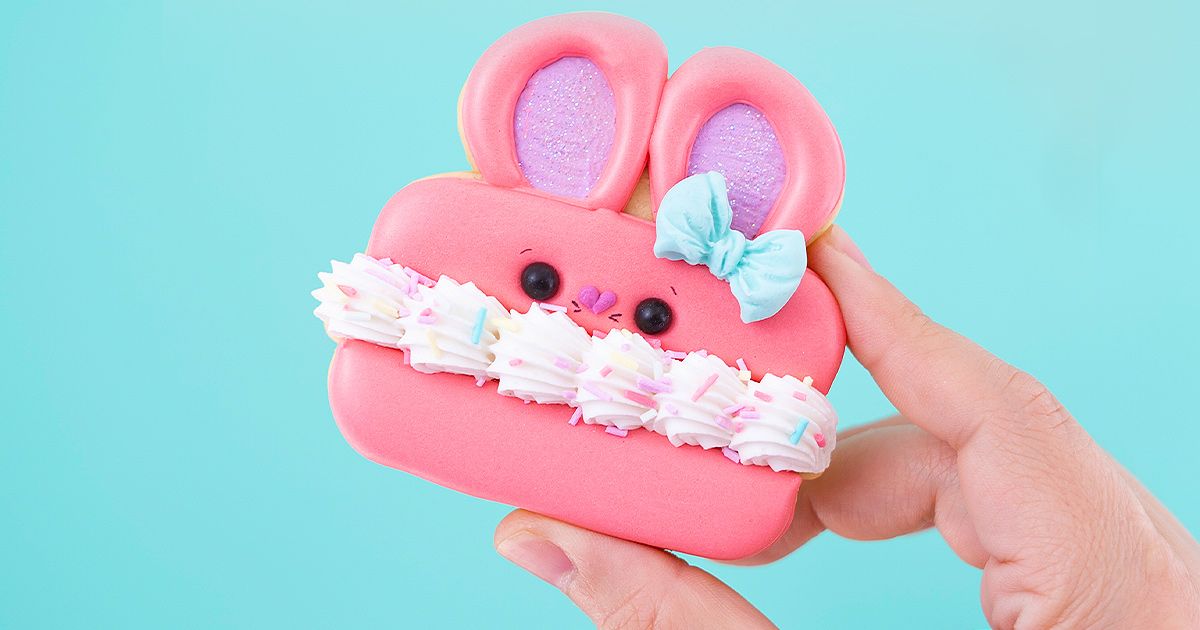
Cupcake cookie with bunny ears

Materials
- Illustration of the cookie
- White royal icing in medium and light consistency
- Pastel yellow royal icing in medium and light consistency
- Pastel purple royal icing (our "lavender flower" color) in medium and light consistency
- Royal icing brown (our "gingerbread doll" color) in medium and light consistency
- Pastel pink royal icing (our "sweet peach" color) in medium to light consistency
- Baking paper (parchment paper)
- Edible marker or non-toxic pencil
- Baked cookie with the illustration figure (you can see the procedure for making the dough and cutting the il-lustration in our Domestika course "Advanced Techniques for Cookie Decorating"
- Tipless pastry sleeves
- All medium consistencies go into a piping bag with coupler and duya #1.5 or #2.
- Sprinkles of different shapes and colors.
Procedure
With the help of an edible marker or a non-toxic pencil, you are going to trace the illustration on baking paper and then outline the figure on the opposite side of the paper.
Place the paper over your cookie and trace the lines so that your cookie is outlined on the cookie.
You are going to outline the ears with peach royal icing with a medium consistency and a #1.5 duya and then fill it with a light consistency of the same color.


Outline and fill the base of the cake with yellow color and then fill in each area, we will leave the section of the waves unfilled so that the division is marked.


Once these two previous areas are dry, you will fill in the section with waves.

Outline the ears with a medium white consistency and then fill in the ears with a medium white consistency.

Then, outline with medium consistency gingerbread doll color the chocolate part and fill with light consistency.


Now, you are going to outline the purple section and fill it as well. Before it dries, you will decorate it with sprinkles and sugar figures as you like.


We leave you the procedure in video in case you want to see them too:
And that's it, you now have a cookie that will captivate everyone at home or in your business, now let's make mini bunny cookies.
Mini bunny cookies

Materials
- Cookie illustration
- White royal icing in a medium and light consistency.
- Pastel orange royal icing in medium and light consistency
- Green royal icing (our "avocado heart" coloring) in firm consistency
- Royal icing black in medium consistency
- Yellow royal icing in medium consistency
- Pink royal icing (our "bubble gum pink" coloring) in medium consistency
- Royal icing mint (our "marshmallow mint" coloring) in medium consistency
- Edible black marker
- Light pink shader for veneers
- Round brush for veneers
- Acetate
- Tipless pastry sleeves
- Duyas #1.5, #ST50/ #349
- Baked cookies in the shape of the illustration (you can see the procedure for making the dough and cutting the illustration in our Domestika course "Advanced Techniques for Cookie Decorating"
Procedure
Mark your cookie as we explained in the previous tutorial.
Outline with medium consistency white color the bunny section and then fill it and let it dry for a few minutes.


You are going to outline with medium consistency orange color the carrot part and then fill it with light consistency.

You can add little leaves with avocado heart royal icing in firm consistency and using the #ST50 or #349 dough stick.

With black royal icing or edible marker, I draw the bunny's eyes. Then, with a round brush for badges, place a little pink shader under the eyes. At this point the cookie should be very dry.

Draw the nose and mouth with black edible marker or black royal icing.

Optional: You can make simple mini roses by making small balls of pastel colored royal icing on acetate and let it dry, then make a spiral on top with the #1.5 dowel.


Once the mini flowers are dry, you can place a wreath on the bunnies and complement with more leaves.

We leave you the procedure in video in case you want to see them too
And that's it Vanilos, you have created incredible simple cookies for Easter.
Remember that in our basic cookie course you can learn all the techniques you need step by step to create delicious butter cookies from preparation and baking, to the elaboration of the royal icing from scratch with its consistencies.
We know you're going to love the course so, if you haven't taken it, don't hesitate to do it and, if you've already taken it, don't forget to give us a rating so more people can join.
And don't forget to follow us on social networks to see more inspiration and be aware of the new surprises we have together with Domestika!
Lili y Willie (Vanille Couture)


0 comments