


Watercolor Tutorial: how to paint with the sponge technique
Learn step by step this key technique to apply lights, shadows and textures with watercolor, with Berta Llonch
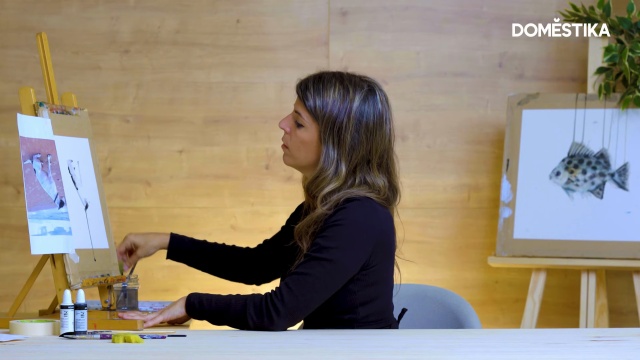
Berta Llonch is a plastic artist and illustrator specialized in watercolor, a technique that she has understood 100%: far from wanting to master it, she gives herself over to the unexpected and uses the water stain sometimes without control to her advantage.
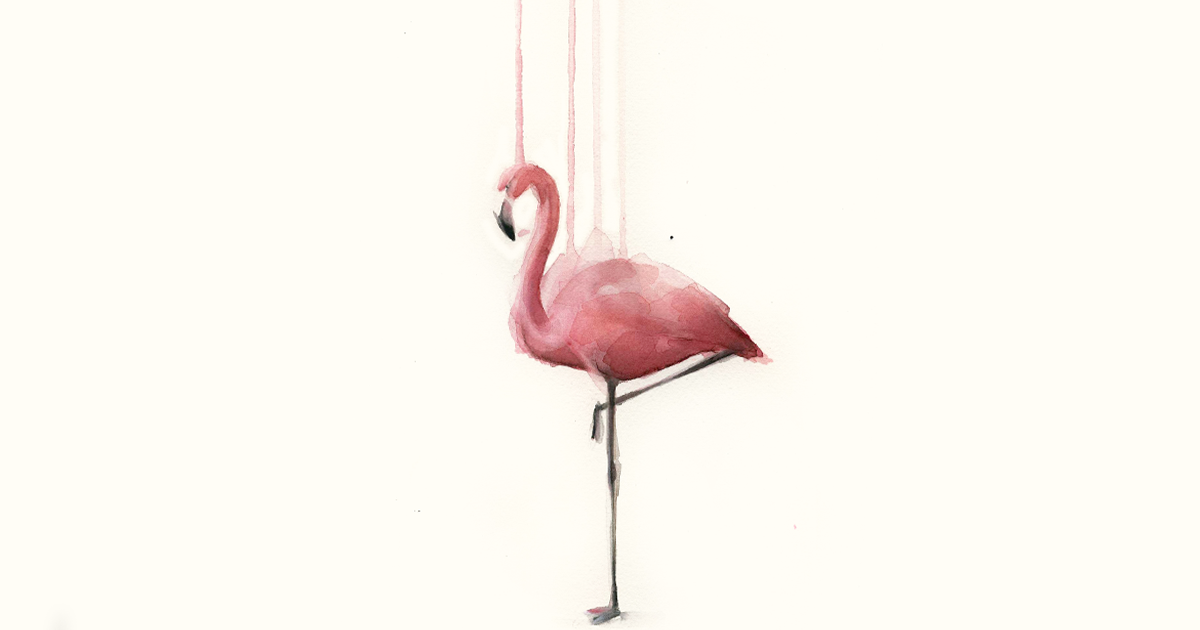
She paints her works vertically and upside down, focusing on basic shapes and proportions, and she employs alternative techniques, such as using sponges to spread paint on paper. Discover the keys to the technique in this tutorial.
To do this, you will need:
- Tube or tablet watercolor
- Black and white liquid watercolor
- Different brushes
- A piece kitchen sponge
- Fine grain watercolor paper
- A reference image
3 steps to paint with watercolor using a sponge
1. Invert the reference image and start painting it

Start working vertically. Invert the reference image so you are not looking at the entire figure itself, but only at the spots of color and shapes. Apply, with a brush, a little black paint on the parts that correspond to the darkest areas of your reference image.
2. Spread the paint with the sponge


The role of the sponge, slightly moistened, will be to spread the paint in a smooth and uniform manner, creating an effect that, rather than teaching, suggests the edges of the figure.
Don't worry if a "stubborn" drop runs down the paper. Losing control is part of the "wild" watercolor process.
3. Put the work horizontally


Alternate between brush and sponge to obtain more or less soft contours. Larger, harder brushes are best for larger areas. Use the finest and smallest ones for details – in addition to the sponge to spread the paint and blend it.
Finally, use a little white watercolor to "clean up" the parts that lack definition and give greater luminosity to certain areas.
Did you like this tutorial? You can learn with Berta Llonch to handle watercolor freely and spontaneously by painting aquatic life in her online course Illustration of marine universes in watercolor
You may also be interested in:
- What is watercolor painting and what materials do I need to start?
- 5 curiosities about watercolor
- 6 free color theory tutorials for creative projects
- 10 artists and designers in the to inspire you for your botanical watercolors
- From naturalistic drawing to narrative illustration, a course by Elizabeth Builes Carmona
- Scientific illustration of animals in watercolor, a course by Balamoc


0 comments