


Drawing Tutorial: tips to get started in urban sketching

Learn these basic tips for painting outdoors with your sketchbook, with David Morales
urban sketching consists of the practice of drawing what surrounds you, from the cities, the streets you walk or what you have eaten in that special cafeteria. David Morales (@dava22) is a Colombian architect and illustrator who uses the sketchbook to document his personal experiences, as if it were a personal diary.
In this tutorial, he teaches you the keys and tips to get started painting outdoors with your notebook. Don't miss the video below!
7 tips for drawing outdoors
Discover the keys and tips from the experts to get started in plein air painting with your notebook. Take note!
1. Find a place where there is contrast
Before starting to draw, you have to decide well what you are going to portray and where you are going to do it from. David Morales recommends that you use a place that has contrasts, whether in light, materials or both, since this will make it easier for you to bring out all the nuances of the scene.

2. The material
-Notebook with hard cover to be able to hold it better
-Pencil
- Calibrated markers of different numbers
-Folding chair

3. Start your drawing
Once you have chosen the perspective of your drawing and you have placed yourself in a place that you like, you must begin to fit the pencil lines. These lines serve as a guide, so David recommends that you make them as thin and light as possible.

You may have trouble discerning the perspective or scale size of your drawing. To avoid this, David Morales recommends that you guide yourself with the pencil to see what your scale will be like.

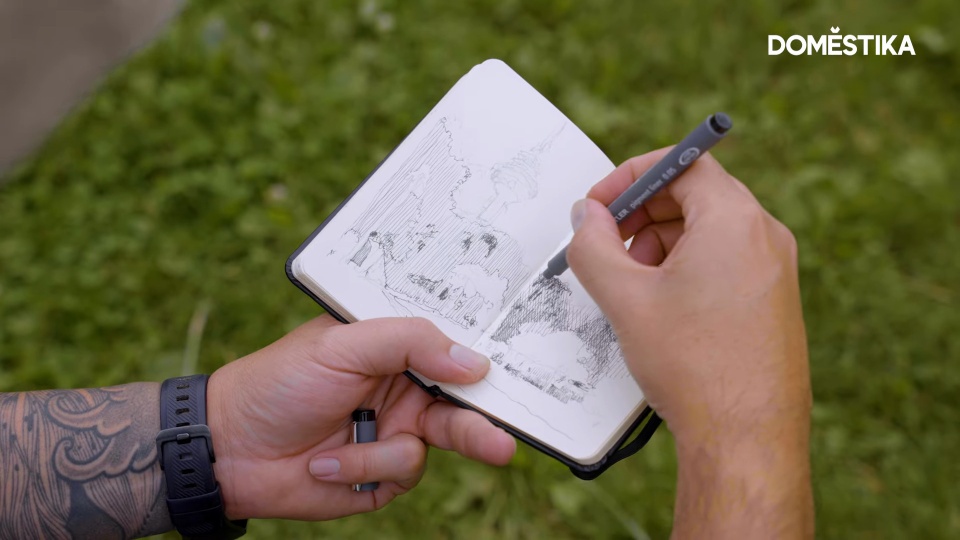
4. Continue in ink
Once we have our scene located and sketched, we will move on to inking our drawing. To do this we will take a very fine marker, 005 and we will mark the darkest points of our drawing. Hold the pen quite far from the tip, this will allow you to make longer finger lines.

5. A trick to better capture shadows
You may not know where the contrasts are or you may have trouble discerning the shadows. To avoid this, Morales uses a very simple trick that consists of taking a photo with his cell phone and changing it to black and white. This way he knows perfectly well where the lights and shadows are.

6. Works well with contrasts
To reach the darker tones we will use a thicker marker, since this way we will progress faster with it. By making the lines with the marker thicker in the same direction you can soften the thinner lines below and ensure that there are fewer jumps between the thinner lines and the following ones and your drawing will be more fluid. Add layers of patterns on top of each other, respecting the areas you want to leave blank.

7. Give the last details to your drawing
Once you have the finished drawing, it's time to give the final details. You can add a small description in which you tell what it is that you have drawn or perhaps a small anecdote, as well as the date and other details. You can also upload a photo to social networks and geolocate it, so other people can comment on the place.

Did you like this tutorial? If you want to learn from him how to use your sketchbook as a life diary and explore ink drawing with the cross-hatching technique, don't miss his online course 'Illustrated diary: fill your sketchbook with experiences'.
You may also be interested in:
-Urban sketching tutorial: using different perspective techniques
-Sketchbook tutorial: how and why to create a thumbnail sketch
-'Urban Sketching: express your world with a new perspective' , a course by Lapin


0 comments