


Illustrator tutorial: how to design a restaurant menu

Learn with Arutza Rico the basic notions of composition when designing a menu in Adobe Illustrator
Obviously, in any hospitality business, food is important... but so is everything that surrounds it. From the interior design of the establishment to the clothing of the employees, through the arrangement of the tables or the presentation of the dishes, the design helps complete the message that the kitchen wants to convey.
And, of course, the design of the menu is one of the most important legs: depending on the type of restaurant, it must follow certain guidelines. It may be more or less original, but what is certain is that it will have to adapt to the image that the business wants to convey. For this reason, Arutza Rico (@arutzarico), brand strategist, designer, illustrator and lyricist, shows you in the following tutorial how to make a restaurant menu taking advantage of Adobe Illustrator design tools:
1. Take into account the material part of the menu
First of all, we have to understand what support our design will be placed on: a paper menu with several sheets? a wooden board? another type of presentation? For example, if it is a support with a certain weight, it must be taken into account that clients may get tired of holding it for too long, so it is better not to load it with information.

2. Proposing the design in Adobe Illustrator
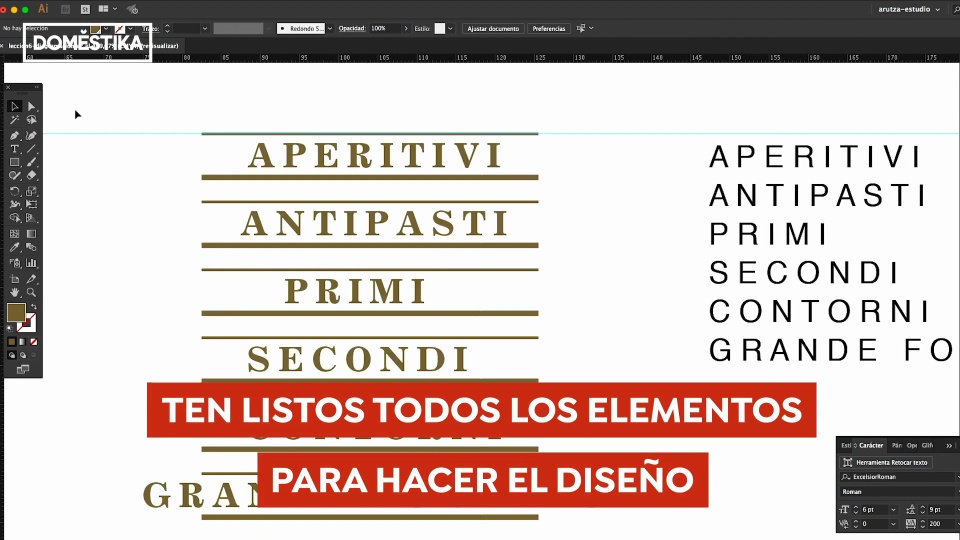
Once we understand the support, we can move on to designing the menu in Illustrator. To start, the canvas must be the same size as the physical piece where the menu will be printed or attached. If we are going to fasten it with rubber strips, staples or any type of hook, it is important to add them to the design to know in which areas we will not be able to add information, since they will be occupied by these fastening pieces.
Taking into account these limitations, and the borders of the printing format, we can create our guides and define the typographic box (the space where we will include all the menu information).

3. Adding the information
Rico recommends starting by adding the legal texts, since we can never skip them, and arranging the rest of the texts from that point. It is also interesting to do a size test (that is, test how the font we are going to use looks like in different sizes, printing it and seeing what it looks like in physical form before adding it to the menu design).
From here, we will have to add the rest of the dishes on the menu: appetizers, starters, main courses, desserts, drinks... depending on the type of restaurant and the number of dishes served, we will choose one type of placement or another. For example, with the text in the center of the letter, justified to the left, taking up more space...

4. The titles
If we want to keep the same style in all the section titles of the letter, the best thing we can do is create one and duplicate it. Thus, the style and typography will be preserved in all our titles, with the necessary formatting adaptations.
Once we have the titles ready, we add them and alternate them with the rest of the smaller texts that refer to the different dishes on the menu. Above all, it is important that you do not lose sight of the different spacings, so that everything maintains aesthetic coherence. Between each title and the plates there should always be the same one, between the margins of the texts and the margins of the printing space... and always taking into account that they are proportionate. To do this, you can use colored squares to mark each of the spaces, and remove them at the end.

If you liked this tutorial, remember that you can learn with Arutza Rico to conceptualize and develop the visual identity of a gastronomic brand in his online course 'Branding for restaurants'.
You may be interested
- Gastronomic creativity and composition of patterns, a course by Vega Hernando.
- Techniques of gastronomic advertising photography, a course by Alfonso Acedo.
- Introduction to the food styling business, a Raw Space course.
- Interior design for restaurants, a Masquespacio course.


0 comments