


Illustration Tutorial: How to Paint a Watercolor Background
Watercolor painting is an incredibly versatile medium thanks to its rich fluidity and potential for blending and layering, but it takes practice to hone the right technique. Thankfully, with the right teacher and a detailed tutorial, learning these methods is made easy.
Sarah Stokes (@sarahstokesartist) is an English watercolor artist known for her bold illustrations, and she has created compositions for bands, restaurants, breweries, and luxury cruise liners owned by P&O and Cunard. Her main inspiration comes from her love for nature and wildlife, especially those living in the woodlands surrounding her home and studio in the Worcestershire countryside.
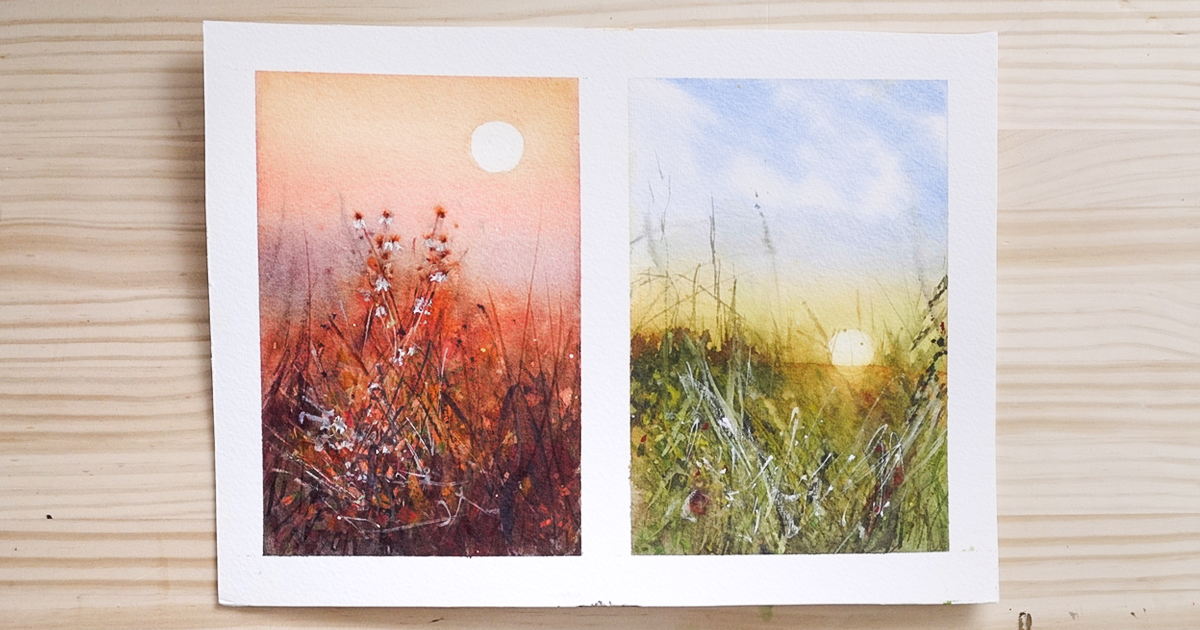
In this tutorial, Sarah teaches you how to create watercolor backgrounds for two illustrations: a sunrise and a sunset in the countryside. Sarah takes you step by step to create both compositions, and explains how to paint each layer. From blending, mixing, creating texture, and adding detail, discover how to create a beautiful watercolor background and add a new artistic skill to your creative toolkit.

How to Paint a Watercolor Background
Sarah takes you step by step to create two compositions.
1. Put masking tape on the border of your paper
Adding masking tape to the edges of your watercolor paper allows you to create a neat frame around your illustration. By protecting the edges from the paint, you are able to paint freely, and achieve a clean result when your piece is finished.

2. Apply masking fluid
This step is optional. If you want to have a sun in your background, apply masking fluid in the shape of a sun and wait until it dries. The masking fluid prevents the watercolor from being absorbed into the paper, so when you begin painting the background, this area will remain white.

3. Start from top to bottom, and lighter to darker
Using a one-inch flat brush, lay your lightest colors down at the top of your page, and as you start going down, apply the warmer and darker colors. For a daytime scene, leave gaps at the top of the page to create clouds. It's important to paint quickly, so the paint doesn’t try, and your colors can blend.

4. "Warm up” your paintbrush when switching colors
As Sarah goes from blue to yellow in her sunrise scene on the left, she “warms” her paintbrush up by applying a bit of red to the brush. This prevents the blue and yellow from combining to create green.

5. Help the page dry and remove pockets of water
By lifting the page slightly at a slanted angle, you allow the paint to flow down. Mop up any pockets of water with a dry brush, which prevents unwanted mixing between paint colors.

6. Use a drier brush for thicker details
When you are moving on to the second layer to add detail, it’s important to switch to a drier brush. Doing so allows you to apply thicker watercolor paint, which has more body and shape.

7. Splash and drag your brush
To create tall plants, use the drier brush to splash at the bottom of the page where you want your plants. Gently drag your brush upwards over the splashes of paint to spread it to your desired height.

8. Use a round brush to create hills
After the initial has dried, Sarah uses a round brush to create hills in the sunset scene. She starts with a dark purple first, then comes in with a dark orange and paints a wider range to create depth.

9. Create texture with the opposite end of the brush
When you add a layer of paint at the bottom-most part of the foreground, you can create texture by turning your brush around and dragging the brush upward. Before doing so, it’s important to allow the paint to slightly dry to a damp state.

10. Apply the detailed touches
Add pops of color with a wet brush by gently splashing it. After they dry, these splashes spread out and reassemble bursts of light.

11. Create the final layer
Once the composition is completely dry, create the final layer with darker, drier colors. Illustrate flowers or add different types of paint. Sarah uses white acrylic paint to create daisies and add extra texture.

Sarah Stokes is a celebrated watercolor artist, and her courses are among the top-rated by the community. In these online courses, she teaches everything from illustrating with charcoal and watercolors to animal portraiture. Explore her courses Artistic Watercolor Techniques for Illustrating Birds, Expressive Animal Portraits in Watercolor, Illustrating the Natural World with Watercolor and Charcoal and Artistic Charcoal Portraiture: Creating Atmosphere.
More resources to learn illustration
1. Learn how to paint a fish step by step.
2. Explore these 3 essential watercolor books to continue learning.
3. Fill your sketchbook with watercolor illustrations with this course.


2 comments
I’m always happy to see a class from Sarah. I’ve taken two of her classes and enjoyed them immensely. Can’t wait to try these!
La versión en español no funciona y no admite subtítulos. Un desastre.