


Cake Decoration Tutorial: How to Paint and Assemble a Sugar Flower
Botanical cake artist Cynthia Irani shows you how to paint and assemble your petals to make a beautiful statement flower and bud
Whether it’s roses, lilies, or tulips, handmade sugar flowers bring an elegant touch to cakes for all occasions. Floral decorations are incredibly versatile, and you can have endless fun experimenting with sizes, colors, shapes, and compositions. While it can take a little time to perfect, you too can learn to make unique designs that will wow your friends and family, or surprise a loved-one at their next birthday. All you need is a little help from an expert…
Cake artist Cynthia Irani (@cynthiairani) loves drawing inspiration from the natural world. Her cakes are a blank canvas that she turns into edible art by decorating them with beautiful floral compositions made of sugar.
In this tutorial, she takes you through the steps to create a beautiful statement flower and a bud that will make the perfect decorations for your cake.
How to Paint and Assemble Your Bud and Flower
You will need:
Petal dust in different colors (Cynthia uses peach and dusty rose)
Wire
Paint brush
White gum paste
Pre-colored gum paste (for the center of your flower)
Rolling pin
Knife
Sugar flower cutter - preferably in different sizes
Metal ball tool for cake decoration
Egg whites
Floral tape
Optional: Coloring gels (Cynthia uses the Wilton brand) and some vodka
1: Preparing Your Petals
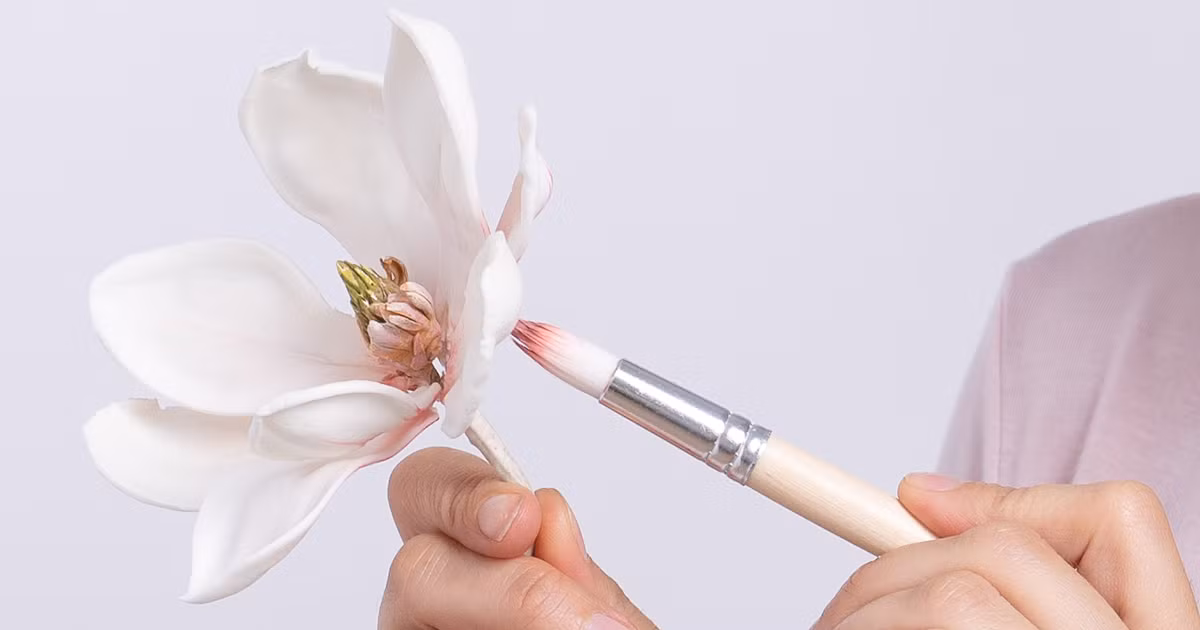
Cynthia has already prepared her first set of petals by rolling out her gum paste and using a sugar flower cutter to cut out and then wire them. She then takes each petal and begins to paint the back with some petal dust.
To do so, she mixes together the colors peach and dusty rose using a soft brush, and taps away any excess dust before applying it to the back of each petal. If you don’t have any petal dust, you can use a coloring gel instead and mix it with a little vodka.
Use gentle brushstrokes from the base of the petal upwards. The color does not have to be even, but should appear natural as it would on a real flower. You can then leave them to one side to dry while you make your bud.

2: Preparing Your Bud
Cynthia then takes another set of four pre-cut petals which she has cut using the smallest size of the sugar flower cutter. Taking her ball tool, she gently rubs the edges of each petal which will make them look more lifelike. She then takes a piece of wired gumpaste which she has made into the shape of a cone as a base to begin adding the petals.

She dips her brush into the egg white solution and paints the cone and one side of each petal. Each petal is then carefully stuck onto the cone using the side that has been painted with the egg-whites.

Overlap each petal to mimic the shape of a closed bud, pressing down each one gently but firmly, and pinching the base of each petal around the wire. When finished, Cynthia dips a clean brush into her petal dust and begins painting the outside of the bud with minimal strokes, to add a touch of color.

3: Assembling Your Flower
Now that the petal dust has dried on your flower petals, you can begin assembling the flower. Cynthia has already created the stem of the flower from a small piece of pre-colored gum paste, added scores to it with her knife, and then wired it.
She then takes her first petal and bends the wire outwards to a 90 degree angle.

She presses it to the side of the stem and uses some floral tape to wind around both wires to secure them together. Keep going in the same way to add as many petals as you like, depending on how large you want your statement flower to be.

Did you enjoy this tutorial? If you want to let your creativity blossom with botanical-inspired cake design, check out her course: “Floral Cake Design: Craft Edible Art.”
You May Also Like:
- Sugar Flowers for Cake Designs, a course by Nasima Alam
- Discover the Incredible Art of Cake Design with Julián Ángel
- Cake Design Tutorial: How to Decorate Cupcakes Like a Pro
- 10 Cake Design Accounts to Follow on Instagram


0 comments