


10 Steps to Make a Self-Portrait Collage
Follow the steps below to create a unique collage with the materials you have at home
I recently shared techniques and ideas to create collages at home with your family in a Domestika live chat. After the live chat, I received several beautiful portraits of the Domestika community.
I decided to document the process of portrait collage as a photo tutorial to share with everyone. Read on as I explain how to create a portrait and give it a personal touch step-by-step:
1) Gather all materials
We are going to use various types of paper, scissors, glue, and a mirror. We will not need pencils or markers. Best to keep them off the table.
Now we need to look at ourselves in the mirror with affection.
Remember that a self-portrait not only depicts us physically but also reveals something about us: what we feel, what we desire, what excites us and represents us.

2) Choose the papers
We need to choose the papers we are going to use, bearing two things in mind:
- They need to ‘get along.’ We need papers that are a good match.
- What these papers tell us: they say something. Papers have a voice of their own, and their own personality: they can be soft, energetic, timid, fleeting. They carry messages and clues that we need to decipher.

3) Format
Now it’s time to decide on the format: the size and the proportions of the portrait, and the paper we will use for the background.

4) Cut
We start cutting some sheets of paper freely, into different shapes.

5) Shapes
We move these shapes around, and we combine them as if they were pieces of a jigsaw to put together some parts of our portrait, and we cut off the rest.
We place the shapes on the support, without gluing them in. (I take a picture in case a gust of wind or a sneeze blows them off their placing).

6) Glue
When the most general parts–the base of the face, the hair, and the neck–are defined and assembled, we can glue them in.

7) The face
Let’s cut out the elements of the face: the eyes, the nose, the eyebrows, and the mouth.

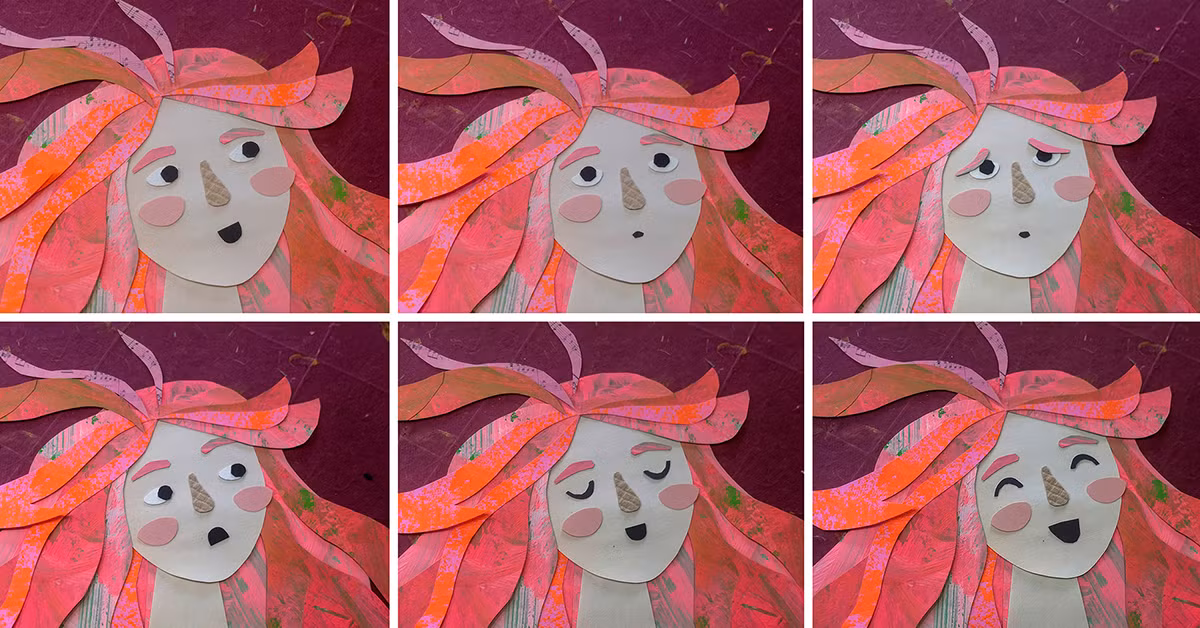
8) Expressions
Before gluing again, we are going to play with the cutouts and move them around to give our portrait different expressions. We can look in the mirror and pay attention to the position of each element in all the expressions and try to copy them. We can also work with different shapes and sizes.
When you’ve decided which expression your portrait will have, you can glue them in. I suggest using tweezers if the cuttings are tiny.

9) Details
We add the finishing touches.

10) Digitize
Digitize your portrait. You can scan it, take a picture of it, or take a selfie with your portrait so you can see the likeness.
Now share it on social media! Use the hashtag #encuentrocollage.


These are some of the portraits shared by the community:

This article was written by Natalia Spadaro, better-known as Estrellita Caracol (@estrellita_caracol). She is an Argentinian illustrator who studied graphic design and later specialized independently in illustration and collage. Her illustrations have been published in books and magazines of various publishers. To learn more about her, enroll in her course Story Illustration with Paper.
You may be interested in:
- Four initiatives to Get Your Creative Juices Flowing.
- Drawing and Creativity for Big Little Artists, a course by Puño.
- Stamping Techniques for Children.


0 comentarios