Interior Design for Public Spaces
Course final project
A course by Juan Luis Medina , Interior Designer


About the final project for: Interior Design for Public Spaces
How to define a style in interior design according to the client
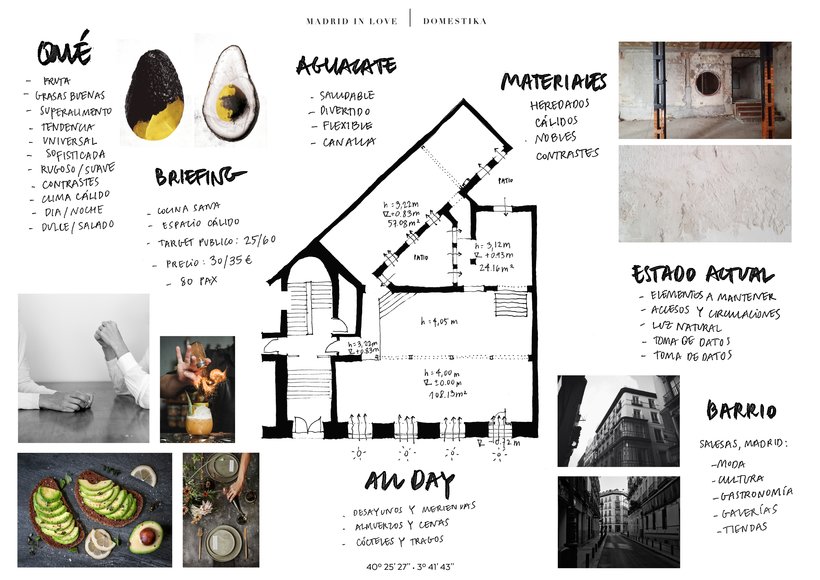
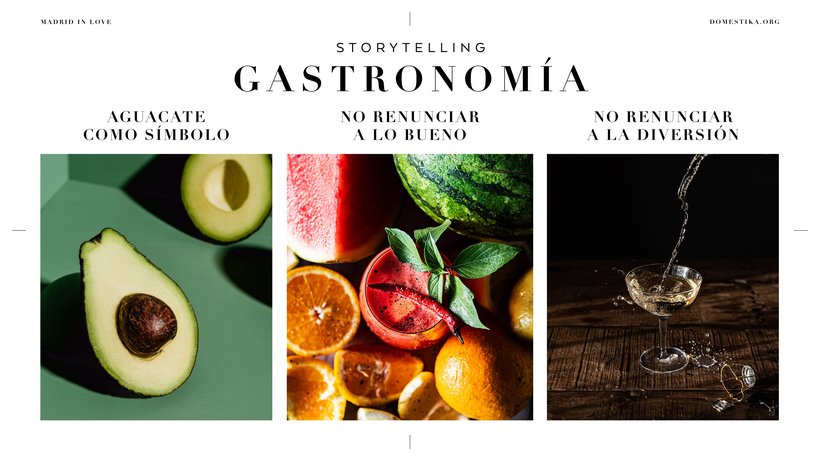
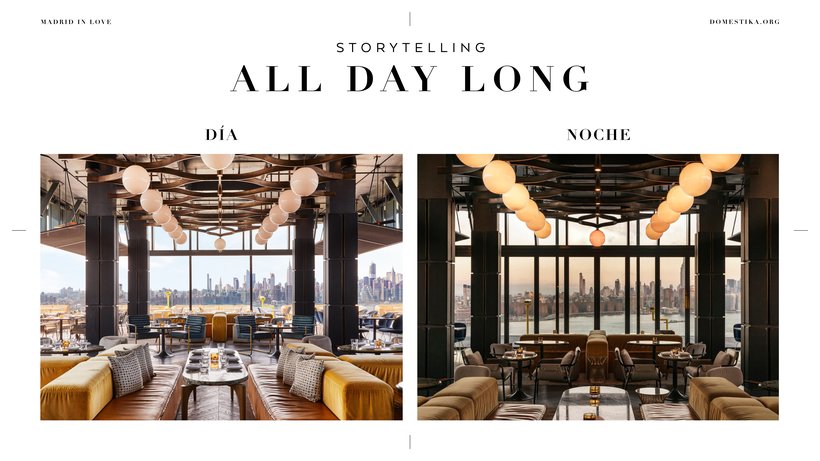
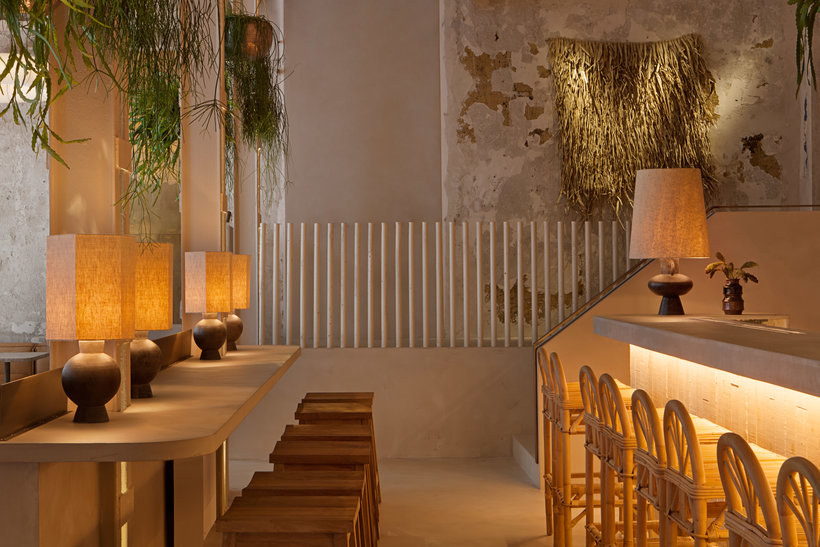
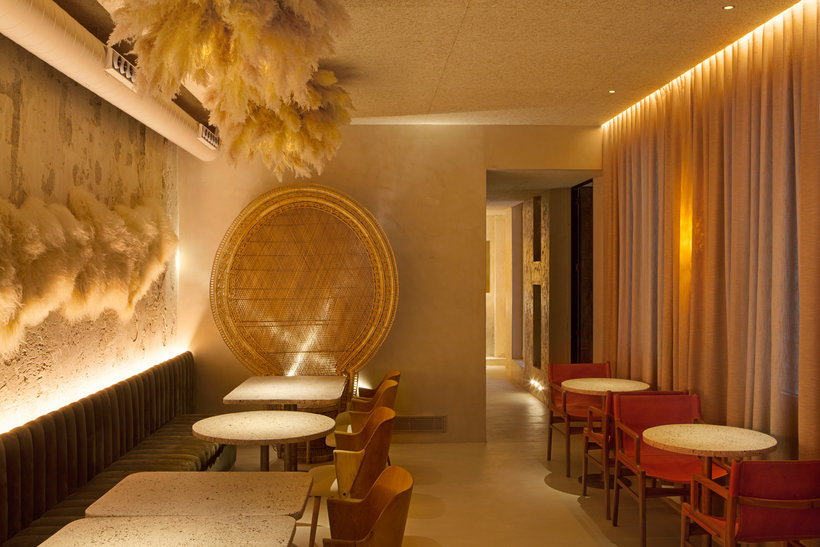
“Now that you have learned to do a good preliminary analysis of the project and to make a good first approximation that allows you to design a public space with a relevant user experience, you are ready to apply everything you have learned in your own public space project. I have shown you the development of the Aüakt project, which we have been seeing during the course, this can serve as a guide or inspiration, but I recommend that you design a different space to let your creativity fly. Next, we are going to review the key phases of the project. It would be great if you showed me one or more images of each phase and added a brief explanation about what you have done in each one. Analysis and research The first thing we do is investigate the client, we must find as much information as possible, not only to know him well, but to use it to our advantage and to be able to empathize with him from the beginning. Then, with the help of the client, we define the end user, the one who will inhabit and enjoy the space. The more defined it is, the more certain the direction of the project will be; your age, your purchasing power, where you like to travel, where you usually go out, what kind of places you like, what are your interests, etc. All information that may be useful in the development of your project is welcome! Then, you have to analyze the briefing of the client, its brand, its values and its objectives regarding the project and the space. First, we understand why the client has chosen it and, later, we analyze with the eye of designers, putting in value everything that is relevant in the space and making a study that allows us to know it perfectly. To finish the analysis phase, we build a conceptual map with all the information obtained in the investigation. When you do it, order, prioritize and hang it in a place that will be visible throughout the development of the project. Here I share an image of the mood board that we have made. Remember that in Unit 2 I left you the briefing of the client and the photos of the premises before our intervention.


Partial transcription of the video
“Final project We have reached the end of this Domestika course, But before we say goodbye, we will review everything we have learned. I explained to you the importance of defining a concept and generate a good user experience to be successful. Then we learned to analyze the customer and the users of the premises. I taught you to interpret a brief, we analyze the space of the intervention and we group that information to create the mood board of the project. Then we include the emotional elements in the design and we define the story that we would tell. We create the user experience, we sele...”
This transcript is automatically generated, so it may contain mistakes.
Course summary for: Interior Design for Public Spaces
-
Category
Architecture & Spaces -
Areas
Interior Architecture, Interior Decoration, Interior Design, Retail Design, Spatial Design

Juan Luis Medina
A course by Juan Luis Medina
Juan Luis Medina studied image and sound and then specialized as a photographer and artistic director in his hometown of Alicante before begining his career as an interior designer. His work combines visual references from cinema, art, set design, and architecture with icons such as Oscar Niemeyer, Cesar Manri, and Axel Vervoordt.
After studying interior architecture at the IADE and working at various studios, in 2011 he founded Madrid in Love alongside Naroa Quirós. As Creative Director of Madrid in Love, and with 10 years' experience and 150 design projects under his belt, he has appeared on the AD100 list for two consecutive years. This list recognizes the most influential interior designers and architects of the moment.
- 100% positive reviews (40)
- 1,767 students
- 15 lessons (1h 20m)
- 18 additional resources (5 files)
- Online and at your own pace
- Available on the app
- Audio: Spanish
- Spanish · English · Portuguese · German · French · Italian · Polish · Dutch · Turkish · Romanian · Indonesian
- Level: Beginner
- Unlimited access forever
Category
Areas

