


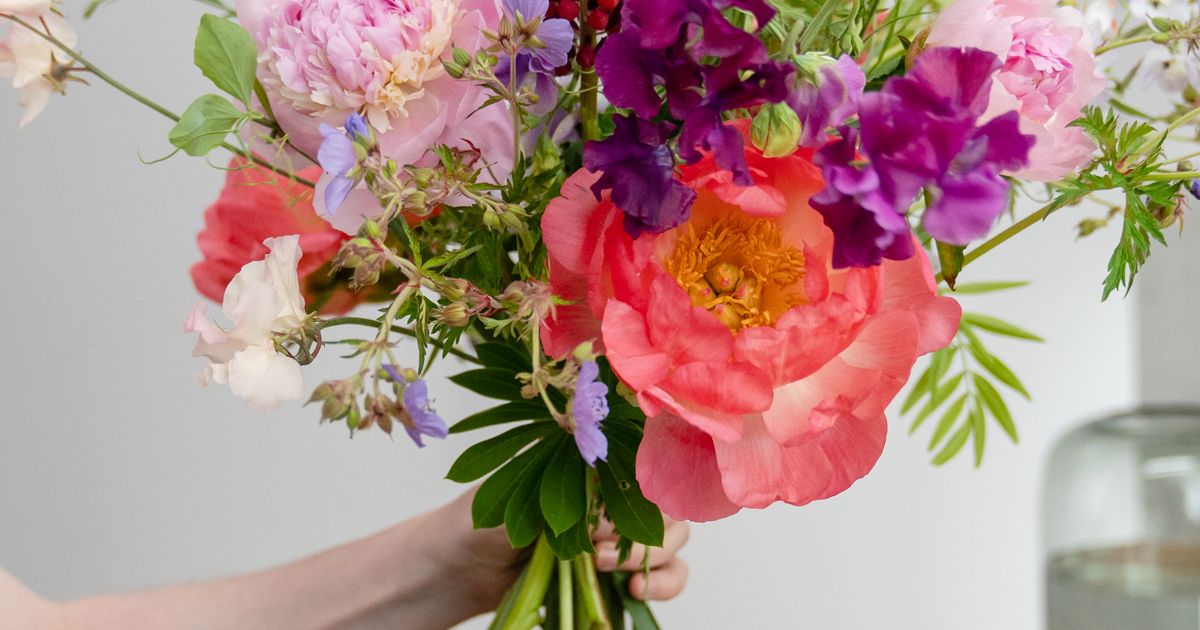
Flower Arrangement Tutorial: How to Make a Hand Tied Bouquet
Discover the techniques flower arrangers use to create an abundant-looking, bouncy bouquet, with Bloom and Burn
No matter how nice your choice of flowers are, putting them together into a well-constructed bouquet requires a bit of knowhow.
Graeme Corbett (@bloomburn) is a florist and business owner whose flower styling brand Bloom and Burn was born from the kitchen table of his North London flat seven years ago. Since then, Graeme’s contemporary, seasonal and natural floral compositions have attracted the likes of Jamie Oliver and The Voice UK.
In this tutorial, Graeme will show you how to build a show-stopper bouquet and tie it together with paper and twine. Watch the video to find out how!

How to make a hand tied bouquet
What you will need:
-Twine
-Scissors
-Selection of flowers
-Large sheets of tissue paper or brown paper
1. Pick your flowers
Choose your flowers. Every good bunch of flowers should include the “stars” - that is, the eye-catching flowers - and the “fillers” - which are the “supporting” flowers and foliage. Add texture to your arrangement by choosing foliage in a variety of widths and heights.

2. Build your bouquet
Snip off a piece of twine and hang it around your neck. Begin with one stem, and hold it at your “binding point” - the point where you want all the stems to cross. Add your next stem, cross over the binding point, and twist the bunch. Repeat this with every new stem you add to the bouquet. As you’re adding the flowers, think about the balance, height, and width of the bouquet.

3. Adjust your bouquet
Snip off any foliage that you feel gets in the way of the design. If gaps appear in the bouquet, gently push stems into the binding point from above and relax your hand slightly. Begin pulling certain stems up or down depending on the bouquet height and texture you want to achieve. A great tip is to create your bunch in front of a mirror; that way, you gain a larger overall perspective of the bunch of flowers as it develops.

4. Tie the flowers together
Lay your bunch down on a surface, and without letting go, use your other hand to wrap the twine around the binding point. Wrap it around a few times - not too tightly - and finally secure it with a double knot.

5. Trim your stems
Level your stems out by cutting one stem to the length you desire, then cutting the rest to the same length. Make sure to cut the stems at a 45° angle; this will enable them to drink more water when you eventually place them in a vase.

6. Wrap your bouquet
Cut your piece of twine and put it somewhere within reach. Use tissue paper and brown paper and fold each sheet in half at a slight angle. Start wrapping each sheet around the bouquet, holding the sheets together around the binding point and making sure the peaks of the paper overlap as symmetrically as possible. Once you’ve covered the entire bunch, tie the paper together with your piece of twine.

Did you enjoy this tutorial? If you want to put your green fingers to work and create a show-stopping bunch, then check out Bloom and Burn’s online Domestika course, Floral Arrangement Design with Seasonal Blooms.
You may also like:
- What is Floral Design and What are the Basic Techniques
- Stamping Tutorial: How to Create Homemade Stamps with Potatoes
- 10 Online Floral Design Courses to Try at Home
- Centerpiece Design with Dried and Preserved Flowers, a course by Violeta Gladstone


0 comments