


What Is a Foundation Stitch and How’s It Used in Embroidery?
Learn how you can use foundation stitches to protect your embroidery on paper projects
Understanding how to create a foundation stitch is an essential technique for embroidery on paper—a little-known technique that's full of creative possibilities.
While needles and thread are obvious resources for this type of embroidery, arguably the most important element is the paper. More delicate than textile fibers that are often used for embroidery, paper requires extreme care, which is why foundation stitches are essential for protecting the paper and ensuring the quality of the embroidery.

An expert at her craft, Mexican textile artist, researcher, and teacher, Gimena Romeno (@gimenaromero) specializes in experimental embroidery techniques using paper; her pieces have featured in collections at high-profile venues like New York's MoMA and the Bank of Mexico.
Sharing her knowledge built up over ten years of researching and practicing artistic embroidery, in this article, she explains how a foundation stitch can help protect your projects. She also shares essential embroidery materials and various ways to apply foundation stitches using her own as examples. Finally, discover the works of other creative experts in this discipline.
Why do you need to use a foundation stitch?
An accessible craft that allows you to let your creativity run wild, embroidery as a form of expression is present in countless cultures, from East to West. If you like to create with your hands, there are all kinds of opportunities to explore in this craft: transferring photographs on fabric, combining threads with paint, and embroidering in relief. It's a fantastic craft for experimenting.

The key to Gimena's experimental embroidery is the combination of various techniques and textures. When she first started practicing embroidery on paper, she realized that when she pierced the material with the needle, it shifted to one side, making the process more difficult. Plus, as she continued piercing the paper, the more damaged it got.
As such, Gimena concluded that she needed a type of stitch that stabilized the material and ensured an optimal finish: "It started when I began embroidering on paper: I needed to find a way to embroider without damaging the support material, especially as I also work with different types of paper."
This is why she devised a collection of so-called foundation stitches that she applies in her embroidery projects. The key is to integrate them into your piece, combining them with other stitches, to achieve high-quality results.

Foundation means origin, support, or base. As such, a foundation stitch is one that forms the base. These stitches work well on their own or as a starting point to build upon for more elaborate decorative stitches without damaging your material.

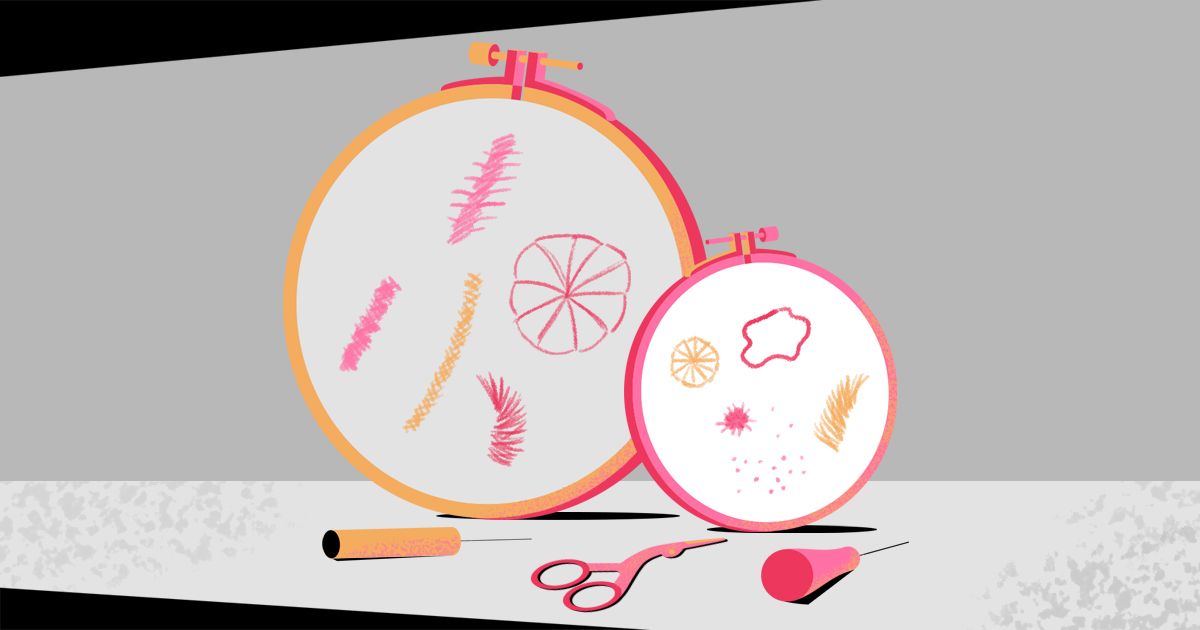
What materials and tools do you need to embroider foundation stitches?
Gimena recommends the following essentials:
- Thread
Ideally cotton perle, available in different thicknesses and characterized by its shiny and polished finish.
- Paper yarn
You can buy specialist yarn in a store, although it's a bit more expensive (in her course, Gimena explains how to make your own thread).
- Needles
Preferably a needle with a large eyelet (for easier threading) and a blunt tip.
-Embroidery scissors
For better results, you want a pair with a pointed end; they're also used for unpicking and for finishing touches.
- Punch needle
This is the tool with which you punch on paper. There are different types with different uses. For example, the braille punch (the red one in the image) is blunt as it’s not used to perforate the paper but to mark it by pressing. The idea is to combine them according to your needs and not be too harsh on paper.

- Hoop
This keeps the working surface tight, which in turn also creates tension so that your stitches are taut. You can also use the hoop as a decorative frame to hang your embroidered projects.
- Paper
This technique allows you to experiment with (and reuse!) papers of all kinds that you have around the home.
However, not all paper is suitable. Scrap paper, for example, is often full of scribbles, patterns, and text—adding embroidery to the piece might be too visually busy.
In general, Gimena recommends thick, non-handmade paper without too much texture, such as Guarro Super Alfa 450g paper and Arches paper.

What types of foundation stitches are there?
Over the years, Gimena has developed a few different kinds of foundation stitches. Here, she shares some simple styles (each demonstrated in the pictures).
- Palestrina stitch
This is a linear stitch with a raised texture that can quite be decorative. It's first sketched with a pencil and then embroidered. Gimena notes that when embroidering this stitch, it's important to remember the direction of the stitches: work from top to bottom and then across.

- Pinwheel stitch
Named for its resemblance to a pinwheel toy in motion, for this stitch you start by drawing an asterisk on your paper. Then, you can begin to thread, building the bulk of the embroidery on this asterisk. Once the lines of the asterisk or foundation are covered using thread, you can fill in the center with another material such as wool. It's a nice chance to play with size and color to achieve different results.

Mill stitch
Like the pinwheel, the name of this stitch comes from its resemblance to a windmill. Just as with the pinwheel, the center is pierced with a slightly larger hole allowing more threads to pass through it. You can trace the circumference and mark on the stitches you want. Keep in mind that the more stitches you place around the rim, the fuller it will look.

Paper embroidery tips and inspiration
If you like decorative arts, playing with paper textures, and combining colorful threads, get inspired by taking a look at some of Gimena's works below. For her, embroidery on paper is a way of communicating through memories and personal moments. Her passion is to create images that evoke feelings and emotions.
The images pictured below come from Gimena's Mujeres Divinas (Divine Women) series that features photographic slides, engravings, graphite, and colors. Using only two sheets of simple paper as her backdrop, look at the way she's added various layers to complete the works:

In the following project, Gimena created her own paper thread (a technique she covers in her course). In her compositions, she aims to maximize the potential of all her materials so that each one can tell a story.

Adding quotes or phrases from books or diaries as well as photographs can inject a more personal feel, or even sentimental value, into a piece. Experiment with a variety of paper types in different formats and designs for a richer result, like in this piece pictured below:

To add even more textures, you can also experiment by encasing the paper in a material like glass, or you can add volume with other objects such as small photo frames. Once you have embroidered your piece, Gimena recommends playing around with the composition. One simple option is to glue it to an MDF board.

More inspirational paper embroidery artists
Discover three moreembroidery artists who explore novel themes using thread and paper, and take your own work to the next level...
Karen Barbé
Karen Barbé (@karenbarbe) is a Chilean designer and textile artist with more than a decade of experience in embroidery. The author of the book Colour Confident Stitching, her main source of inspiration and experimentation is color. At Domestika she teaches the course Color Theory for Textile Projects.

Liz Sofield
Liz Sofield (@liz.sofield.artist) is a textile, paper, and ceramic artist originally from New Zealand and based in Australia. Her hand-embroidered paper models revisit traditional origami techniques and play with light and shadow. Explaining her style, she says: "I like to question the boundaries where craft and art intersect and test the interpretation of domestic craft in a contemporary way."

Emily Barletta
Emily Barletta (@emily_barletta) is a New York-based artist whose works have been exhibited in several galleries. She's known for experimenting with embroidery on different surfaces, combining polaroid pictures and thread for her signature style.

If you want to learn more about embroidery on paper and how to craft foundation stitches, check out textile artist Gimena Romero's Domestika course, Experimental Embroidery Techniques on Paper. It's an excellent way to learn techniques to carefully work and experiment with paper, textures, images, threads, and embroidery stitches.
English version by @acesarato.
You may also like:
- Embroidery Tutorial: The Basic Stitches for Beginners
- 12 Online Upcycling Courses for Getting Creative at Home
- Embroidery Tutorial: How to Prepare Your Hoop Step-By-Step
- Embroidered Hand Lettering: Create Wearable Art, course by Ciara
- Hand Embroidery for Clothing: Stitch a Collage Design, course by Damaja


0 comments