


Lettering Tutorial: How to Draw Spooky Letters

Learn how to draw spooky letters with typography artist and illustrator Adam Hayes
Clever typography can communicate far more than just words, and there's no clearer example than the work of typography artist and illustrator Adam Hayes (@mrahayes). Merging his passion for typography and illustration to create fun, concept-driven lettering which is playful and full of character, his work spans the design, publishing, and advertising industries, and his clients include Apple, Facebook, Google, and Honda.
Halloween offers a great opportunity to add some extra character to your usual creative style. In this tutorial, Adam demonstrates how to create spooky Halloween letters to add a creative twist to your typography.
1. Draw guidelines with a ruler
Before you start drawing out your letters, it’s good to think about what size they need to be and draw guidelines. These will allow for even spacing between your letters and a straight line, if that’s what you want. Lightly draw these with a pencil since you will be erasing them later in the process.

2. Sketch out your letters in pencil
Now that you’ve mapped out where your letters will go, it’s time to draw them. You don’t need to think too much about the style or features on each letter yet, as these will be added in later. For now, simply focus on getting the basic letter shapes down.

3. Use a pen to draw over your letters
Now the fun begins: it's time to add shape and style to your letters. Use the basic pencil sketches you created as a base shape, but extend beyond them to add fun and spooky features. They could be dripping letter shapes covered in slime, slanted and shocked looking letters, or ghostly wobbly lines. Use this as an opportunity to experiment and add the personality that will help your letters stand out.

4. Add details and character
The letters are really starting to look spooky now, but you can add more character with further details such as small illustrations, perhaps spooky eyes or little spiders and cobwebs. Be imaginative and have fun.

5. Erase your pencil lines
You’ve got your letters drawn in pen now, so there’s no need to keep your guidelines or original pencil sketch. This is the part where you thank yourself for drawing these elements in lightly!

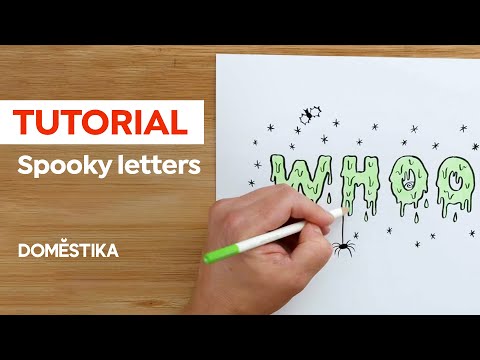
6. Bring it to life with color
Time to make your letters pop! Use gruesome greens, moody blacks, and pumpkin orange tones to make your letters stand out and look super spooky. You can use pencils here, like Adam has, to build up shade and tone, or opt for bright and heavy pen marks to add impact.

If you'd like to learn more about developing a playful and creative sketchbook for your lettering projects, make sure you check out Adam Hayes's upcoming online course with Domestika.
You may also like:
- Sketchnoting 101: Drawing as a Communication Tool
- Creative Doodling and Hand-Lettering for Beginners
- Graffiti-Style Lettering


0 comments