


Arabic Calligraphy Tutorial: Basics for Beginners
Learn step-by-step the basics for writing in this ancient Arabic script style, with Joumana Medlej
Born during the Islamic Golden Age, Kufic script is the earliest invented style of Arabic calligraphy and is prized for its beautiful compositions and the harmony of its lines and forms.
Calligraphy artist Joumana Medlej (@majnouna) helps keep this ancient practice alive by sharing the often meditative process for creating these characters.
In this tutorial she shows you how you can begin making the basic shapes you’ll need to start building letters and words. She also shares tips for how to warm up your hand, and advises against common mistakes.

Materials Needed for Arabic Calligraphy
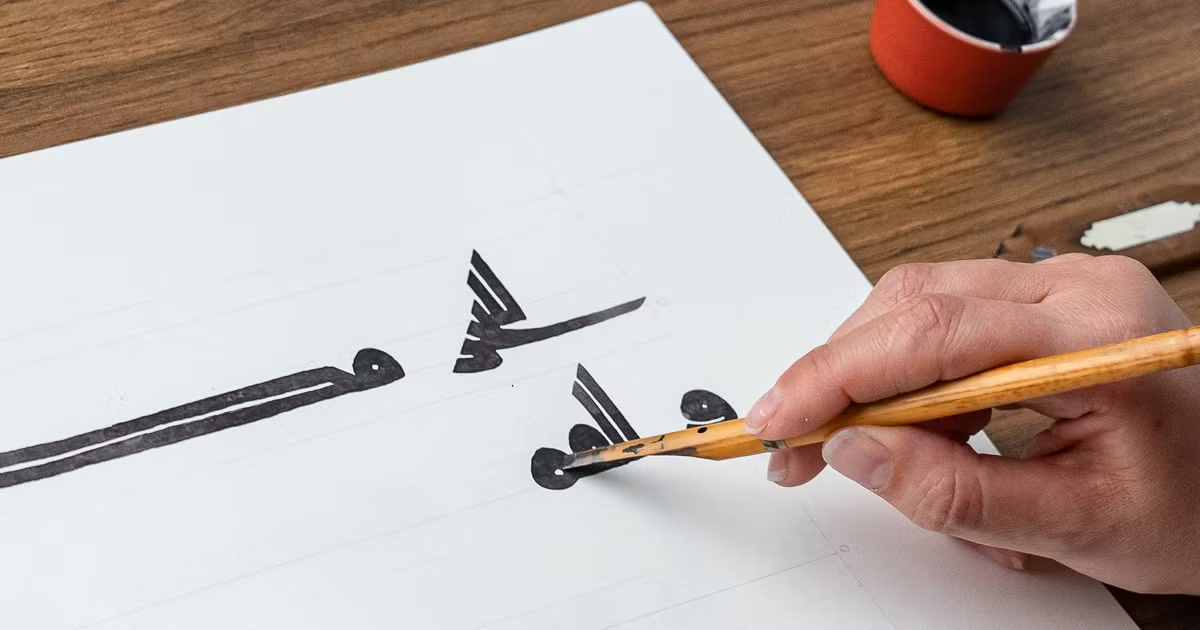
Pen
There are many types of pens you can use, Medlej recommends using a square cut bamboo pen if you’re right handed, or an oblique cut bamboo pen if you’re left handed. You can also use a metal pen if the tip is thick enough.
Ink
Traditionally Kufic script is made using gallnut ink, made from gallnuts, which are full of tannin, that are ground down and mixed with iron salt. It is waterproof once dry and while it can take a bit of time to master, is recommended since it encourages you to practice good habits from the start. You can also use any other type of black ink.
Paper
Kufic script is not a style you can work in a small format, so it’s best to use an A3 sheet of paper. It’s important that the surface of the paper be very smooth. To help with creating balanced and even shapes, you can use a ruler and pencil to make guide marks.
The 5 Basic Shapes Needed to Write in Arabic Calligraphy
Vertical Stroke
Pulling your pen downwards, you can create a straight vertical stroke. This shape can be used in a long or shorter version, depending on the characters you combine it with.

Horizontal Stroke
Pull your pen from left to right to create a horizontal stroke.

Oblique Stroke
Pull your pen down at an angle so that it gently curves, ending in a horizontal stroke that sits above the line of your paper.

Circle
Use two strokes to form your circle, almost as if you were drawing rounded parentheses pushed together. You can then add ink to the places where they join to make the transition look smoother.

Returning Tail
Create a line that looks like a tilde (~), then from the left side extend it into a downward curve.

Basic Arabic Calligraphy Warmup
The aleph is the first letter in Kufic script and is often used as a warm up that beyond helping you gain confidence can also serve as a form of meditation.
To make an aleph, create a vertical stroke and then gently curve it to the right.
As you practice, keep these tips in mind:
Move Your Hand
One common mistake is just to move your fingers while creating a character, but if you move your hand and wrist you’ll be able to achieve much more fluid lines.
Make Smooth Transitions
Try to avoid making your curve too sharp, since it disrupts the harmony of the letter. Instead, slowly pull and carry the pen so that it creates a smooth and natural looking curve.

Pay Attention to Pressure
As you come to the end of the aleph, you want your line to get thinner so pay attention to where you are in the letter and begin lifting pressure off your pen accordingly.
Work from Right to Left
In Arabic calligraphy, text is written from right to left, so as you’re practicing make sure to write in that direction.
Go Over Your Strokes
Because a pen can’t hold much ink, to create solid, dark lines you will need to re-dip it frequently so that you can go over and fill in your strokes.

If you want to learn more about this ancient form of Arabic calligraphy and how to write short texts using traditional artistic practices, check out Joumana Medlej's online course Arabic Calligraphy: Learn Kufic Script.
You may also like:
- 6 Free Tutorials: Lettering and Calligraphy for Beginners
- Lettering, Calligraphy, and Typography: Do You Know the Differences?
- Why Is Calligraphy So Good for Your Brain?
- Shodo: Introduction to Japanese Calligraphy
- Uncial Calligraphy for Beginners


2 comments
thats so nice :D
This is fascinating. I'm just wondering wether your longer course explains variations for left handed writers?