


DIY Tutorial: How to Create Bookmarks With Pressed Flowers

Learn to create handmade bookmarks using pressed flowers with Happy Green Family
Do you painstakingly fold the corner of the page in your book to remember where you stopped reading, or are you someone who uses a bookmark? If you’re in the second category, you might use a little piece of paper, a receipt or the ticket to the last gig you attended. But there’s a simple, pretty and affordable way to create your own bookmarks out of pressed flowers.
Camila Hurtado is the founder of creative botanical lab: @Happy_Green_Family. She has many years’ experience applying botany to publishing, collage, jewellery and a range of DIY projects. In this tutorial, she teaches you how to create bookmarks with pressed flowers.
Watch this video:
Create a Bookmark in 4 Easy Steps
1. Select Your Materials
Research the design you’d like to create. You can select the right materials when you know what you’re looking for. Happy Green Family suggests a range of elements you can use to create your bookmark, but in the end it’s simply a matter of being creative.
Materials:
- Sheets of paper or card in a variety of thicknesses, textures and colors for the base.
- Pressed flowers and leaves.
- Liquid silicone and double-sided sticky tape.
- A sheet of thick acetate to protect your design.
- Printed quotes, plants and animals or pages from old books to cut out and decorate your design.
- Embroidery thread or string and a hole punch.

2. Prepare your composition
Cut a piece of card into a bookmark shape. Here, Happy Green Family used a piece of black card. Once you know what you want to make, lay out your composition on top of your base. You can cut a page out of an old book and place it over your card to reveal a half black / half printed design. Remember you’re using a vertical format, so you need to adapt your composition accordingly. Then attach your page to the card using the double-sided sticky tape. It’s best not to use silicone or glue as the page can wrinkle.

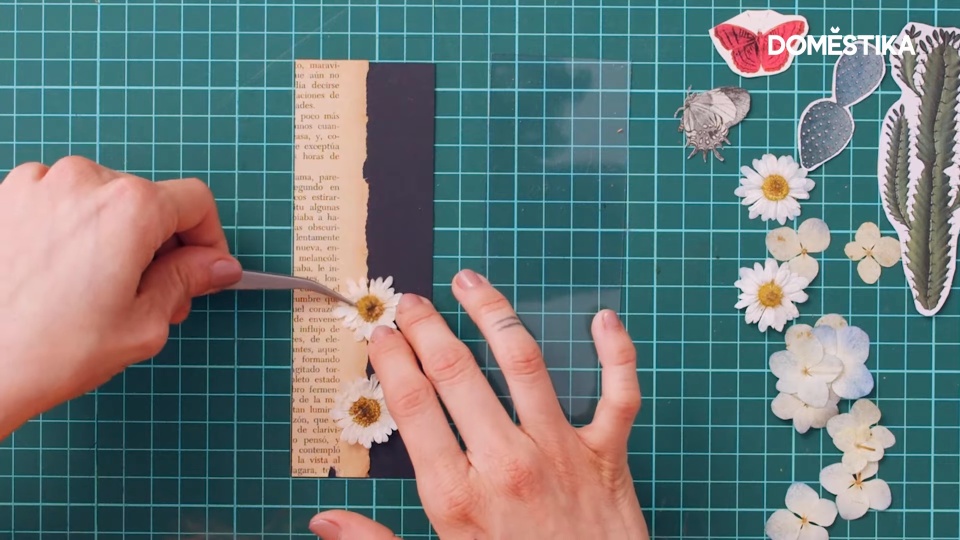
3. Select and attach your flowers
Choose the best flowers for your design. In the video, Happy Green Family picked a few daisies. Use tweezers, as this will make it easier to position them. Glue them down with a little spot of liquid silicone.

4. Protect your bookmark with acetate
Now you’ve created your design, it’s time to finish your bookmark by covering it with a layer of acetate. Place the acetate on top of your base and make a hole in one of the top corners using your hole punch. Then pass your string, thread or ribbon through the hole and tie with a little knot or a bow. Don’t forget to clean your acetate before placing it onto the card, as it tends to gather dust.

Like this tutorial? If you’d like to learn how to preserve and press plants to create unique botanical art compositions, don’t miss Happy Green Family’s online tutorial: Basic Botanical Pressing Techniques.
You may be interested in:
- Botanical Printing on Fabric and Paper, with Anabel Torres.
- Design and Creation of Floral Compositions.
- Design and Creation of Botanical Compositions.


0 comments