Photoshop Tutorial: How to Quickly Add Shadows and Highlights
Learn how to add rough shadows and highlights using the lasso tool, brush, and smudge tool with Karmen Loh
Adobe Photoshop is one of the leading programs for digital illustration and photo manipulation, and knowing how to use it can expand the possibilities that you can explore in your creative work.
In this tutorial, Karmen Loh (aka @bearbrickjia), demonstrates how you can use just a few simple Photoshop tools to create greater depth in your portraits by adding shadows and highlights.
Find out more in the video below:
1. Find an image reference
You can either create a drawing based on a reference photograph—look for one where the person is in a similar position with the same light source that you'd like to replicate. Open your image reference and your drawing side by side in Photoshop. You'll use this as your guide when determining what parts of your portrait will receive shadows and highlights.
2. Set up your interface
On the left-hand side of your screen you should see the Photoshop toolbar, and on the right there should be three menus open: Color, Adjustments, and Layers. If you don't see these menus, go to "Window" in your top toolbar and select them, and if you don't see your HSB sliders in the color menu, click on the upper right corner of the menu to find and select them.
3. Work in layers
Separate the hair, skin, and clothing into different layers, and pixel lock each. This means that you'll only be able to paint opaquely over the base color.
4. Block out the shadow
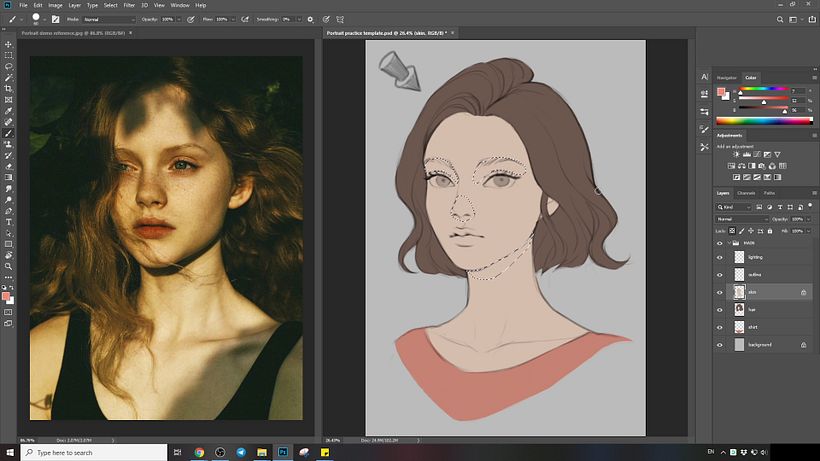
Starting with the skin layer, use the Lasso Tool and make sure the Add to Selection mode is on, which will allow you to make multiple selections. Use this to select the main shadow areas (for example, underneath the neck and below the brows).
5. Pick the shadow color
To create a shadow color, color-pick the base skin color and then use your HSB sliders to increase the saturation and decrease the brightness.
6. Fill in the shadow
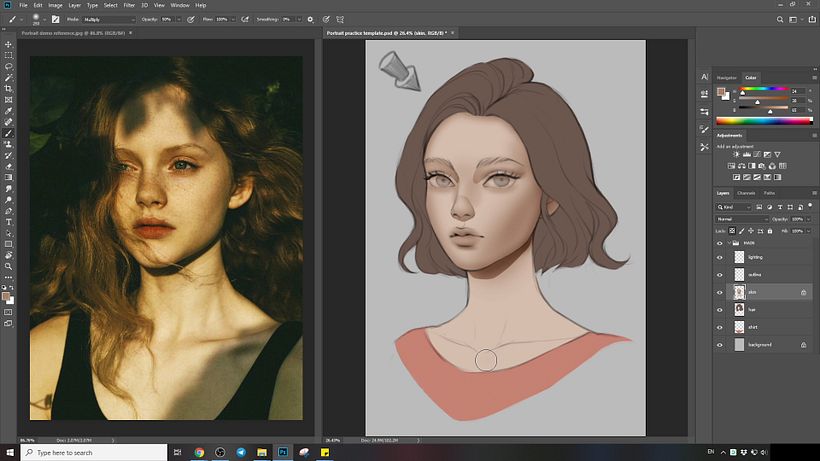
Select a soft round brush and make sure that the brush mode is set to Multiply. Set the opacity to 50% by pressing 5 on your keyboard. At this stage, remember that it's important to use a large brush and paint without zooming in so that you don't overdo the details.
Now it's time to fill in the areas you previously selected. Once you've finished, you can deselect your selection by pressing Ctrl+D on your keyboard.
7. Add rough shadows
Using your reference image, add rough shadows to the rest of the skin, using a soft brush and adjusting the size accordingly depending on the area you're working on.
8. Repeat process for hair and clothing
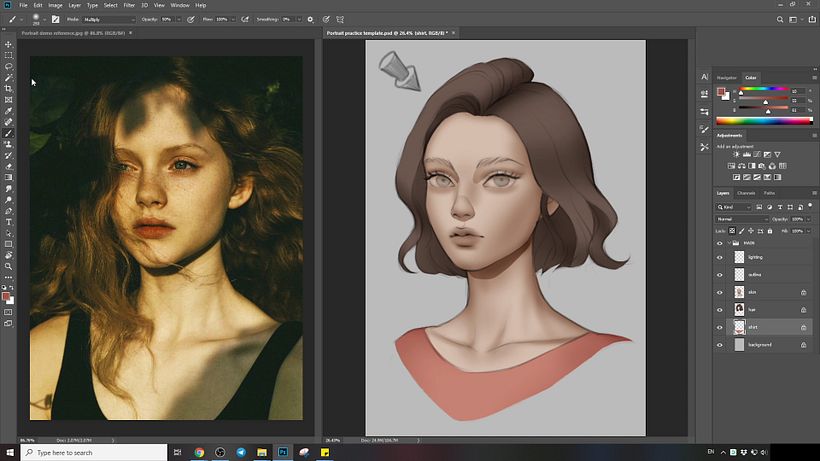
Repeat the process for each section, making sure to do it in the corresponding layer.
9. Blend
Now you'll return to each layer to blend out the hard edges that were created by using the Lasso tool. To do that, select a soft smudge tool and set the strength to 40%. You can slightly zoom in, but don't overdo your blending, just a little bit is enough.
10. Apply highlights
Add highlights in each corresponding layer. To create the highlight color, color-pick the original base color, and use your HSB sliders to increase the brightness. Using the soft brush, increase the brush size, set the brush mode to Overlay, and set the opacity to around fifty percent. Use your reference image as a guide.
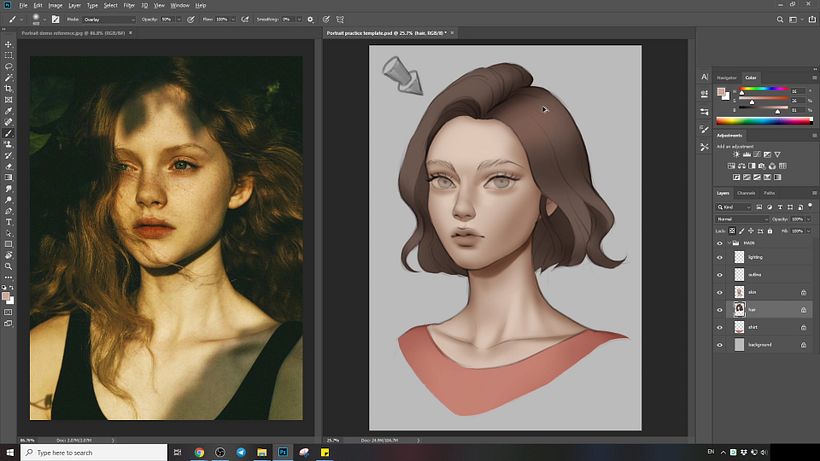
11. Final tip: keep an eye on highlight color
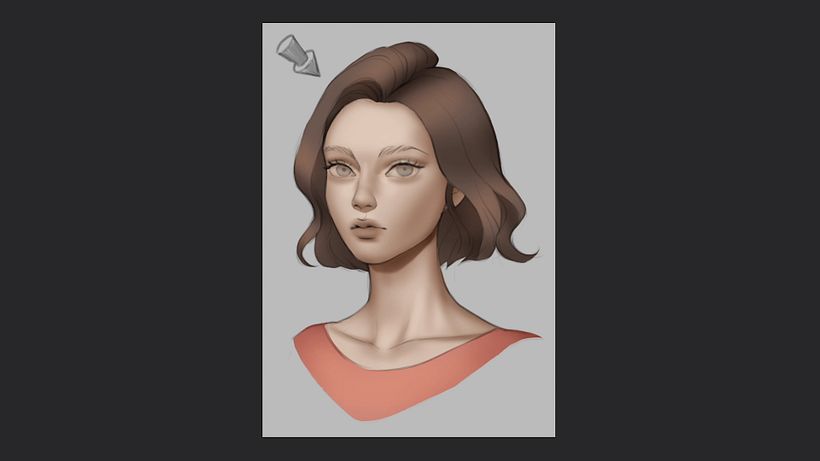
Sometimes when adding highlights, the resulting color might not look how you want it to — for instance, your hair highlights might come out too yellow or red. If this happens, simply use the HSB sliders to adjust the hue until you find a highlight that you're happy with.
If you liked this tutorial, you can learn more about creating portraits in Photoshop by checking out Karmen Loh's online course, Digital Fantasy Portraits with Photoshop.
You may also like:
- Digital Painting for Characters: Color and Light, a course by Joel Santana
- Composition and Color for Creative Illustration, a course by Marcos Chin
- Adobe Photoshop for Illustration, 6 courses by Gemma Román
- Adobe Photoshop for Retouching Portraits, 5 courses by Iris Encina




1 comment
davismiller846
Thanks for sharing Adding Shadows and Highlights to Your Portrait tips.