


DIY Tutorial: How to Design Your Own Desk
Learn to sketch a DIY furniture design freehand to make the perfect workspace with Gema Casada Olea, founder of El Tarro de Ideas
A workspace that let's us work comfortably is essential to letting our talents and creativity flow. An inadequate desk or seat, bad lighting, or cramped space is sometimes unavoidable but making an effort to improve this will help us be more efficient.
Gema Casado Olea, founder and director of DIY agency El Tarro de Ideas (@eltarrodeideas), is an expert in the design and creation of homemade workspaces that adapt to the necessities of each and every creative.
She runs us through the sketch and configuration process for creating a personalised desk from zero in the video below:
1. Materials and objective
All you need for this exercise is a pencil, paper, and an eraser. There are two objectives: get an idea of the dimensions of our table and determine the materials we need (planks of wood in this case) and in what sizes.

2. First general sketch
Sketch the space with a few lines and roughly draw your desk inside of it. This first sketch will let you make your first decisions: What shape will it be? How many legs do you want and where? Do you want to add drawers? Don't forget to think about storage, keeping your workspace free is always a good idea.

3. Take general measurements
How long will your desk be? How wide? How tall should your legs be? You can already start noting these measurements in your first sketch.

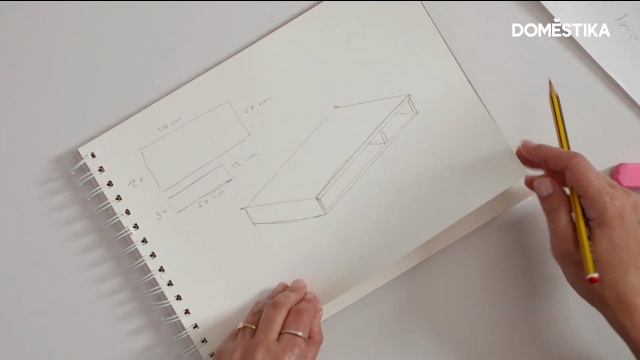
4. Sketch the desk's surface in detail
Now, we need to take our desk apart piece by piece to work out each part's measurements. Start with the top, calculating thickness, length and width. Once we have those dimensions, we can move through all the necessary pieces of wood we'll need and in what sizes.


5. Draw the legs in detail
Now, it's time to take apart the legs in the same way you did for the top. The desk Gema is designing here has two sets of two legs joined together by a pair of slats. She has also included a set of drawers for tools and papers which will have another support that attaches to the legs at the top.
In any case, the most important thing is that you remember to measure absolutely everything so you can separate all the parts of your desk more easily.

If you liked this tutorial, learn more about making your own desk and storage from scratch on Gema Casado Olea's course Design and Creation of Handmade Workspaces.
You may also be interested in:
- Professional Woodworking for Beginners, a course by Patricio Ortega
- Introduction to Frame Making, a course by El Pez Enmarcado


0 comments