


How to Create Transparencies with Watercolors
Ana Victoria Calderón explains, step by step, her techniques to create transparencies with watercolors
Making transparencies is the most basic and useful exercise to start painting with watercolors and creating incredible pieces. Ana Victoria Calderón (@anavictoriana), the renowned Mexican watercolor artist, explains how to achieve different levels of transparencies and how to control the amount of water to create them.

Step 1. Materials
For this exercise, you will need paint, a brush, a palette, watercolor paper, and water. You must know that there is no white paint in watercolor painting, it is the paper that serves as the white color and the amount of water applied is the amount of transparency or opacity that each tone will have. It is therefore essential to learn to control the amount of pigment when painting with watercolor.

Step 2. First layer
Add water to a palette. Add some pigment and mix until the water becomes a small puddle of paint. It is important to remember that you should never paint directly on paper with the paint fresh from the paint pan, you should always first go through the palette with water to control the load and tones.

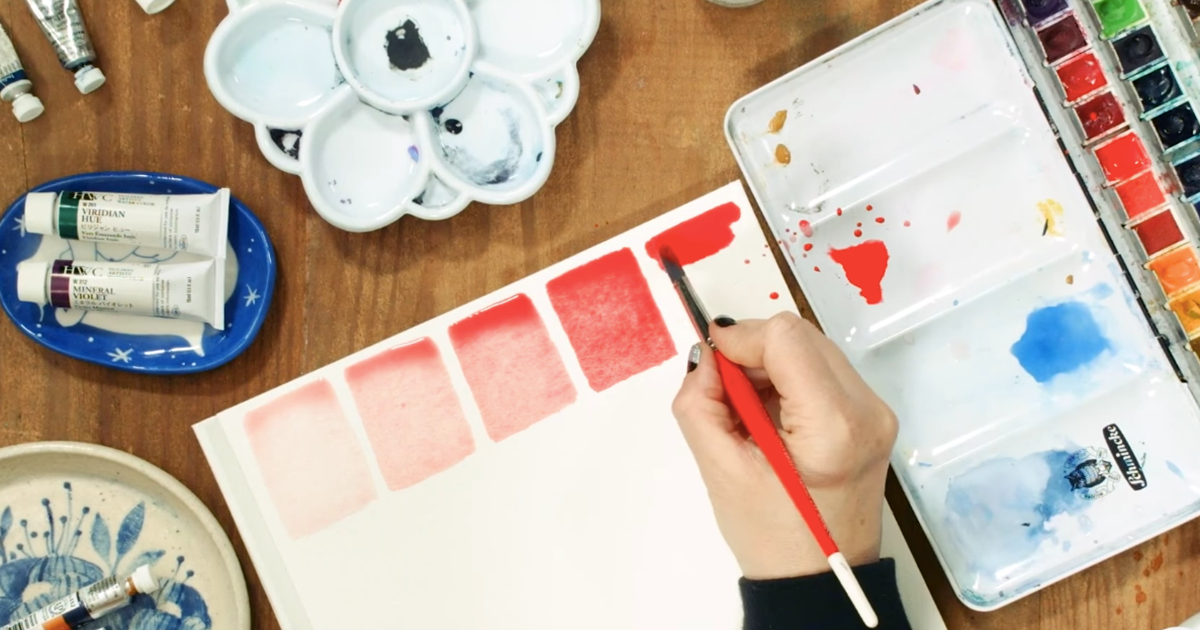
Step 3. The lightest first rectangle
On the paper start to make rectangles that go from transparent to opaque to learn to control the opacity of watercolor. Start with a very transparent rectangle.

Step 4. Create opacity
Add more pigment to the puddle of water you initially prepared, and mix it to make the wash more opaque due to the higher concentration of color. Make your second rectangle next to the first. This exercise is ideal for training the eyes to different levels of transparency.

Step 5. Compare the results
Repeat the process until you complete 5 rectangles, with the last one being the most opaque. The more pigment you add to the water, the thicker the liquid so it will take a little more work to drag the paint. It is important to never paint the sides first and then fill the rectangle but to paint from side to side because the watercolor can dry quickly and look uneven.

Step 6. Other colors
Try the same exercise with other colors and enjoy the versatility of watercolor.
See all the steps on this video explained by Ana Victoria Calderón:

Find the following Domestika courses by Ana Victoria Calderón Modern Watercolor Techniques and Techniques for Watercolor Illustration where she teaches the basics of watercolor painting and how to apply the technique to attractive illustrations.
If you want to start in watercolor, try any of the Domestika watercolor courses at all levels.
You may also be interested in these tutorials:
- Watercolor Tutorial: How to Paint with Watercolor Brushes and Pencils
- Craft Tutorial: How to Prepare Your Frame to Start Embroidering
- Illustration Tutorial: The Color Wheel


0 comments